
Brown Gal Trekker's JMT Thru Hike Guide Northbound (NOBO)

The John Muir Trail
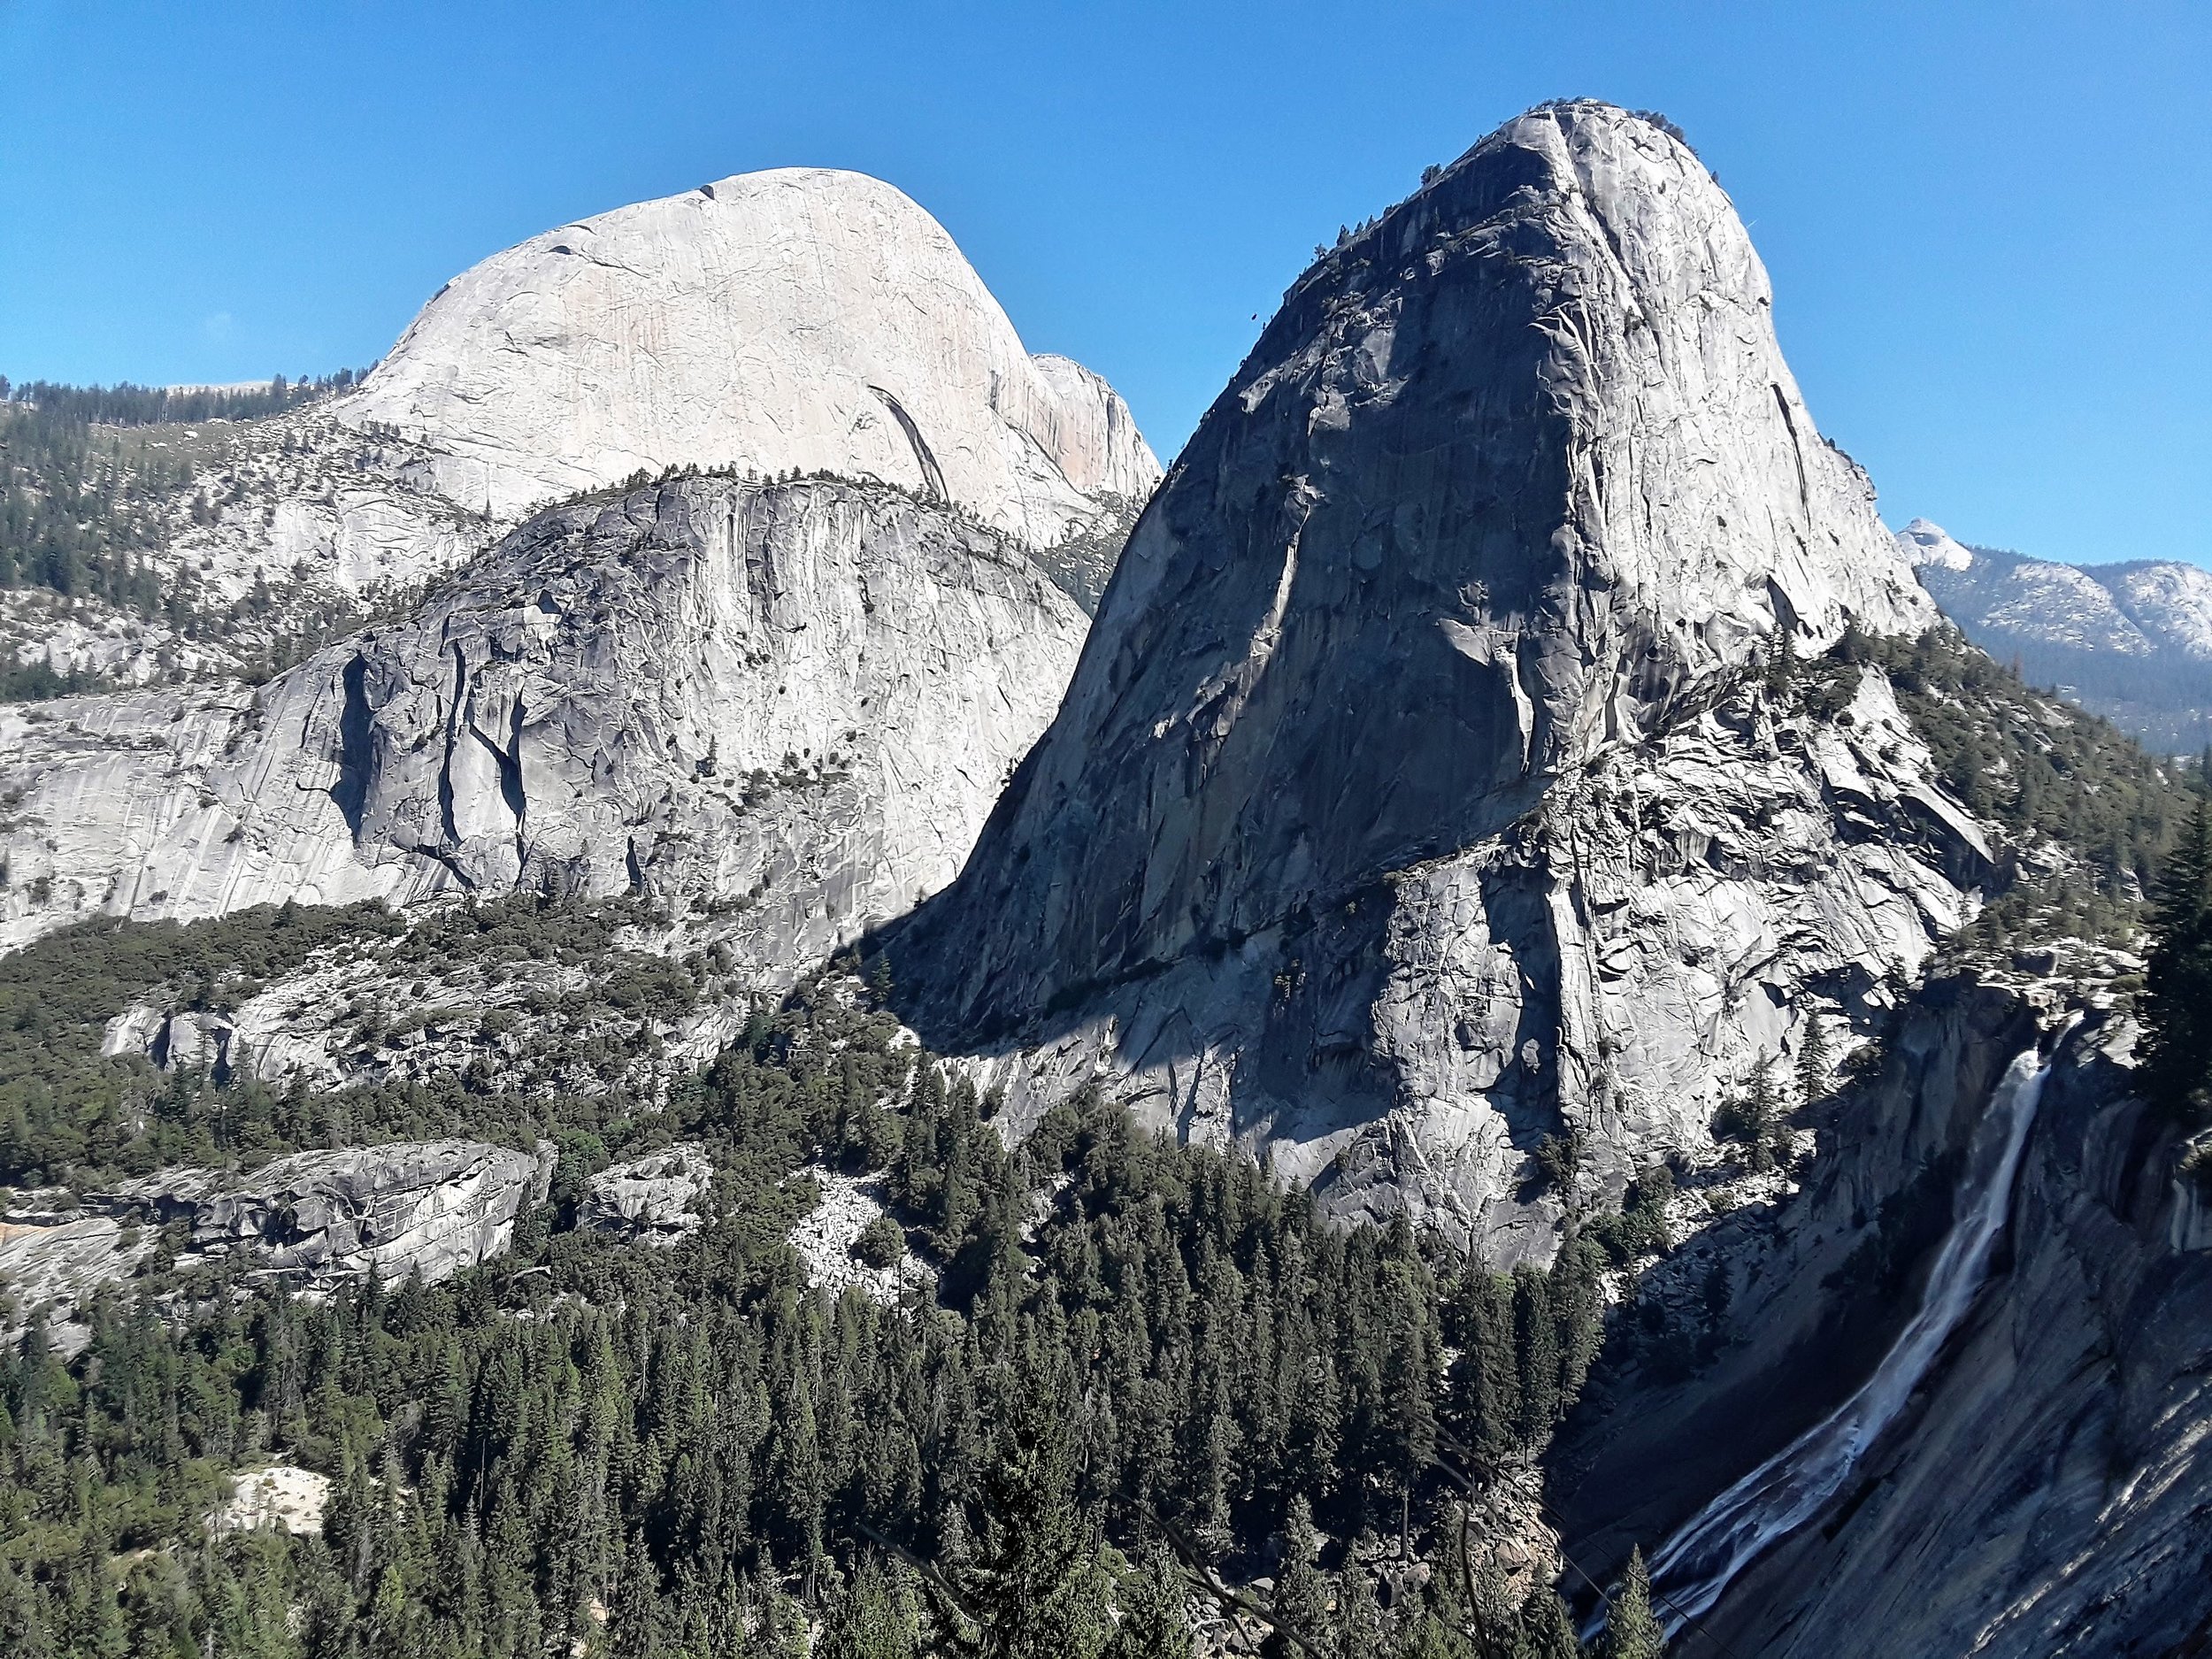
Avid backpackers aspire to hike the entire length of the John Muir Trail for good reasons. Located in California’s Sierra Nevada, it spans 210 miles and passes through the Yosemite National Park, Ansel Adams Wilderness, Kings Canyon National Park, Sequoia National Park and Inyo National Forest. It’s world class in terms of landscapes, one lake after another, while you indulge in the views of Sierra Nevada. It’s also a challenging trek as hikers need to hike 11 to 13 passes which are as follow (northbound):
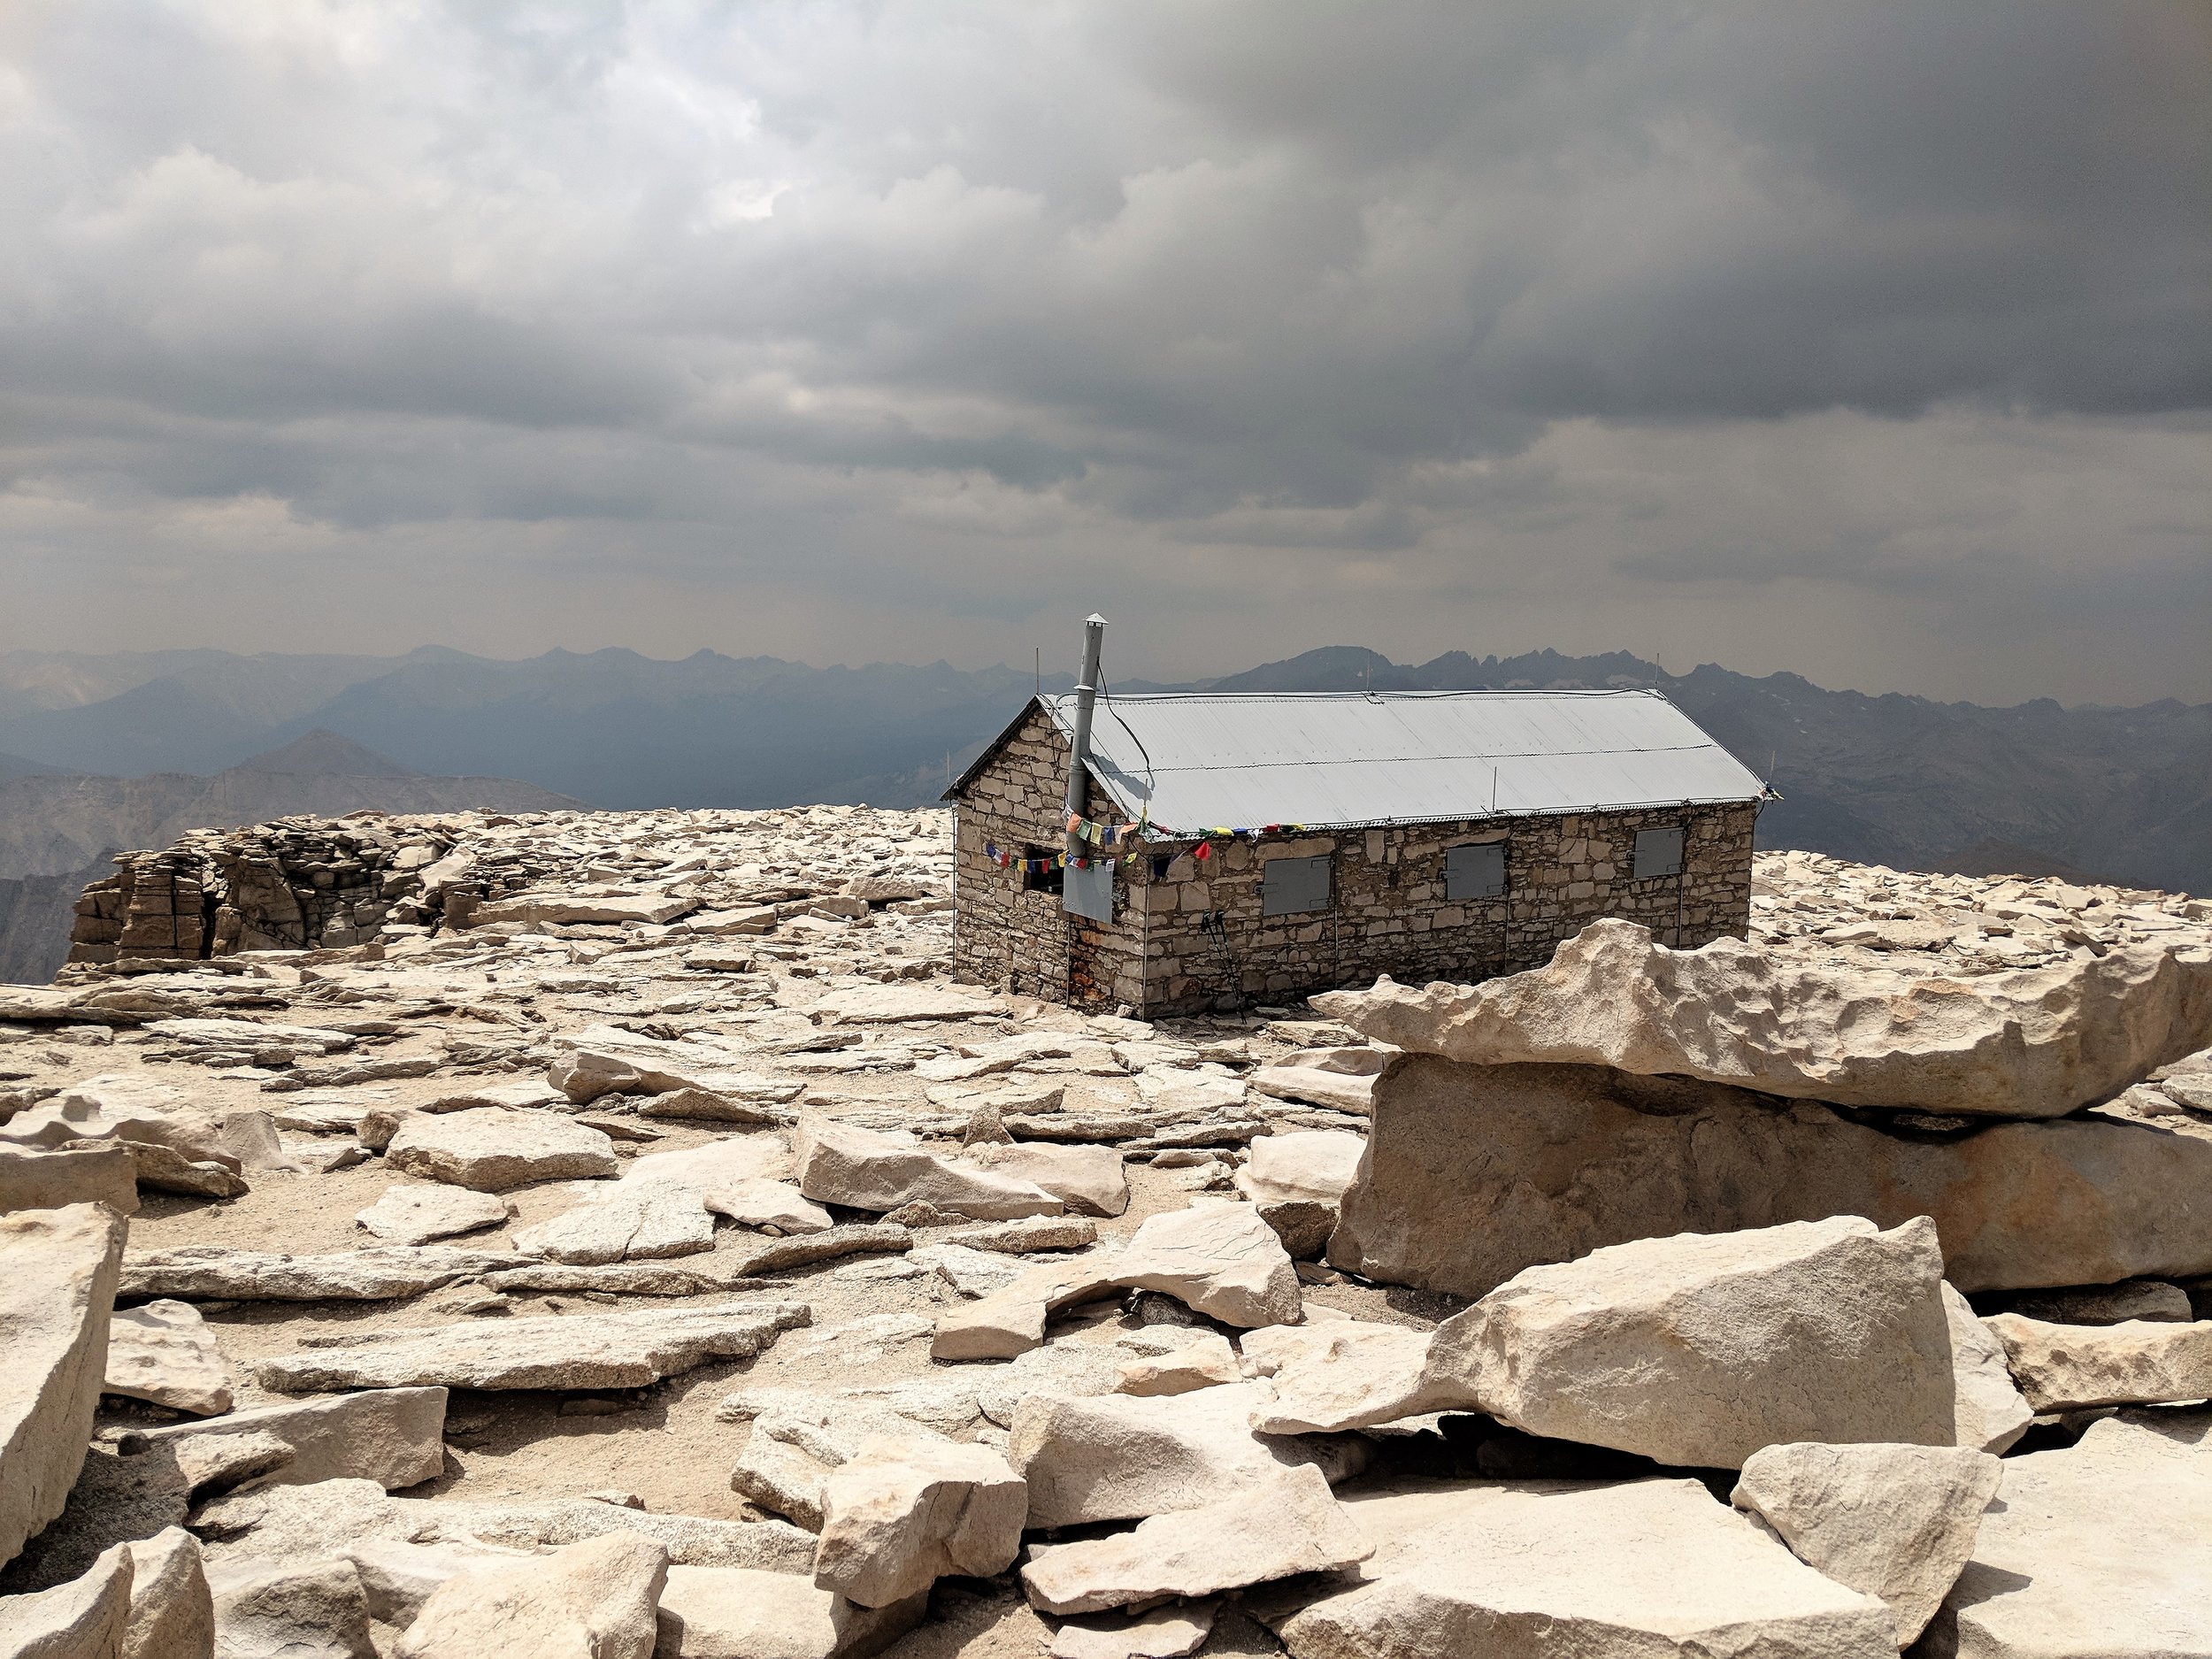
Mt. Whitney 14505 ft
Forester 13118 ft
Kearsarge 11710 ft
(if resupplying in Independence)
Glen 11925 ft
Pinchot 12086 ft
Mather 12100 ft
Muir 11991 ft
Selden 10898 ft
Silver 10754 ft
Island 10205 ft
Donahue 11073 ft
Cathedral 9703 ft


I completed my solo thru hike of JMT’s entire length of 210 miles plus 11 miles climb up from Whitney Portal starting from Whitney on July 29, 2018 and ending in Yosemite Valley on August 21, 2018, a day ahead of my schedule. It was one of the highlights of my hiking career to date. Even despite having trekked globally for almost 20 years, JMT proved itself to be one of the best trails in the world for a long-distance hike. It’s an impressive hiking destination and completing it would be an impressive accomplishment for any hiker of any type.
Everyone who gains interest in thru hiking the JMT has his or her own personal reasons to do so. For me, I initially hiked the Rae Lakes Loop, parts of which included the JMT. I trekked the JMT with a personal reason in mind. I trekked it in memory of my mother who passed away a year before my trek. No matter what your motivation is, JMT affords any hiker an opportunity to enjoy nature’s miracles and the gift of being in the moment. Read about my Rae Lakes experience here.
To me, the preparation for JMT as outlined below was arguably the toughest part. Once you’re on the trail, all you need to do is to take your time to enjoy nature’s show. I did exactly that, and more.
Southbound v Northbound
When choosing whether to go south or north, it will depend on how you wish to experience the JMT. Do you wish to tackle the altitude gradually? Do you wish to start out with the highest pass and experience an easier journey as you go along?
With my itinerary northbound and a resupply stop at Independence, I hiked over 13 mountain passes in 22 days plus 2 zero days. As you can see, altitude-wise, heading southbound allows you to gradually acclimatize. Whichever direction you take, make sure to be aware of the challenges it entails so you’re fully prepared for what’s ahead of you. On the trail, the northbound experience made me reflect on how life has been for me as a full-time entrepreneur and mountain nomad.

THE UNEXPECTED CONSEQUENCE OF GOING AGAINST THE NORM
JMT northbound wasn't the original intention. The start supposedly had to occur in Yosemite heading southbound and ending with the highest passes like most thru hikers do. Many proclaim southbound route trains you best for the harder climbs and higher altitudes. And yet northbound JMT took shape due to the permit limitations. Hence, northbound became the journey.
Starting at southbound would have entailed the opportunity to build up my endurance and strength for the highest peaks or passes on the trail. In doing so, I could have been half present in the moment as the experience would have naturally eased me into it. The highest passes would have been tackled in the end and my hiking body would have been prepped for them over time.
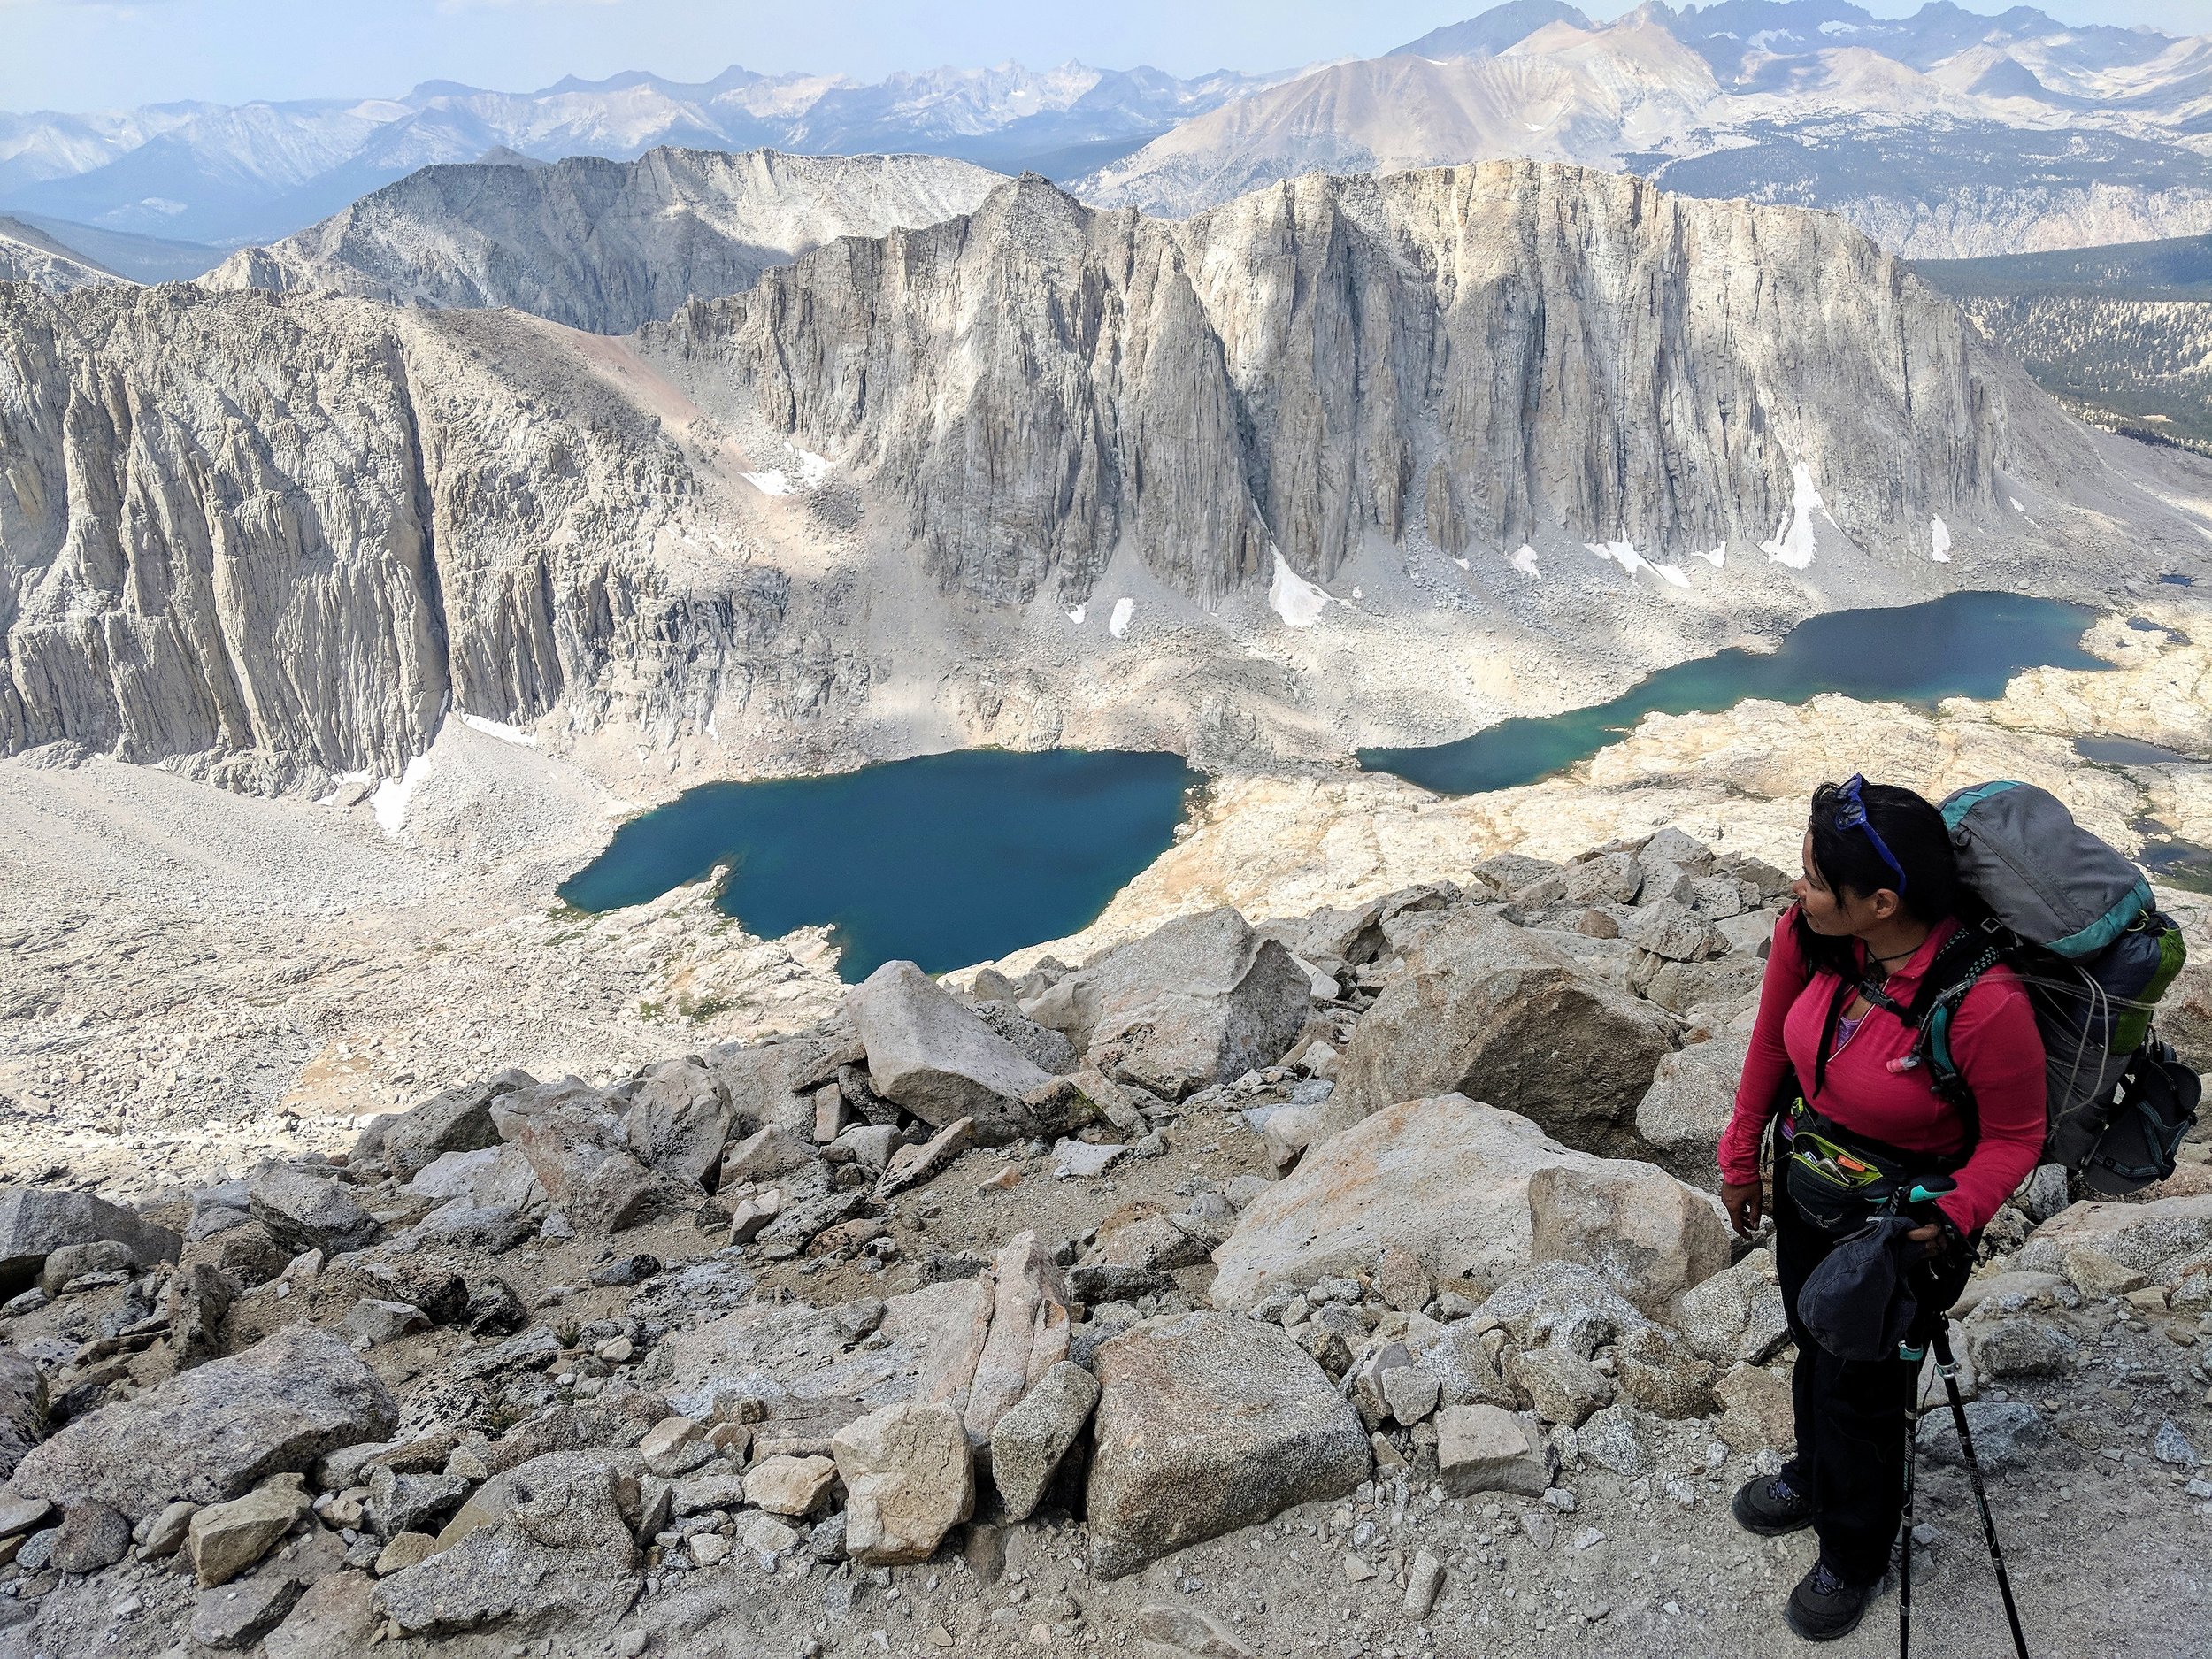
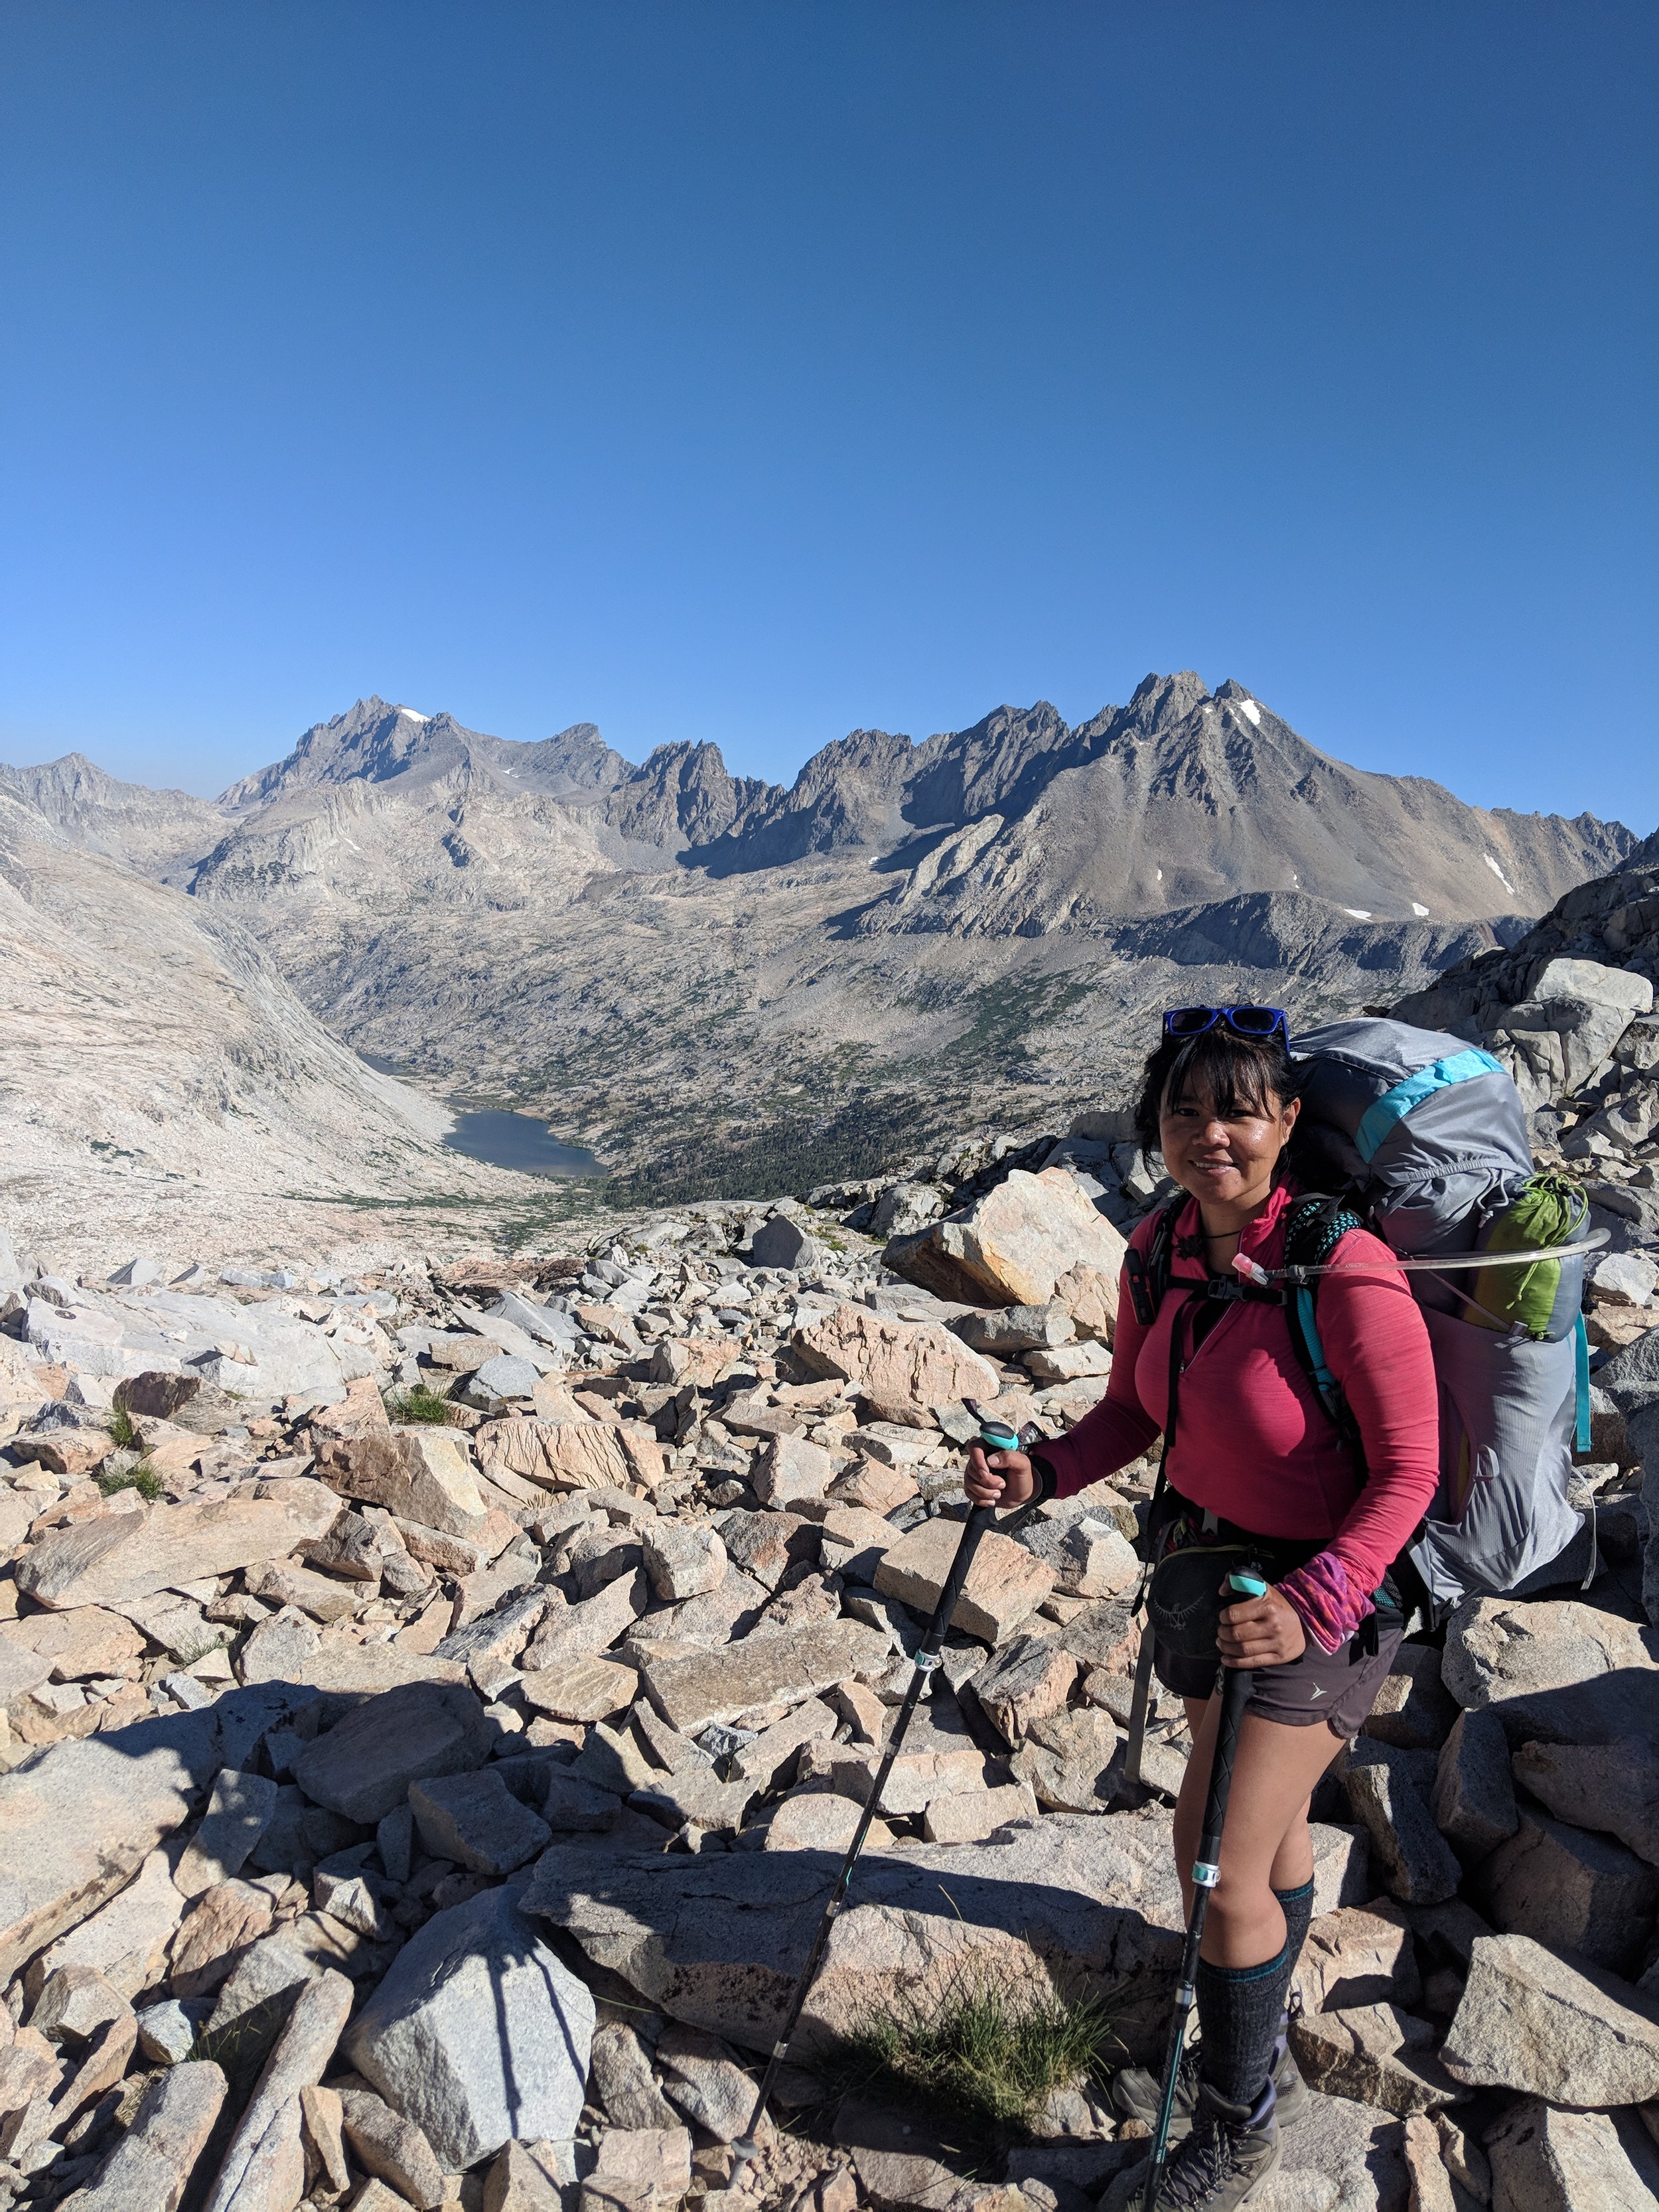
NOBO is a different experience overall. Whitney greeted me on the 2nd day. Forrester pass at 13000 feet came in on day 4. Kearsarge at 11750 feet came the next day. I hauled 40 pounds all the while. Flats and downhills weren't the welcome sights I received in the first 5 days.
I dreaded NOBO. I thought it wasn't the best way to ease my way into this trek. In fact, there's no gradual introduction. I had to dive into all this on the first day and give it my 100% from the start.
But NOBO was a reflection of my own personal journey where jumping off a cliff by leaving behind my stable and secure life as a lawyer to become nomadic is the scariest decision I have ever made. NOBO allowed me to be fully present in the moment, to appreciate every step of the way no matter whether it took me on a grueling uphill or somewhere in between where I managed to enjoy a flat or downhill journey. It became a welcome notion that encapsulates where I am exactly in life. I'm not preparing or training anymore. I'm not in wait for the bigger steps. I am already doing and taking the biggest risks. Whitney, Forrester, Kearsarge are all symbolic of time not wasted and for my openness to embrace pivotal moments not in 20 days, but NOW. And because of that, I allowed myself to live the journey fully and fearlessly knowing that as time passes the journey will become more restful in the end. In summary, NOBO reemphasizes my ability to have faith in the future and in life no matter how unsteady my ground appears to be at the moment.
The unpredictability and unsteadiness of it all is the journey.
Route options
The John Muir Trail in Sierra Nevada is world class, no doubt. In fact, both Americans and foreigners are drawn to trekking the JMT. There are a few variations available in doing the JMT. Here’s a couple that I personally researched:
JMT Southbound (aka SOBO)
This is the classic route starting in Yosemite. You only have 2% chance of winning the lottery for this permit. My friend (aka logistics buddy) and I opted at first for this one but after almost three months of denial, we decided to pursue another way of getting the permits. Why is this a popular route? The biggest appeal is the fact that southbound allows you to acclimatize as the altitude gain is more gentle than if you’re heading northbound. This route eases you in as you encounter the flatter and lower altitude parts of the trail at the beginning while encountering the highest point which is Whitney at the end.

Go time on the first day at Whitney Portal.
JMT Northbound (NOBO) beginning at Whitney Portal
This is the route that I eventually took, thanks to my friend who was able to obtain a permit as a result of unclaimed permits. Know that this is a challenging route given that you hike up Whitney on the second day. Thereafter, you climb the second highest pass, Forester. You must be in decent shape for this route as there’s no easing into it. However, it’s a quieter and calmer experience as there are fewer NOBO hikers so if you like solitude, this is apt for those who wish to spend lesser time with the crowd.
Other options: NOBO via Horseshoe Meadows which I heard is considerably easier to get permits for. Google this route and you’ll find many articles written about it.
Getting Your Permit Is the Start of It All
The first step to make your JMT thru hike a reality is to secure the appropriate permits.
Yosemite entry point (going Southbound)
The regular SOBO permits can be obtained solely through a lottery. You can apply 170 days prior to the start date of your choosing. Application form must be completed and faxed. For the SOBO permit, you must fill out your starting and ending dates plus your trailheads of preference. The instructions are straightforward but the chances of getting a permit are rather slim. You can learn more about applying via this website.
Whitney Portal entry point (going Northbound)
A) Regular Lottery
You can do NOBO on JMT via obtaining the “Whitney permit overnight” through the regular lottery (which is all you need to do the entire JMT all the way to Yosemite). If you wish to go for overnight Whitney permits through the regular lottery, the application usually starts in February. See details on how to apply for Whitney overnight permit lottery here.
B) Unclaimed Whitney Permits
This is the route I took. If you don’t get your Whitney permits via the regular lottery, there’s one more option for you. Come May, the unclaimed permits are again released for grabs. My friend and I searched for permits on May 1st, when the unclaimed permits were released. These permits can be booked via Recreation.gov. To learn more, go to this site.
Important note: Make sure that you choose the option, “Whitney permits overnight" as opposed to “Whitney day use.” With the overnight Whitney permit, you can do the entire JMT hike all the way north (Yosemite) with no other permits needed.

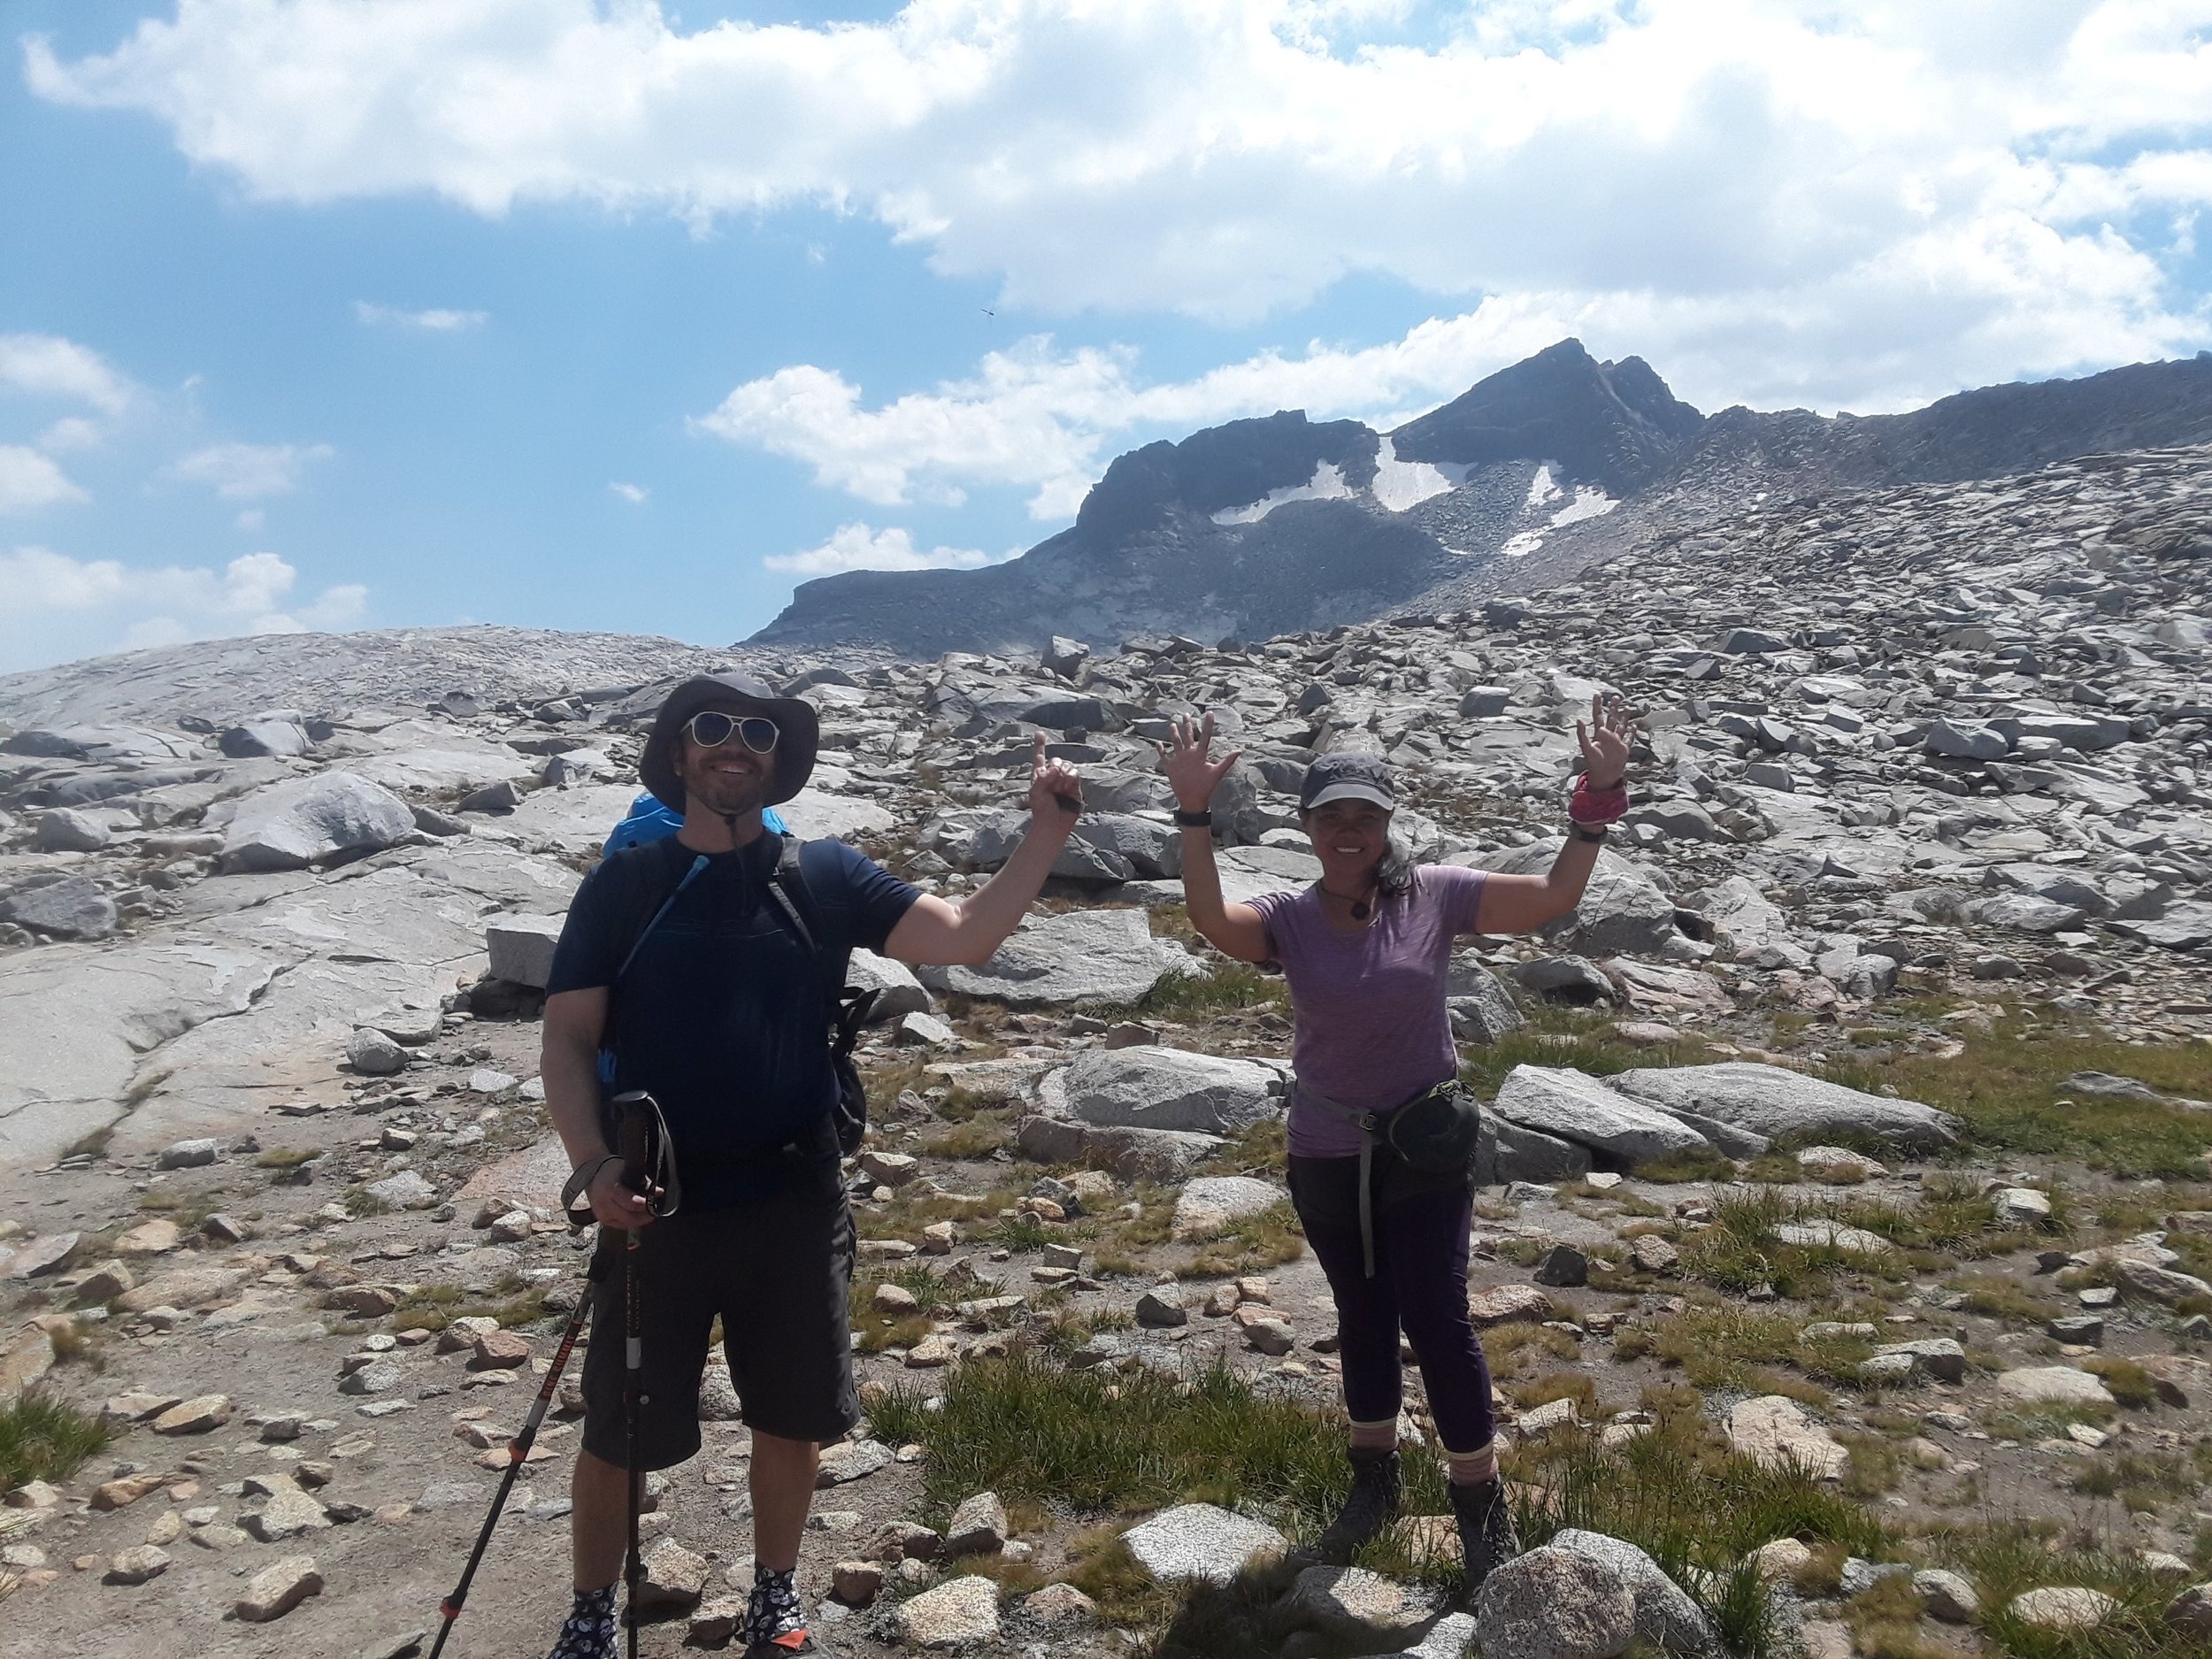
Lucky NOBO thru-hikers on the JMT.
In applying for the permits, you will need to guesstimate your itinerary. The most important part is the entry date and entry point. In our case, we were seeking to secure the overnight Whitney permit for our desired date. When you get to Lone Pine, CA, make sure to stop by the Eastern Sierra Park office to pick up your permit. At that time, you’ll need to provide concrete details of your itinerary as the ranger will enter all that information into their system. This is partly for your own safety so they can keep track of you in the event of unforeseen circumstances.
The park office will provide you the permit and if there’s a few of you in the group, make sure that the other members have a copy of the permit. Taking a photo of the permit and storing this in your phone would suffice. In my case, I did exactly that. While hiking alone the entire time, I ran into a couple of rangers near the Tuolumne meadows who stopped me on the trail asking for the permit. I showed them the copy via my cell phone which they deemed satisfactory.
Create Your Itinerary
The Guthook App was useful in creating the itinerary although some people prefer to use the maps or you can have no specific itinerary and just wing it when you hit the trail. I approached this aspect of the JMT preparation by asking myself the following questions:
1. How many days do I wish to hike the JMT? I gave myself 24 days to work with including rest days.
2. Based on those days, how many miles per day am I willing to hike? You can allocate specific mileage for each day. Take into account the pass(es) you’ll be doing for each day.
In my case, I aimed to do an average of 10 miles per day. There were days I did more than 10 miles and less on other days, depending on whether I wanted to tackle two passes or aimed to go for a specific campsite. In the end, my thru hike took 22 days plus 2 rest days.
3. Pick a tentative campsite for each night to give you some idea on your end goal for each day. I didn’t always stick to the campsite on my itinerary. Picking your campsite in advance serves merely as a guideline. The reality is you’re likely to end up doing a variation depending on how far you wish to go, how your body feels, and if you wish to stay in a specific campsite. Certainly, I aimed for the best campsites for the night but in reality I didn’t stay at all of my preferred sites. Here’s my JMT itinerary:
July 29: Whitney Portal to Trail Camp
July 30 - Trail Camp to Summit to Guitar Lake
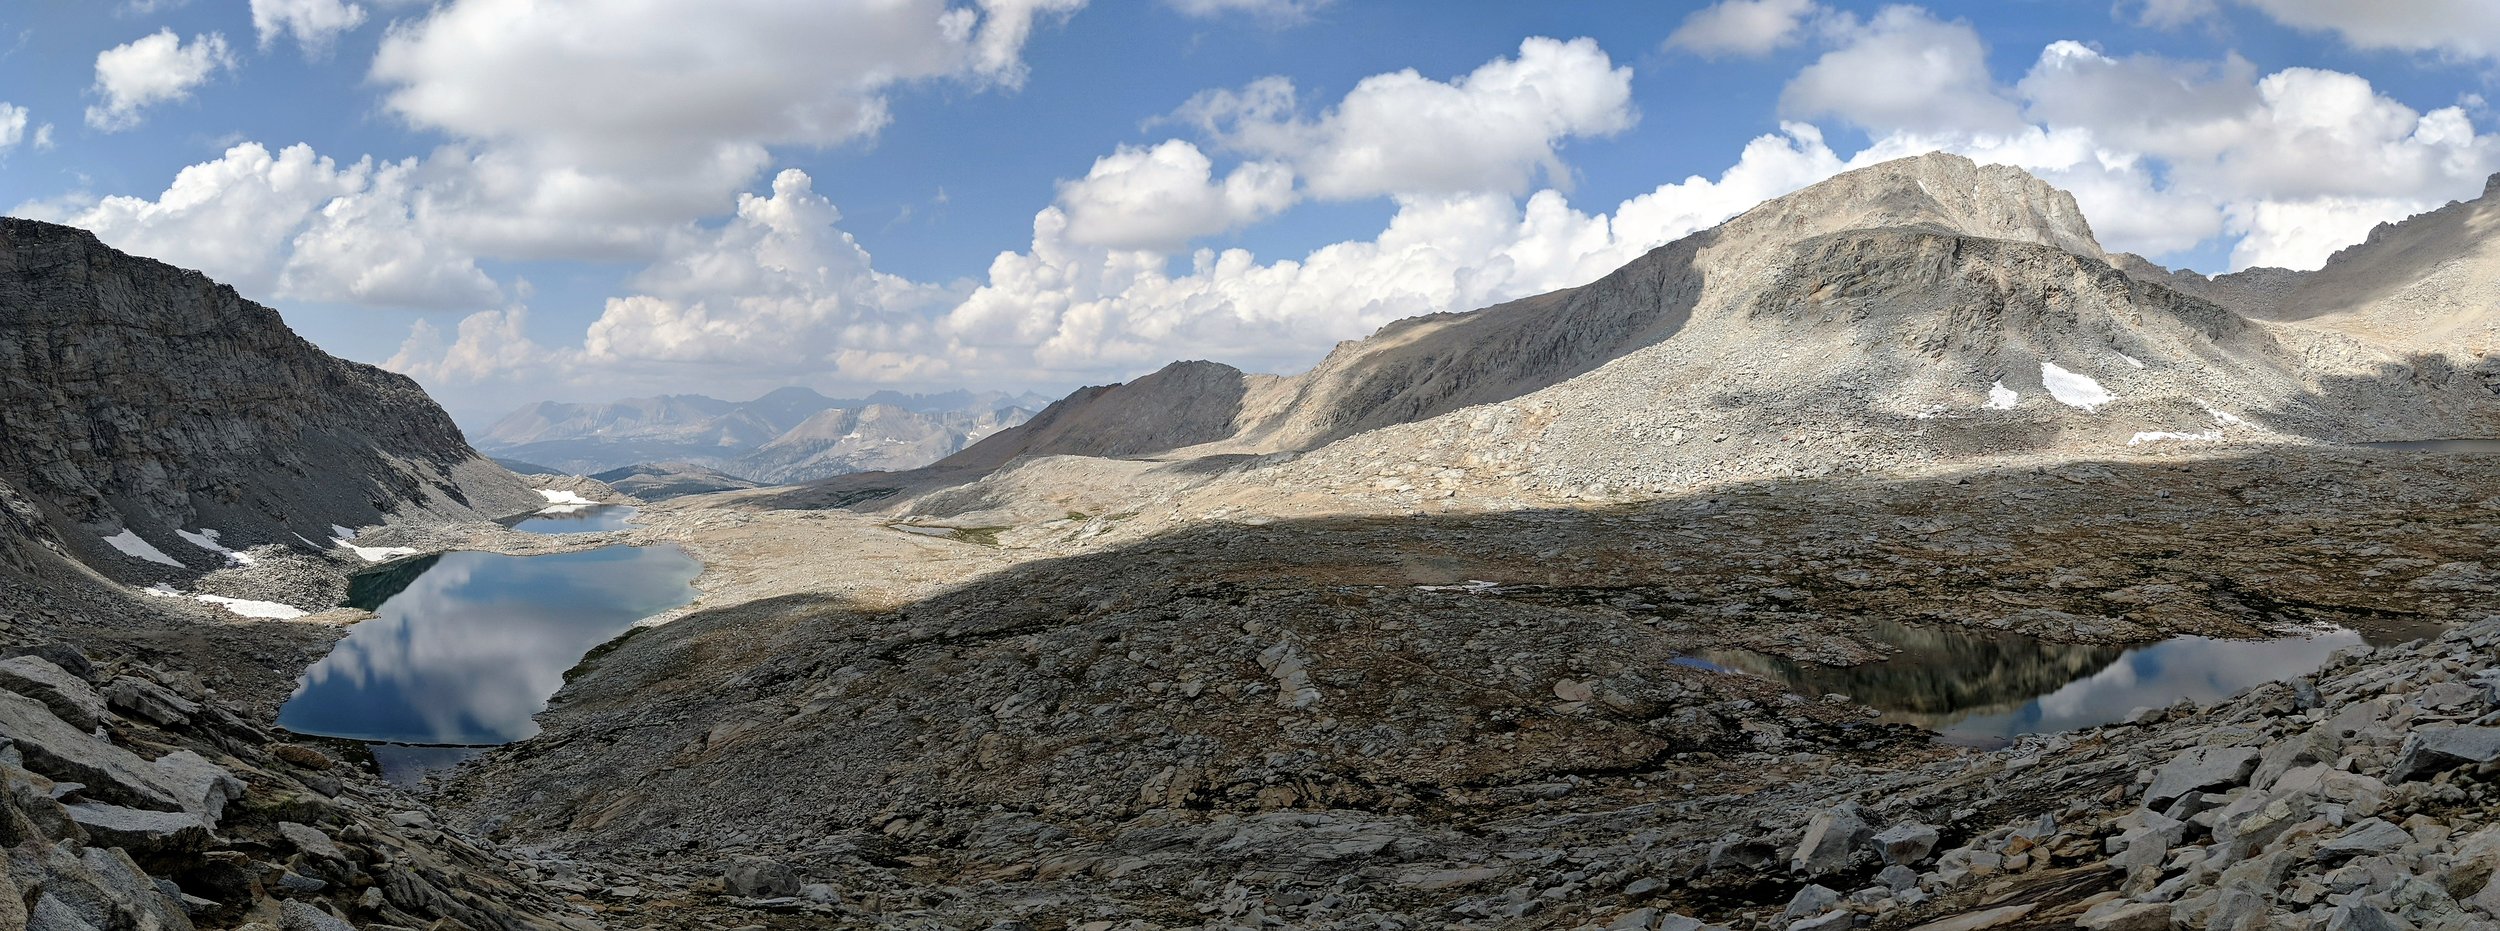
July 31 - Guitar Lake to Bighorn Plateau
August 1 – Bighorn Plateau to Forester Pass to Vidette Meadow
August 2 - Vidette Meadow to Onion Valley via Kearsarge pass
August 3 – rest day in Independence
August 4: Onion Valley via Kearsarge Pass to Glen Pass to Rae Lakes
August 5: Rae Lakes to Campsite 5 miles before Pinchot pass
August 6: Campsite to Pinchot pass to campsite 3 miles before Mather pass
August 7: Campsite to Mather pass to middlefork campsite
August 8: middle fork campsite to campsite at mile marker 79.2
August 9: campsite mile marker 79.2 to muir pass to to evolution creek
August 10: evolution creek to Muir Trail Ranch to sallie keyes lakes outlet
August 11: sallie keyes outlet to selden pass to mono creek
August 12: mono creek to silver pass lake
August 13: silver pass lake to deer creek
August 14: deer creek to red meadows
August 15: rest day in mammoth lakes
August 16: red meadows to Gladys Lake
August 17: gladys lake to Thousand Island Lake
August 18: Thousand Island Lake to island pass to donahue pass to lyell Canyon
August 19: lyell Canyon to Tuolumne Meadows
August 20: Tuolumne Meadow to campsite mile marker 202
August 21: Walked the last few miles to Happy Isles

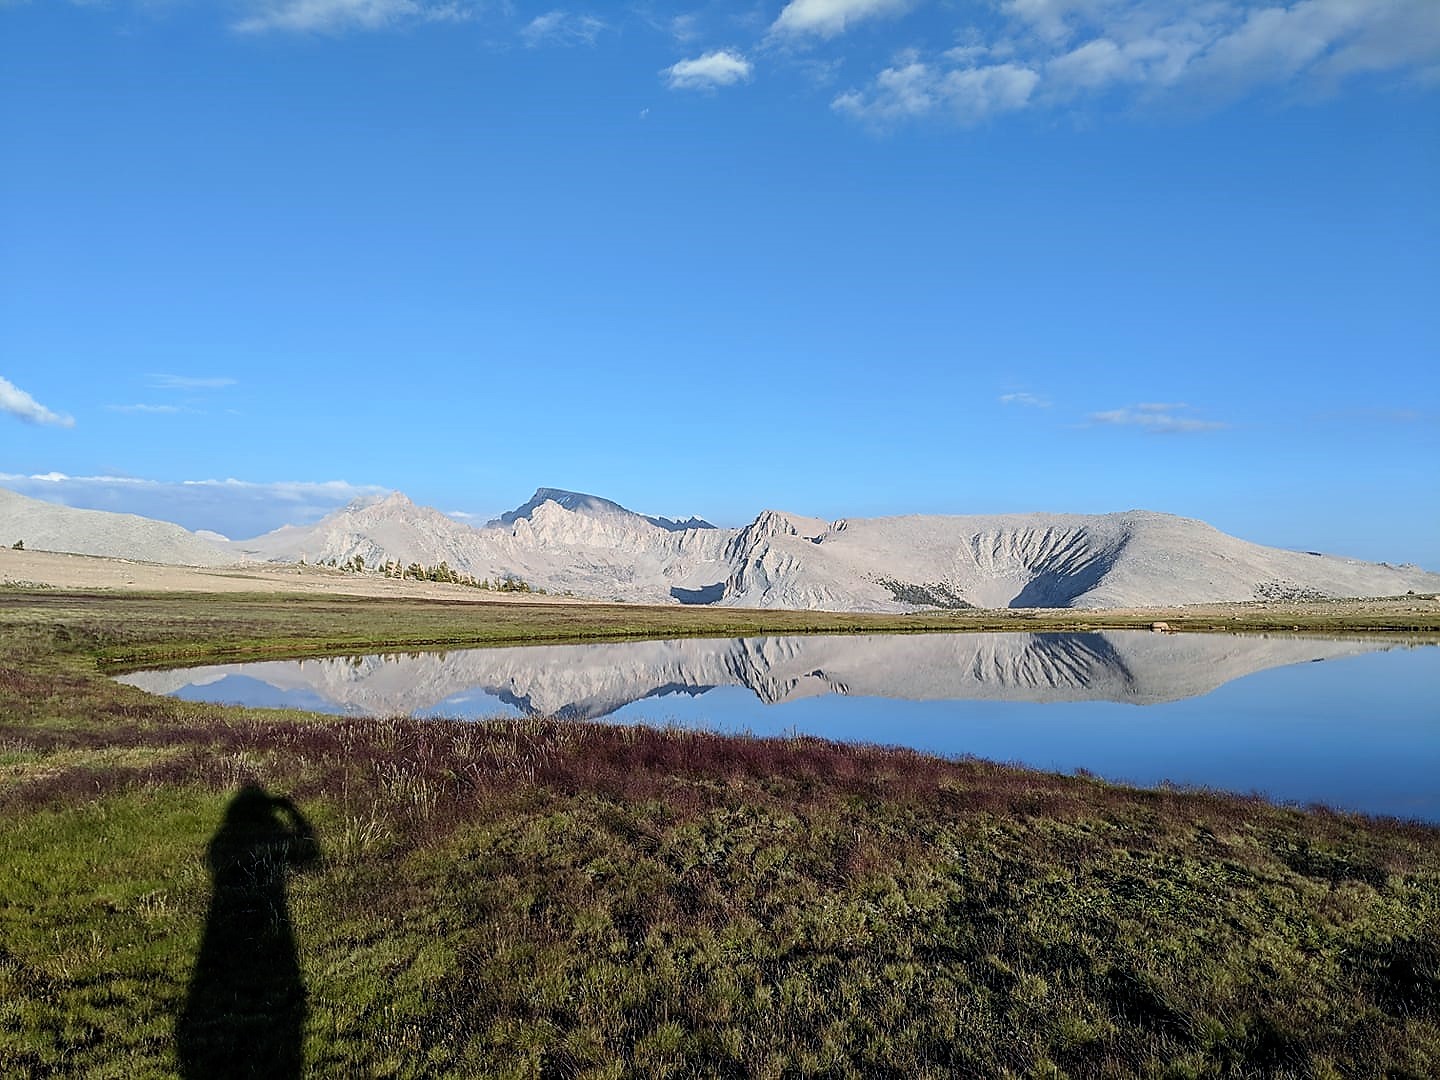
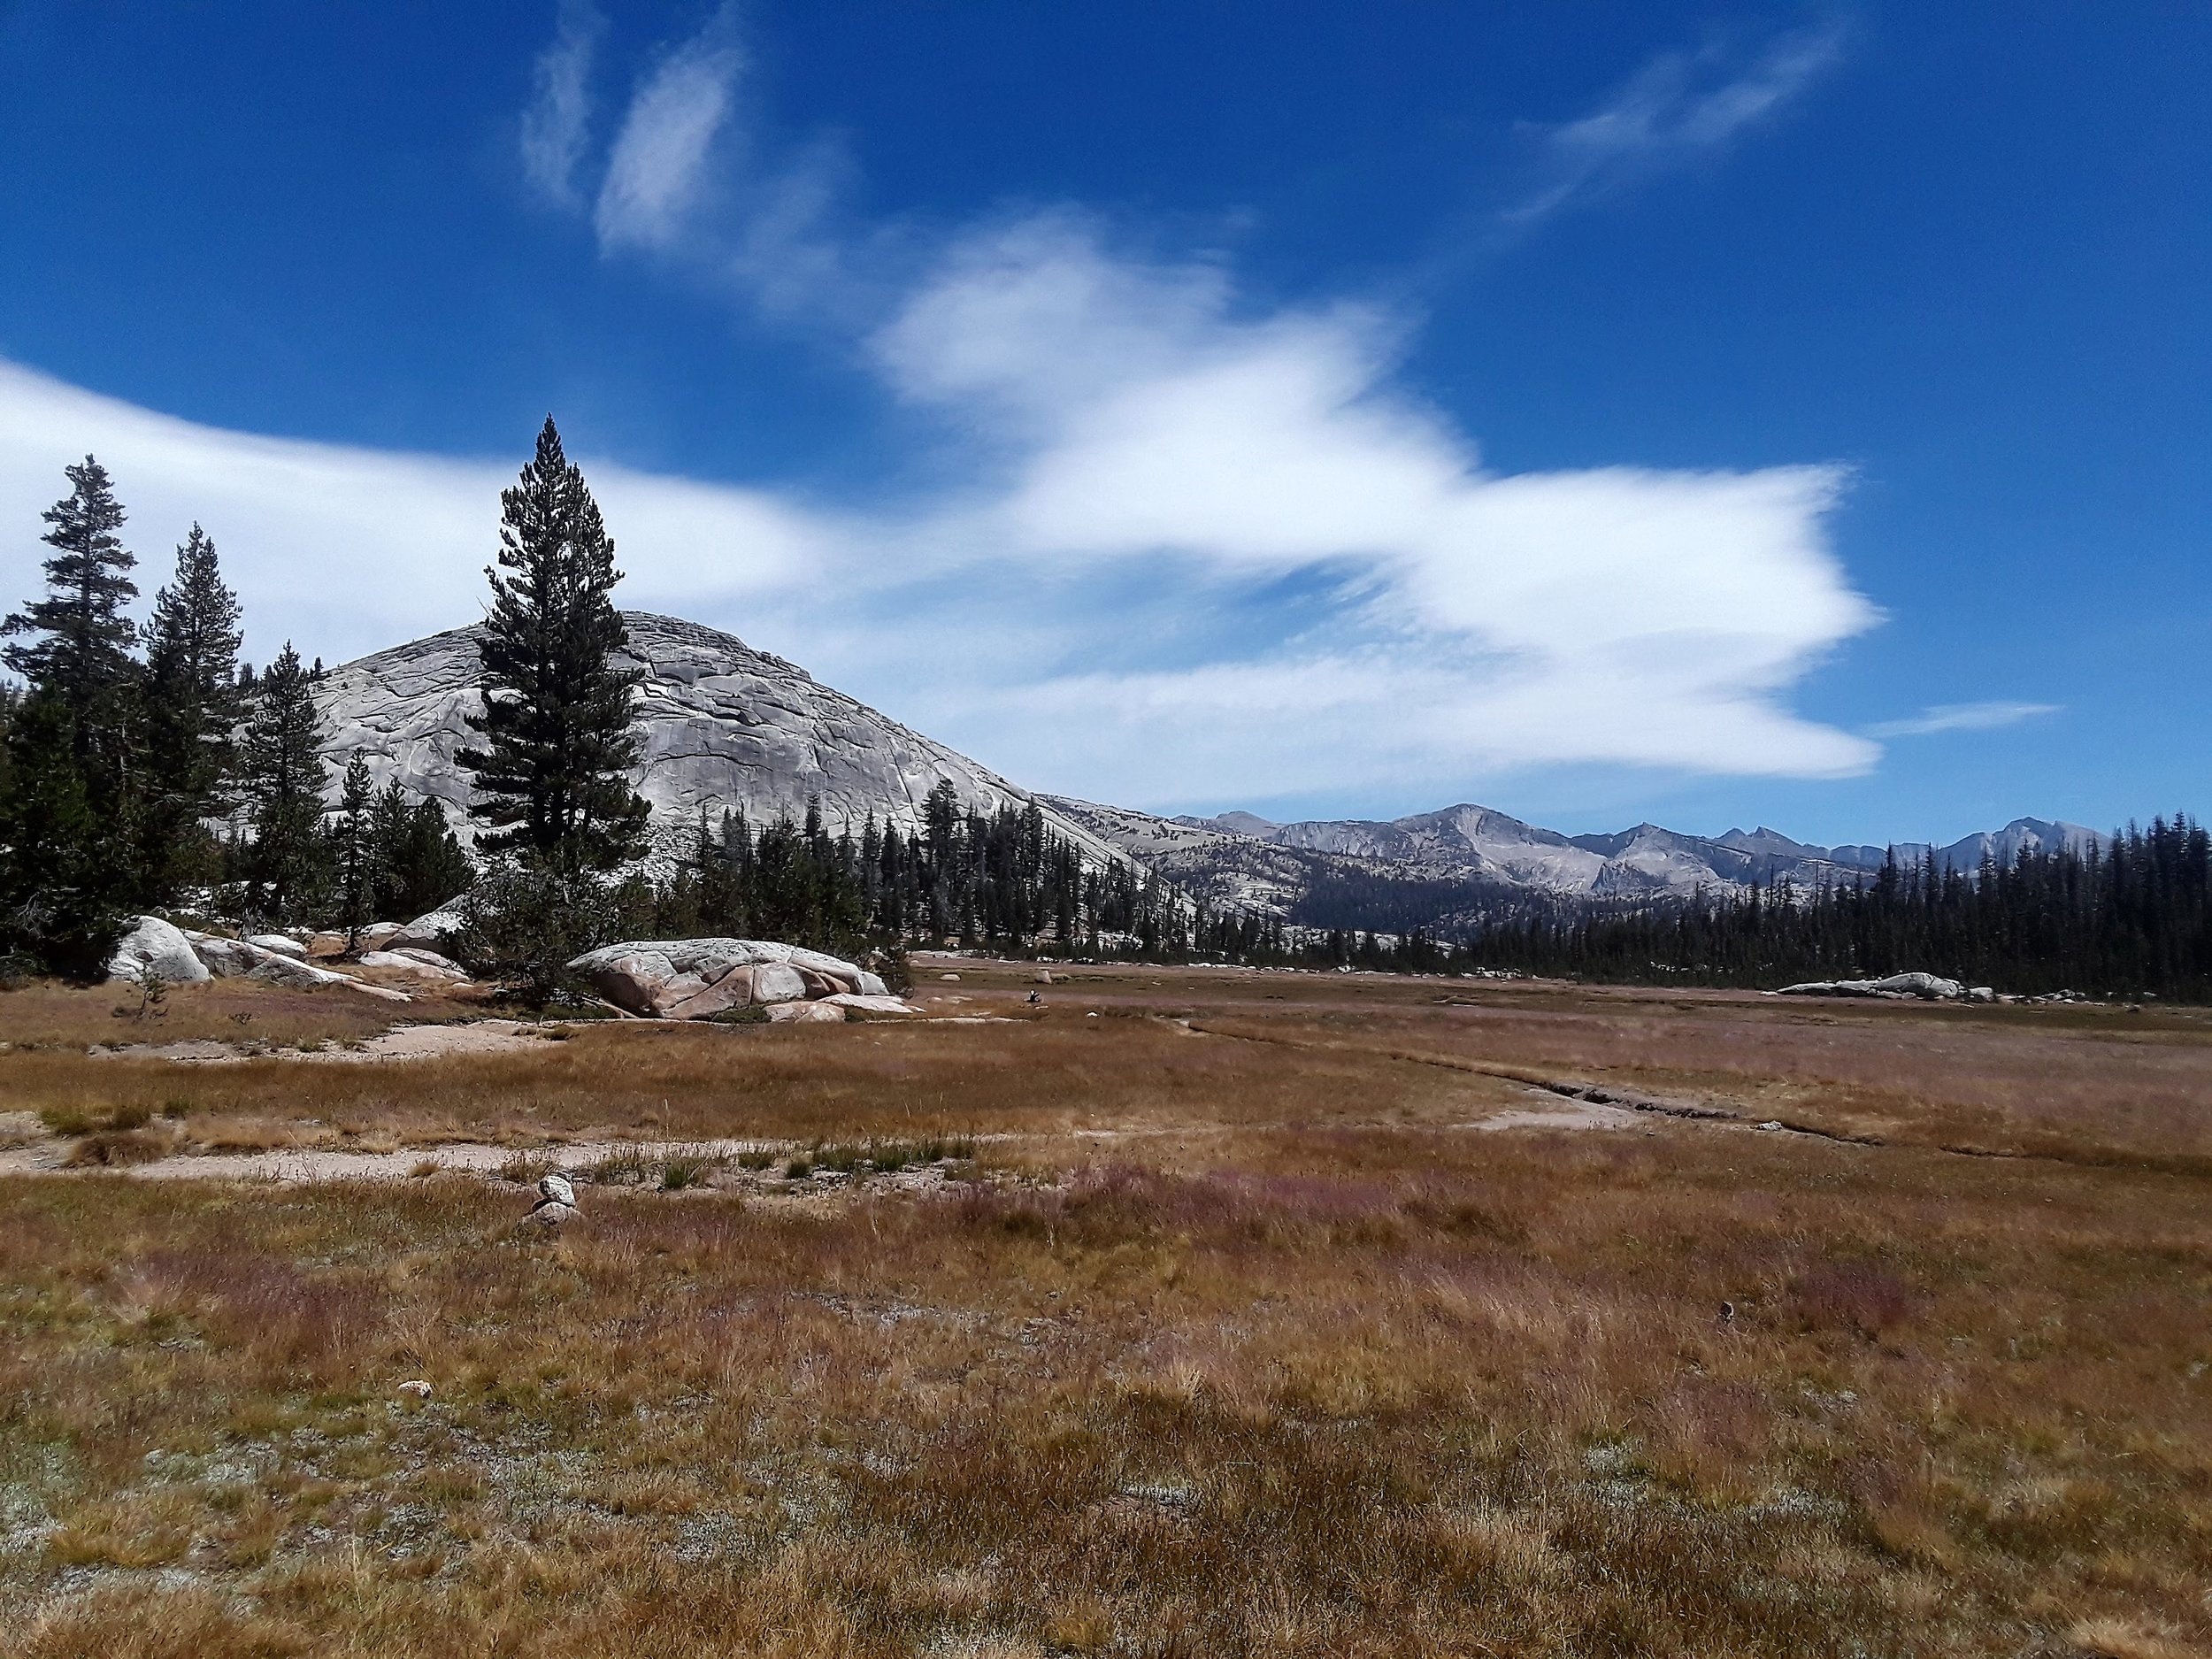
When planning your itinerary, try to make Bighorn Plateau one of your campsites. You’ll sleep in isolation and enjoy the best sunset on the trail.
Resupply Points
There are specific places for resupply along the JMT, and in going northbound, I resupplied at the following points:
1. Independence town
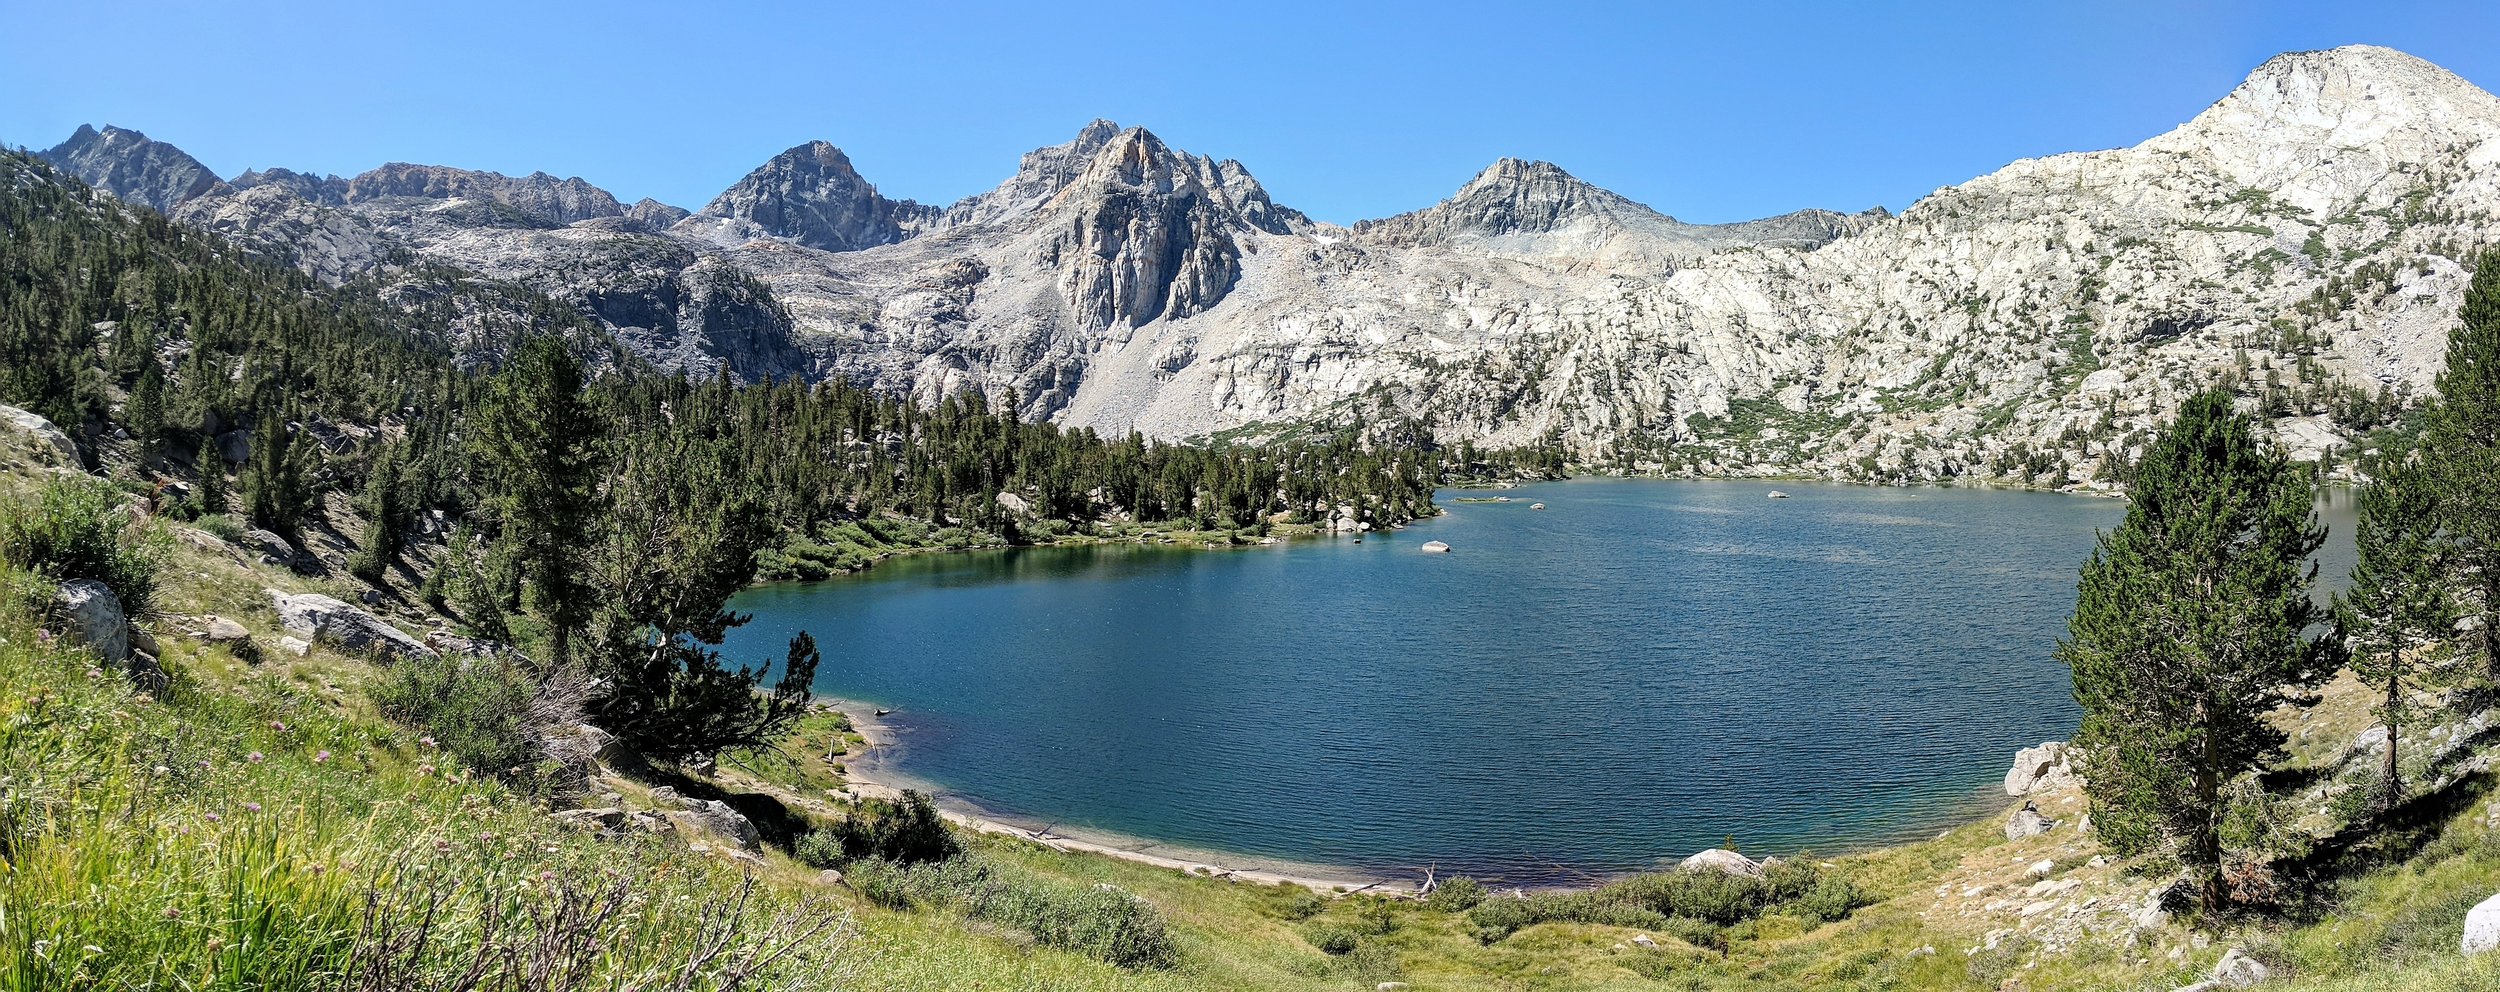
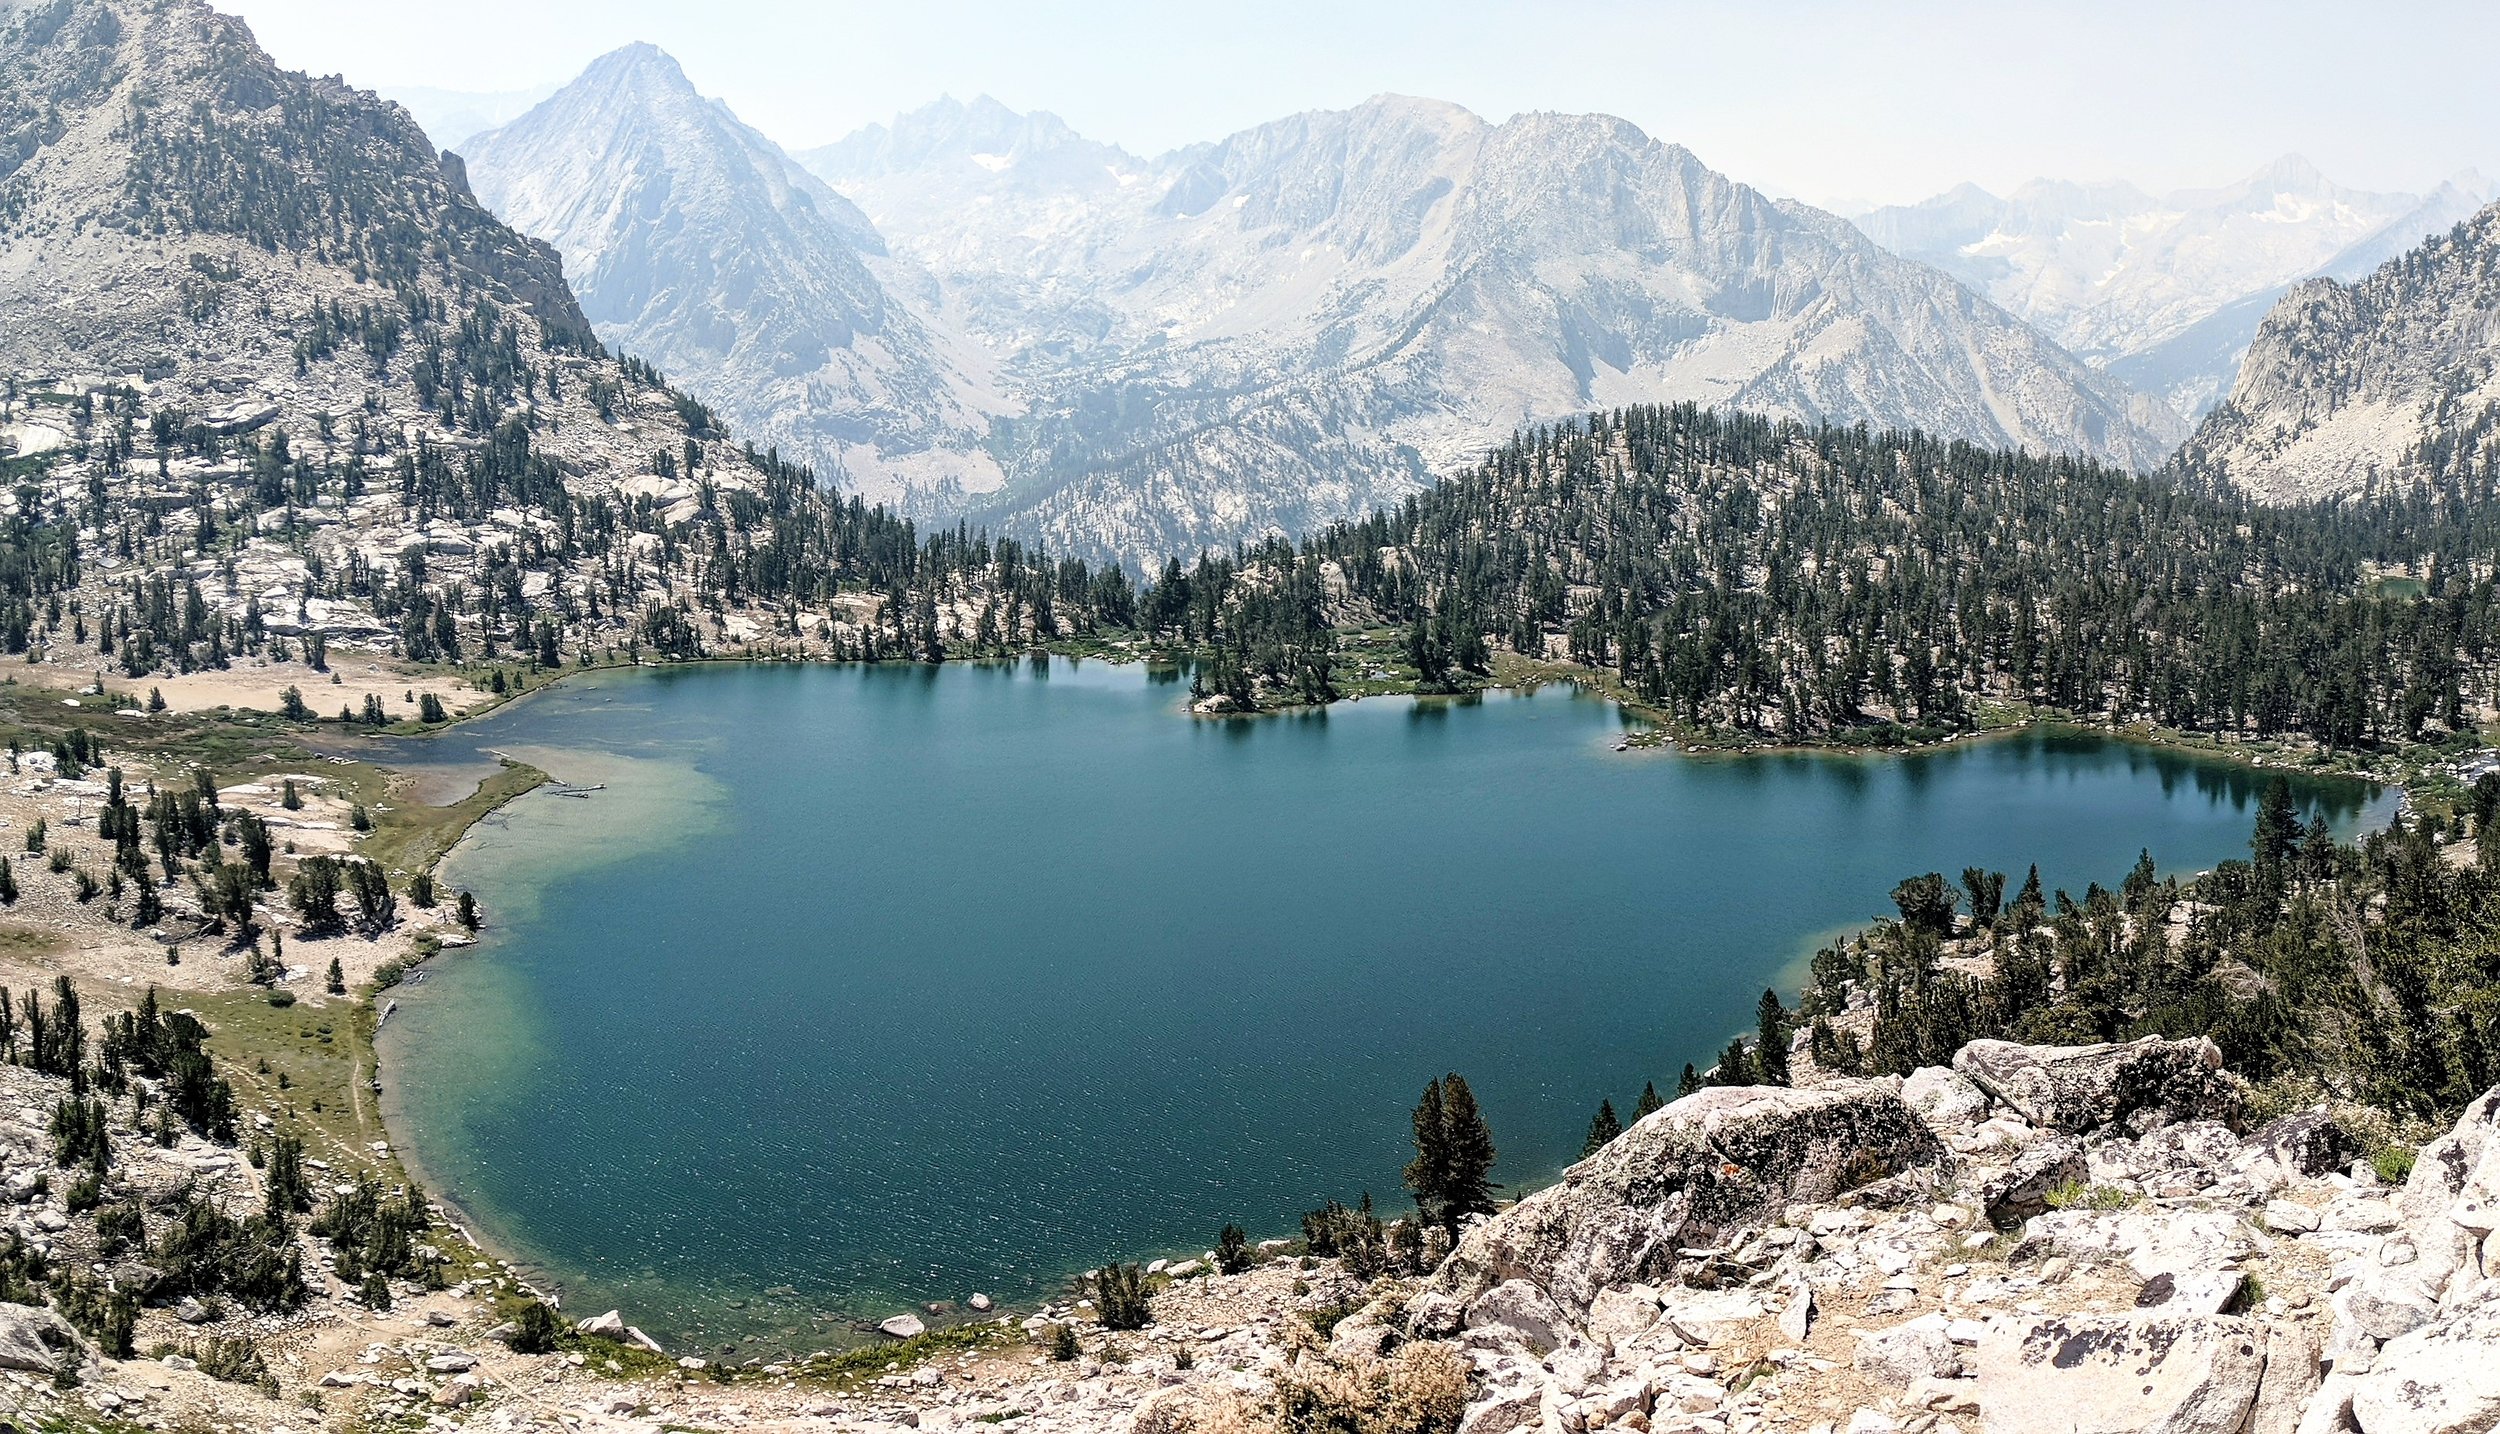
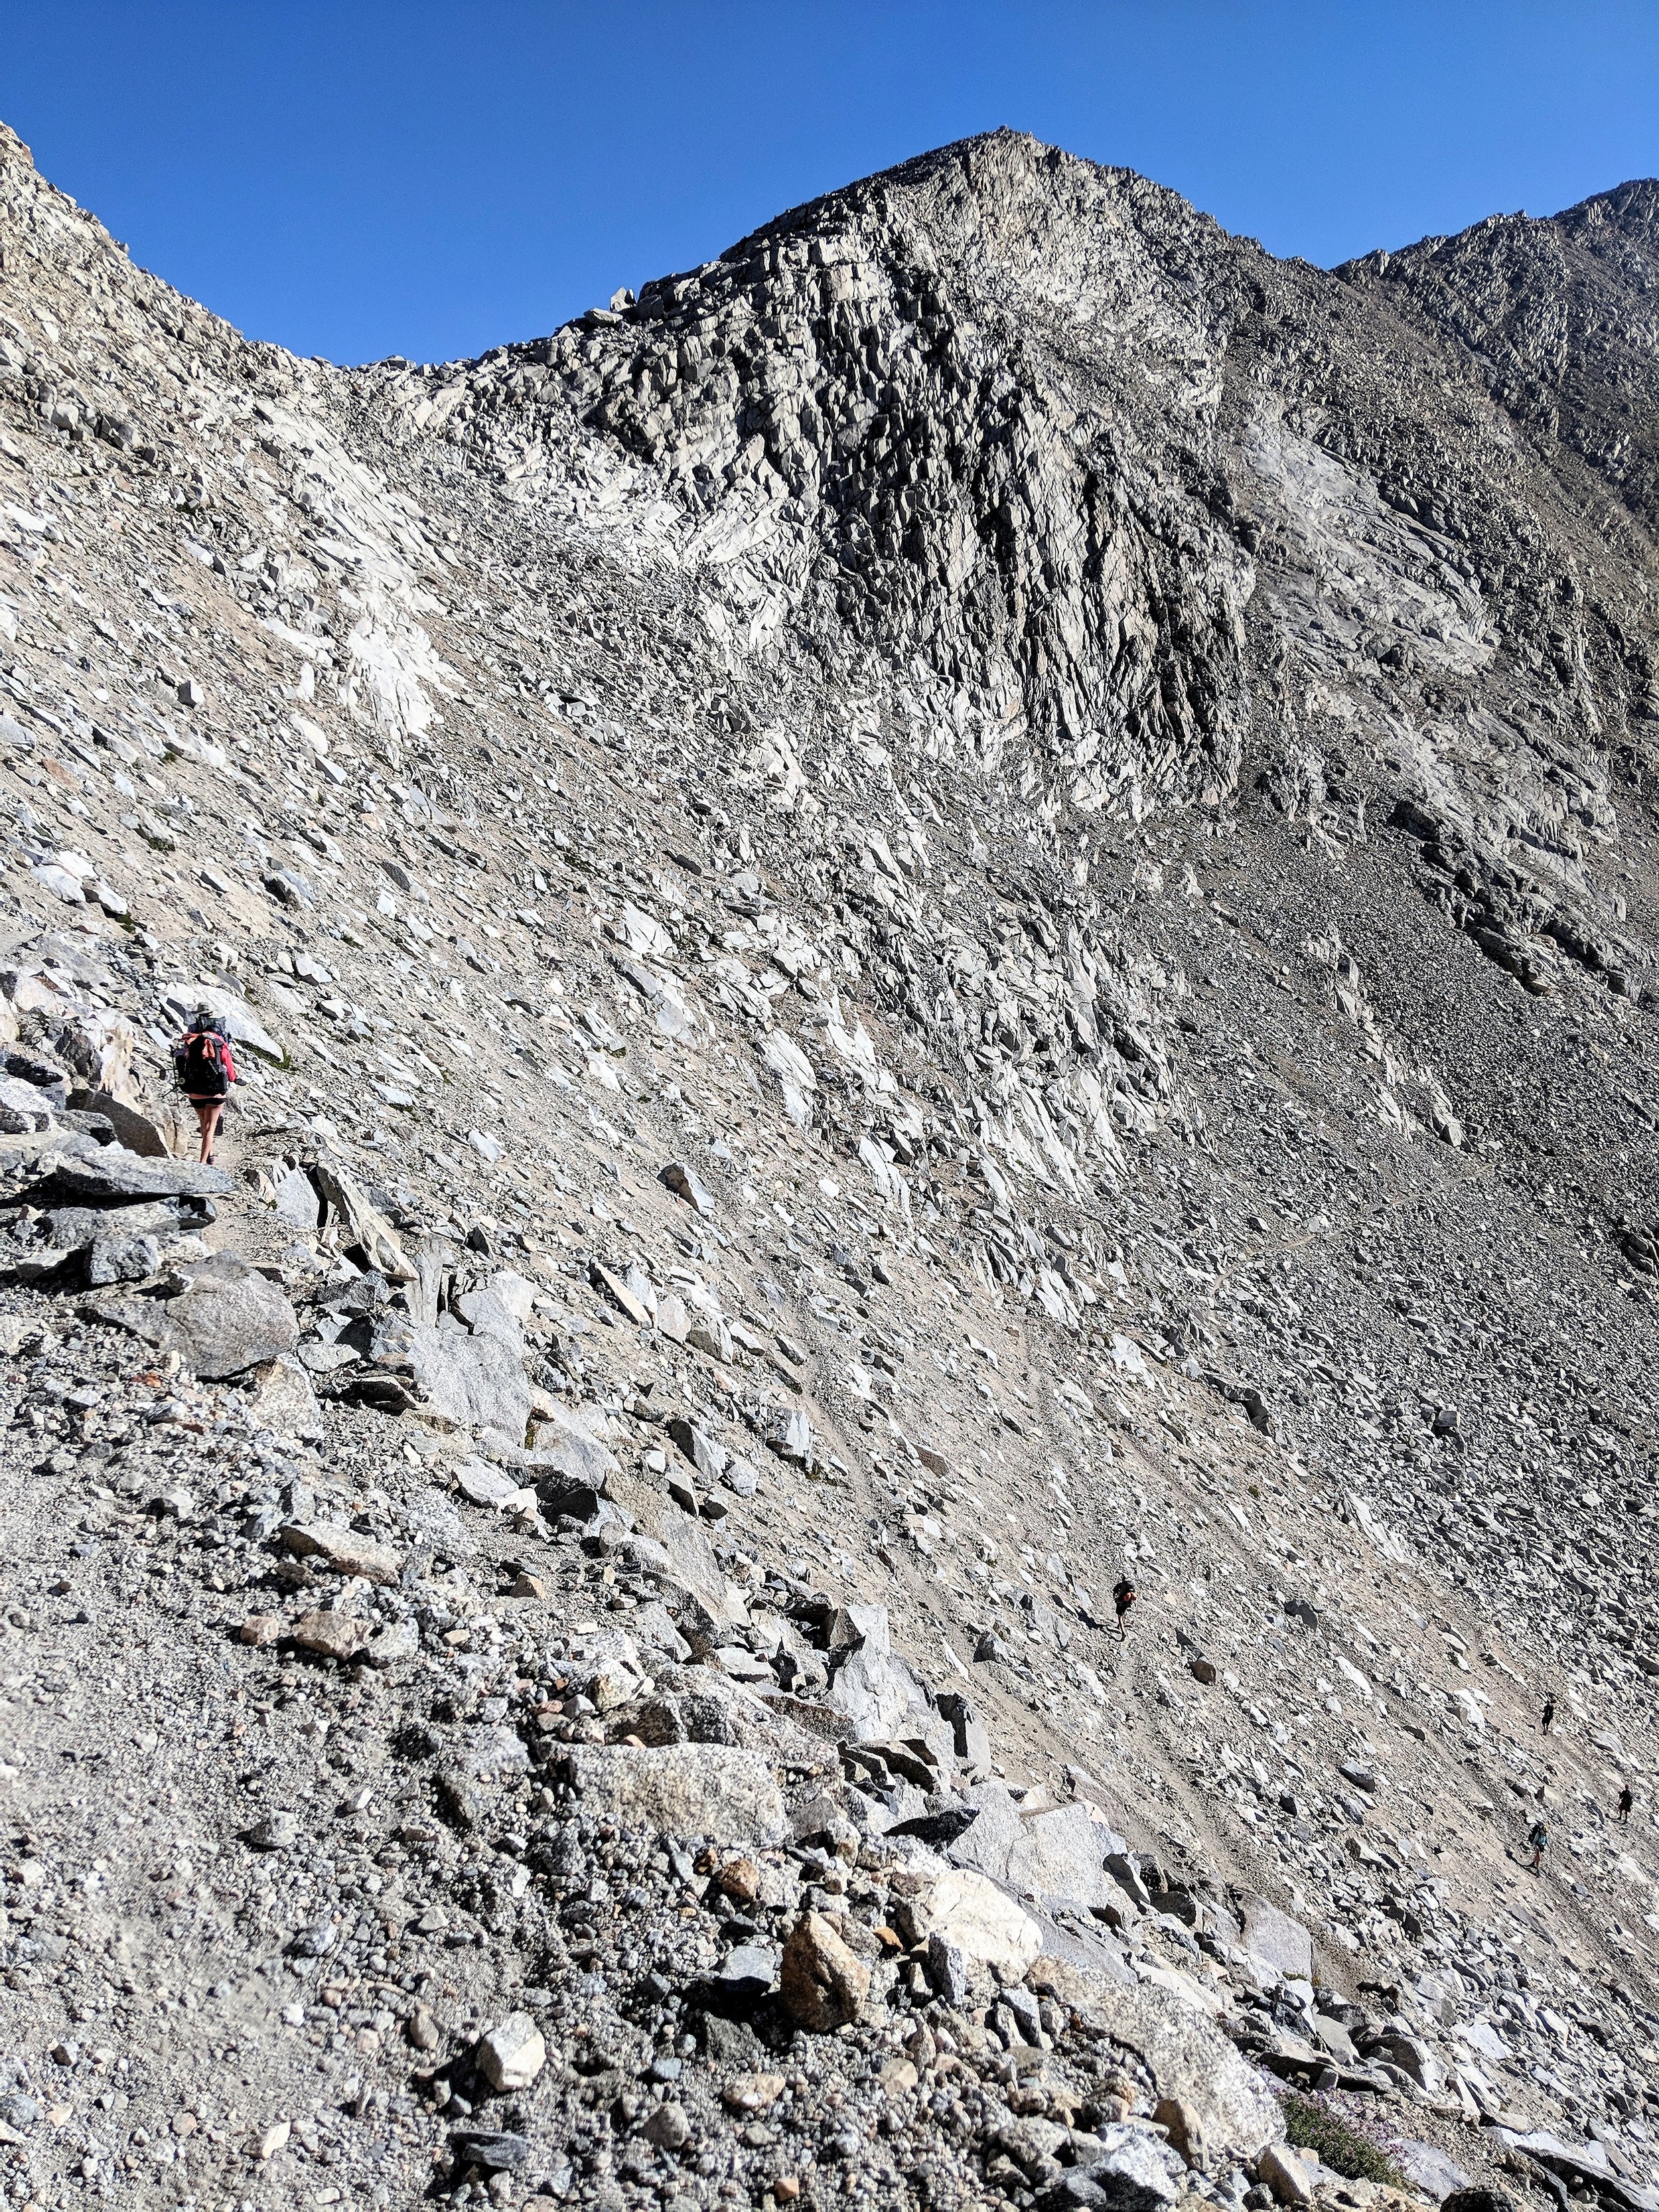
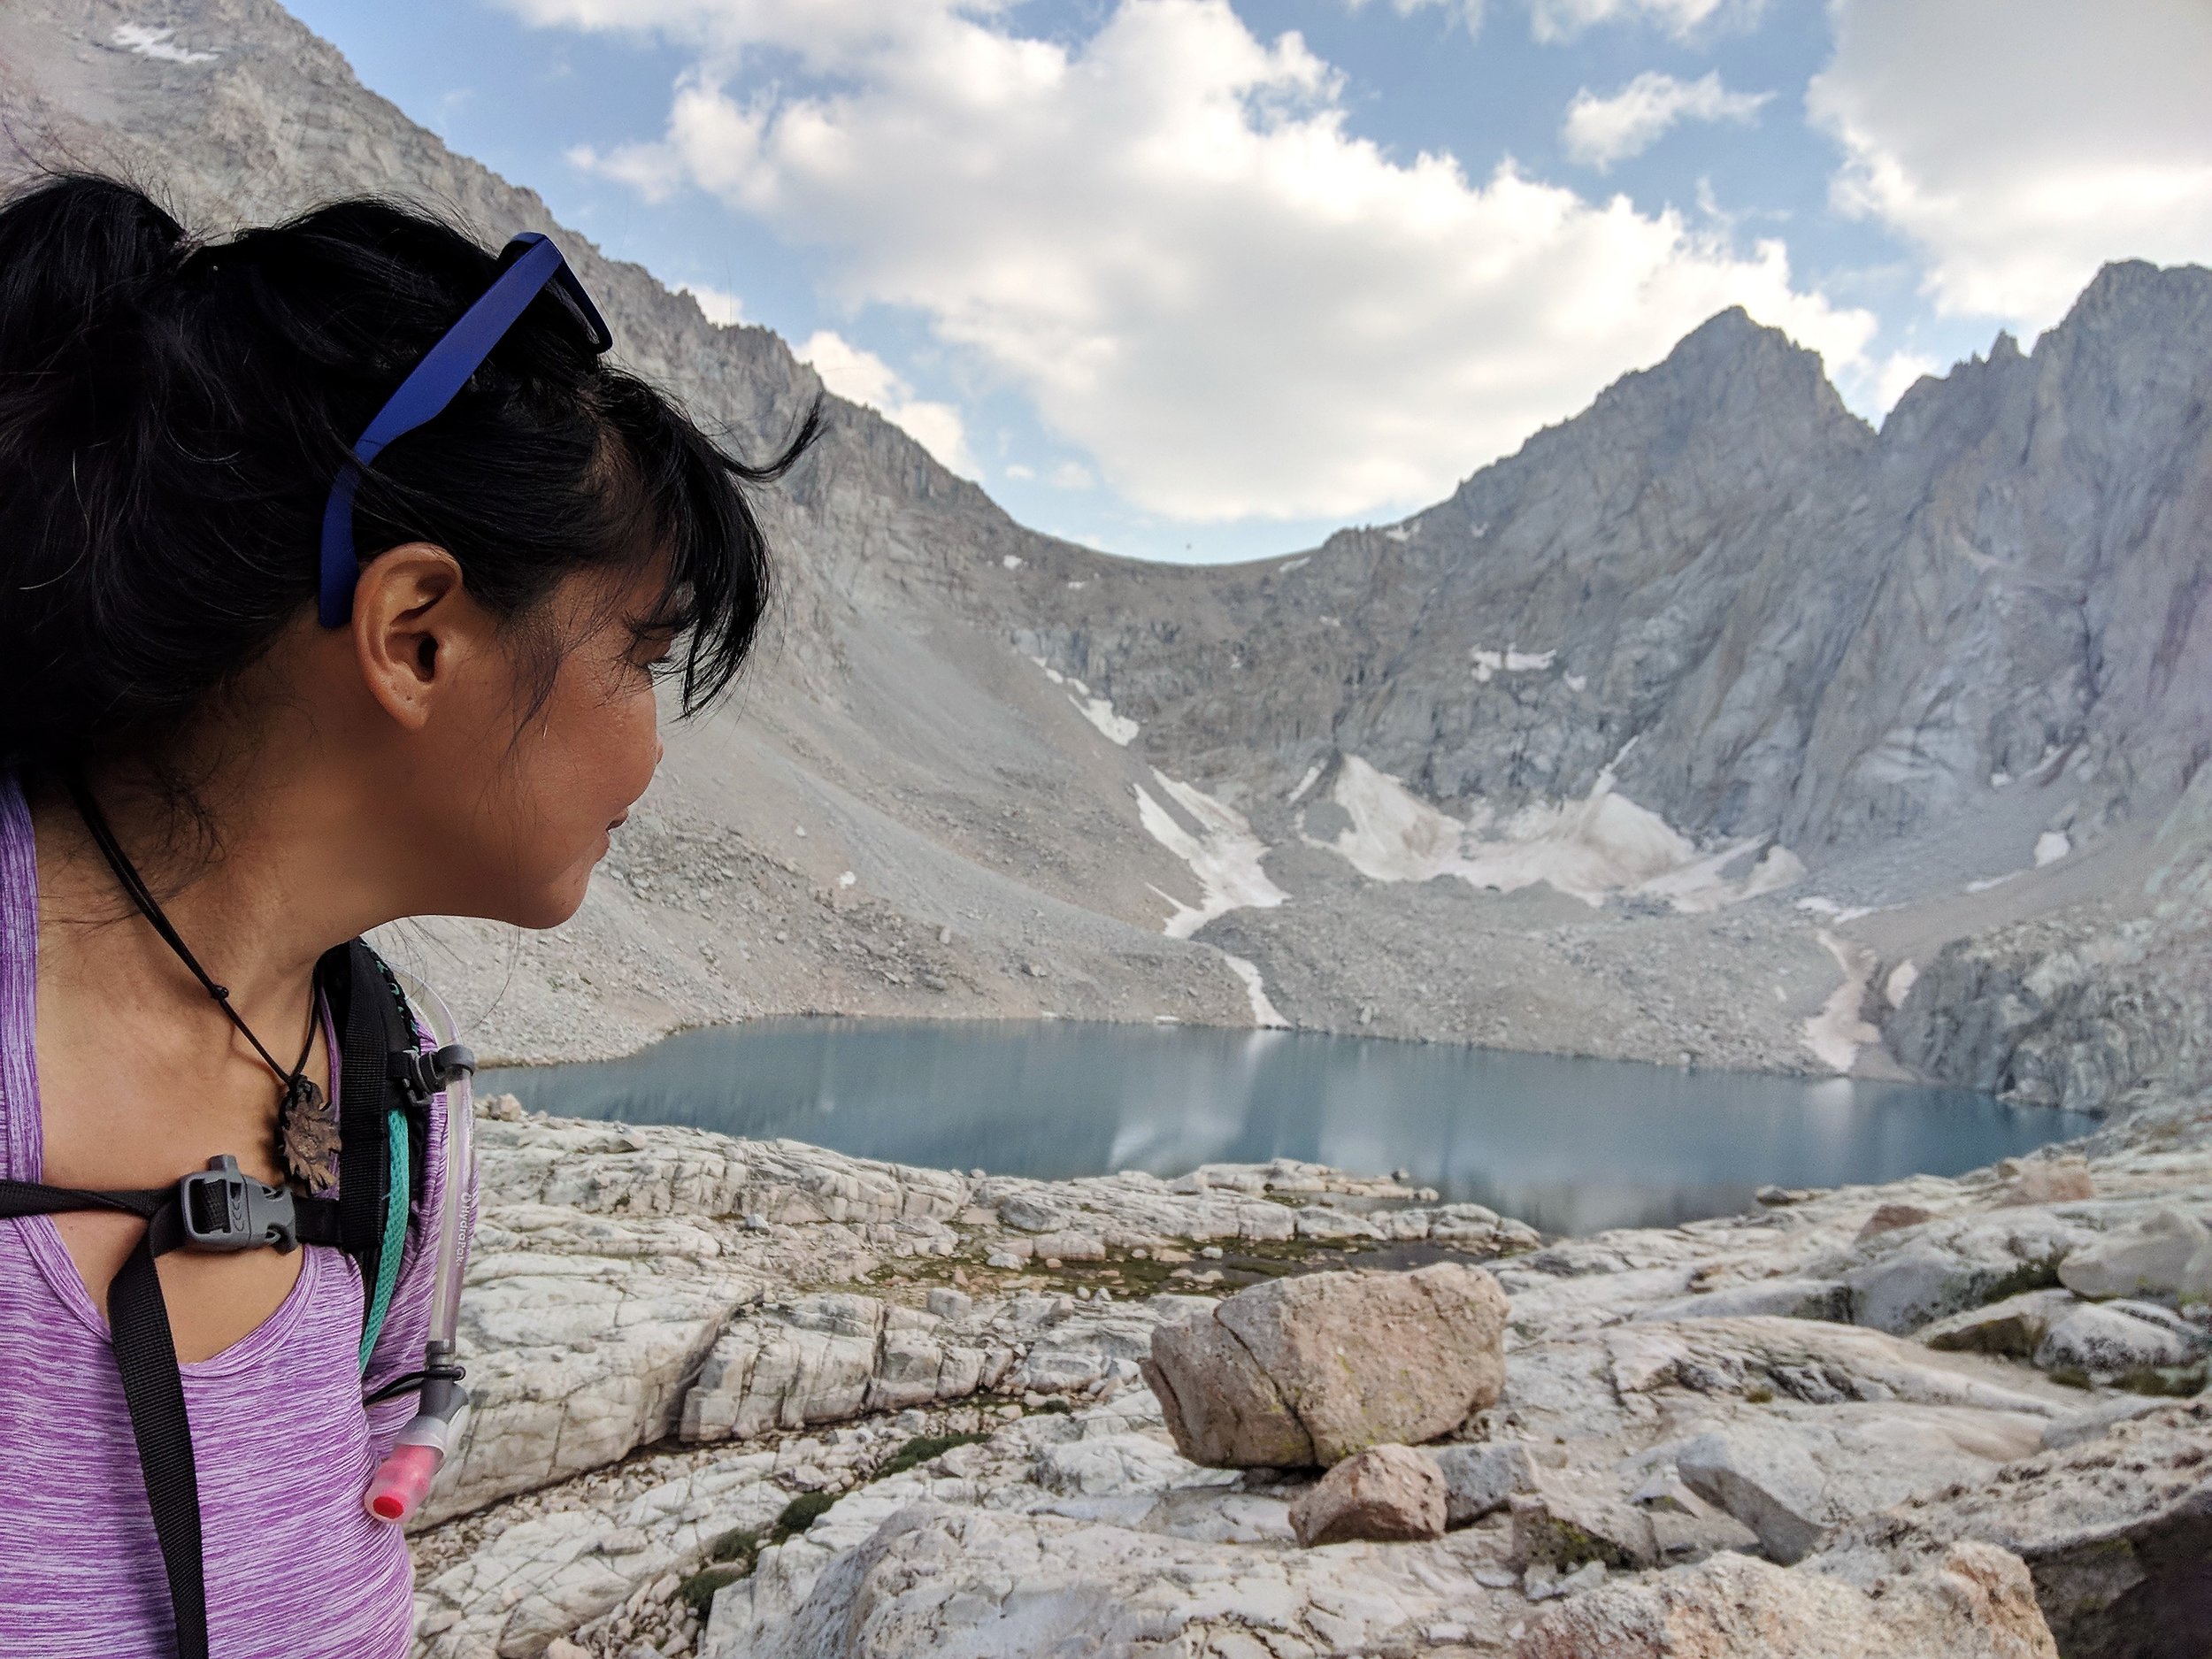
You have a few options for resupply in Independence. But you must know off hand that if you decide to resupply in Independence, you’ll have to hike down via the Kearsarge Pass. To return to JMT, you’ll need to hike up the pass a second time. At first, I was concerned with the idea of adding another pass to my JMT thru hike. However, I was pleasantly surprised how I enjoyed this leg of the trek. For one, it’s a scenic portion of Sierra Nevada and allows you to use two different trails to get off and on the trail. Heading north on JMT, the closest trail that takes you to Kearsarge is via Bullfrog Lake. The first part of this trek required a steep climb for the first hour. En route, you get the chance to visit Bullfrog Lake which is amazingly gorgeous. When I reached Bullfrog Lake, I was the only person there apart from one other person. In the morning, you can see the reflection of the mountains in the water. It was such a treat to walk on this particular trail. Returning back to JMT, you can take the higher route after you go over Kearsarge pass which will lead you towards Charlotte Lake and Glen Pass junction. The view on the higher route was equally impressive. The hardest part is the descent after Kearsage Pass towards the parking lot where you catch a ride to Independence. The return up this portion took a bit of energy but again the climb turned out to be easier than expected.

The beauty of Bullfrog Lake made it worth it to hike up Kearsarge pass twice to resupply in Independence.
Resupply options at Independence
The resupply options at Independence are by virtue of the accommodations in the area. Based on my research, here are the options:
When resupplying at Independence, you’re bound to stay at least a night before heading back on the JMT trail. Initially, the plan was to stay just one night and head back out the next day; but I soon learned that starting out with Whitney and hiking over three passes in 5 days was quite tough on the body and adding a rest day just made sense to recuperate. So, I stayed two nights with one day of rest. My logistics friend and I decided to stay at Independence Inn. What I like about Independence Inn is that they don’t charge for resupply as long as you stay at their place. The caretaker, Jim, was one of the friendliest people I met on my JMT journey. On the day that we exited JMT, we reached the parking lot area around noon, which is the typical pick up time for thru-hikers. Jim picked a few of us who had the same plan of staying at Independence Inn.
Food Tip: So, you’re in Independence and hungry for real food. Where do you go? Just a block or so from Independence Inn, there’s a taco place. Go there. Amazing stuff. There’s really no need to go looking for any other place. Right across from the taco place is a gas station with a mini-mart. There, you’ll find all the other goodies you may crave including resupply items.
Other accommodations to choose from: Mt. Williamson Hotel (pricier stay plus resupply cost).

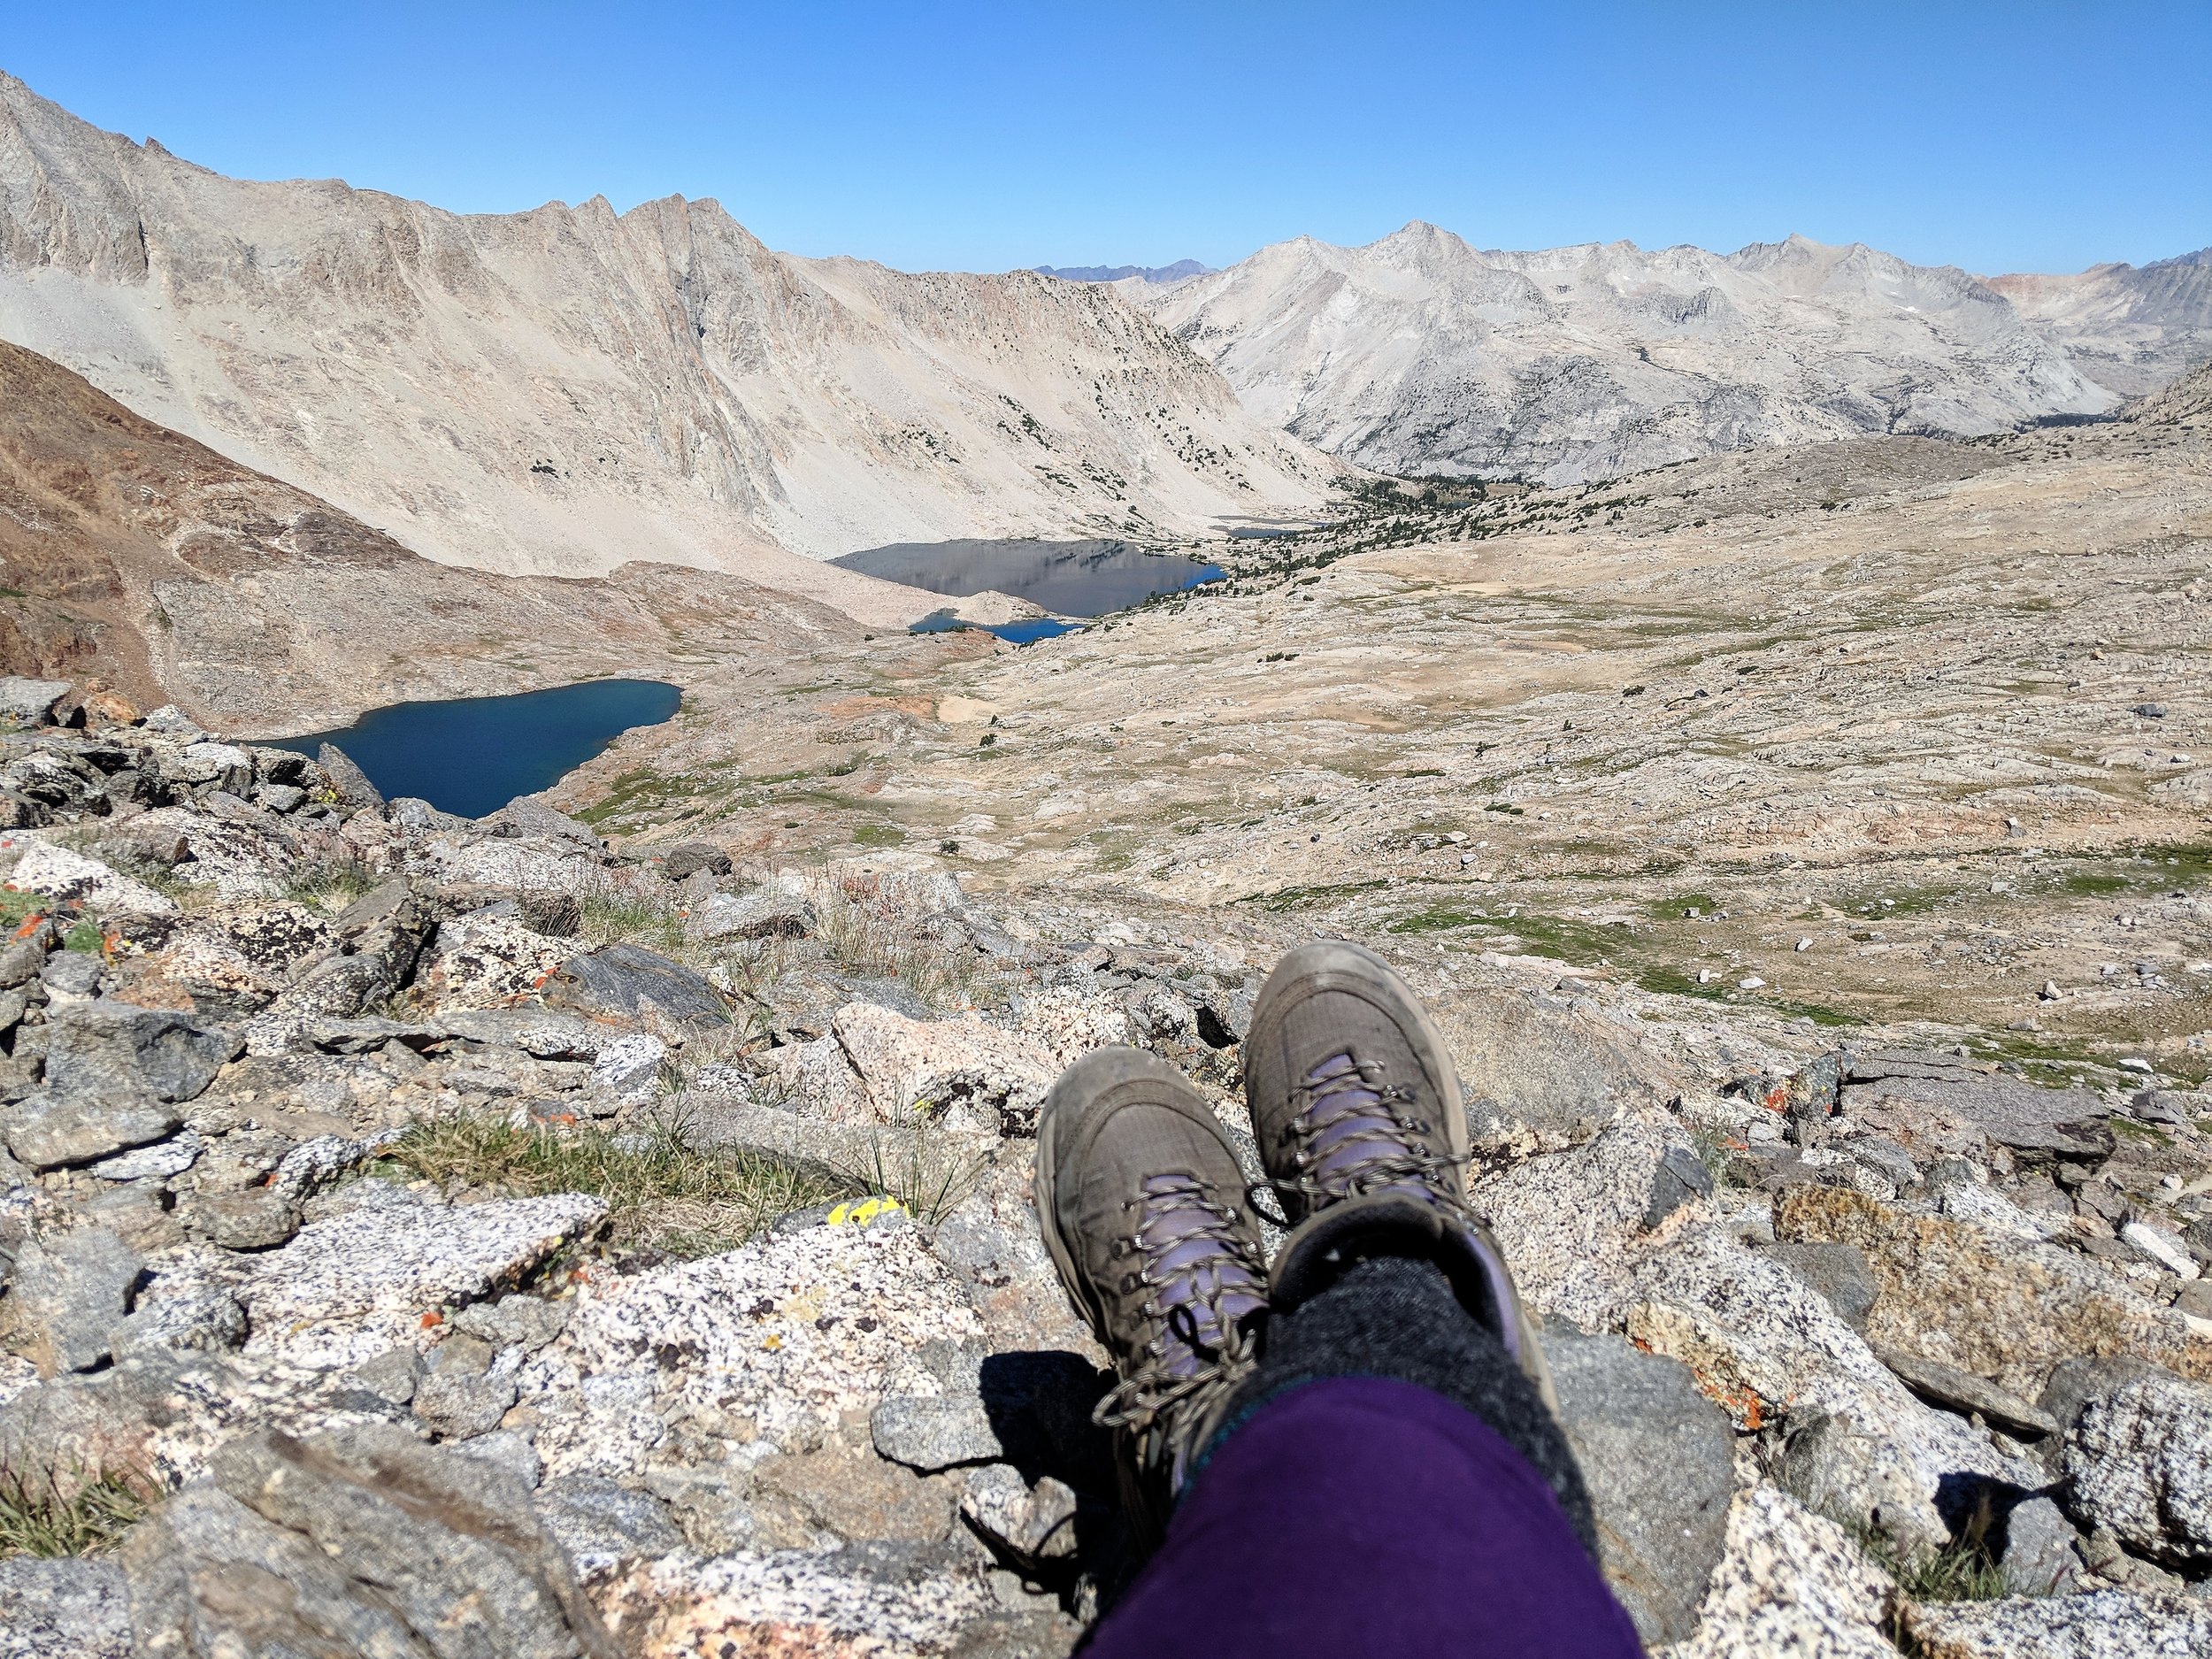
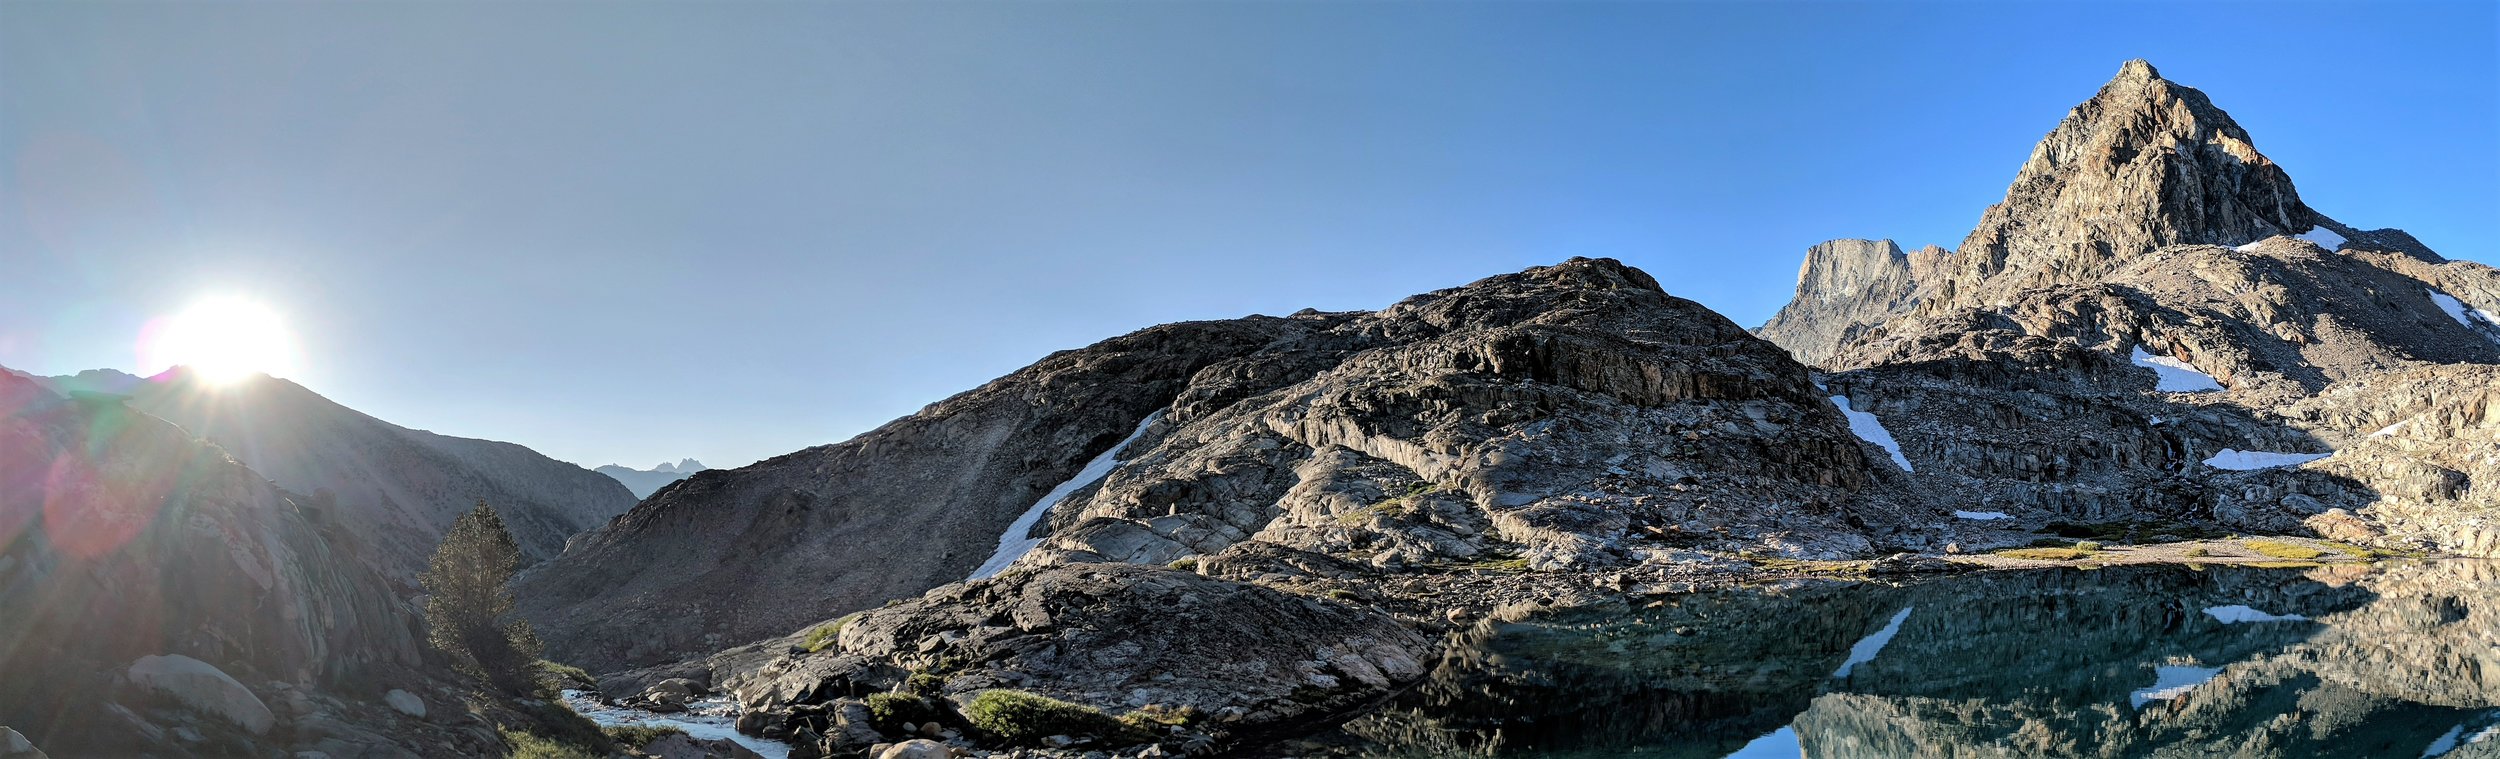
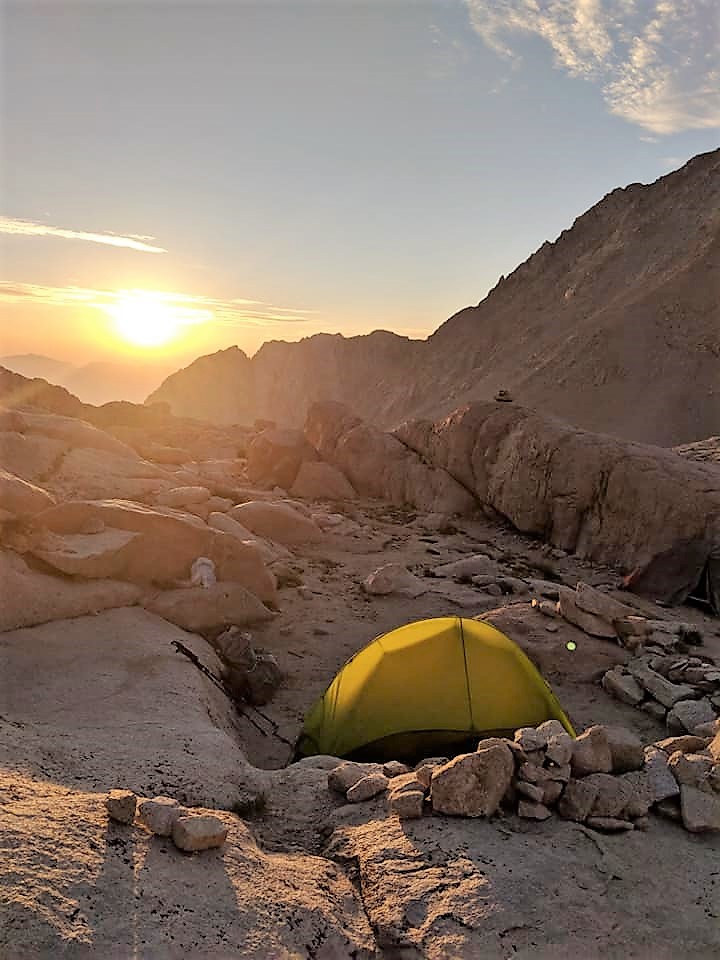
En route to Muir pass at sunrise.
2. Muir Trail Ranch or VVR
Heading northbound, MTR is the first resupply after Independence. VVR is a two day walk further. Usually, thru hikers resupply at one or the other. I chose to resupply at MTR as I didn’t want to carry food for more than 7 days.
Here are the websites where you’ll find the resupply forms and instructions:
Vermillion Valley Resort (VVR)
Here are a few things to consider:
1. MTR charges around $80 for resupply while VVR charges only $30.
2. Both resupply spots allow for camping and hotel stays. In VVR, hikers can camp for 2 nights, free of charge. MTR requires advance reservations for their hotel cabin and tent cabin stays and are often full.
3. While you can fill up with water at MTR, you can’t purchase food or meals there. In contrast, VVR has a restaurant that caters to thru hikers. It has more amenities for thru-hikers such as showers and laundry.
4. MTR has tons of donation bins full of thru hiker goodies! When I reached MTR, I was shocked to see the amount of food and gear that were up for grabs. MTR is a great place to resupply for free if you wish to chance it and search the bins for stuff you need. The bins didn’t only hold the usual food items, but also, there were bins for fuel, batteries, and even hiking gear. Also, if there’s one thing MTR sells, they do have first-aid items for sale.
5. MTR is a 3-hour detour from JMT. VVR is a day detour from JMT and it’s common for people to do a rest day here. Heading northbound, you’ll have to take the trail junction that will take you to the area where you catch the water taxi to take you to VVR. Learn more about how to get to VVR, the water taxi schedule and fare here:
6. There’s a hot spring near MTR for a quick dip and the nearby Florence lake if you have extra time to explore.
Lesson on the trail: There were plenty of folks who opted to do VVR and one thing I learned in my case is that I could have done the same and carried food for the extra 2 days. When you thru hike, your body gets accustomed to the weight and after a week, you’ll find the pack much more manageable than before.
3. Red Meadows or Mammoth Lakes
As a NOBO thru hiker, Red Meadows will likely be the last stop for resupply. Red Meadows offers camping and cabin stays, a restaurant and a well-stocked mini-mart. You can learn more about their resupply procedures here.
I initially planned to camp in Red Meadows but decided to head to Mammoth Lakes instead because of the lack of internet access which I needed to run my social enterprise while off trail. If you decide to go to Mammoth Lakes, there are buses that frequently pick up people by the mini-mart at Red Meadows. You’ll need to change buses to get to the city center.
Where I stayed in Mammoth Lakes
There’s a slew of accommodations to choose from as Mammoth Lakes is a touristy place including hostels for those on a budget.
I stayed at Moderne hostel while in Mammoth Lakes. It was a decent stay. The hostel is walking distance to a few laundromats, restaurants, cafes and grocery stores. It was also walking distance to the bus stop where you take the bus back to Red Meadows to resume the JMT thru-hike.
Side note: If need be, past Red Meadows, you can resupply in Tuolumne Meadows as well as there’s a roadside mini-mart and restaurant next to the backpacker campsite.

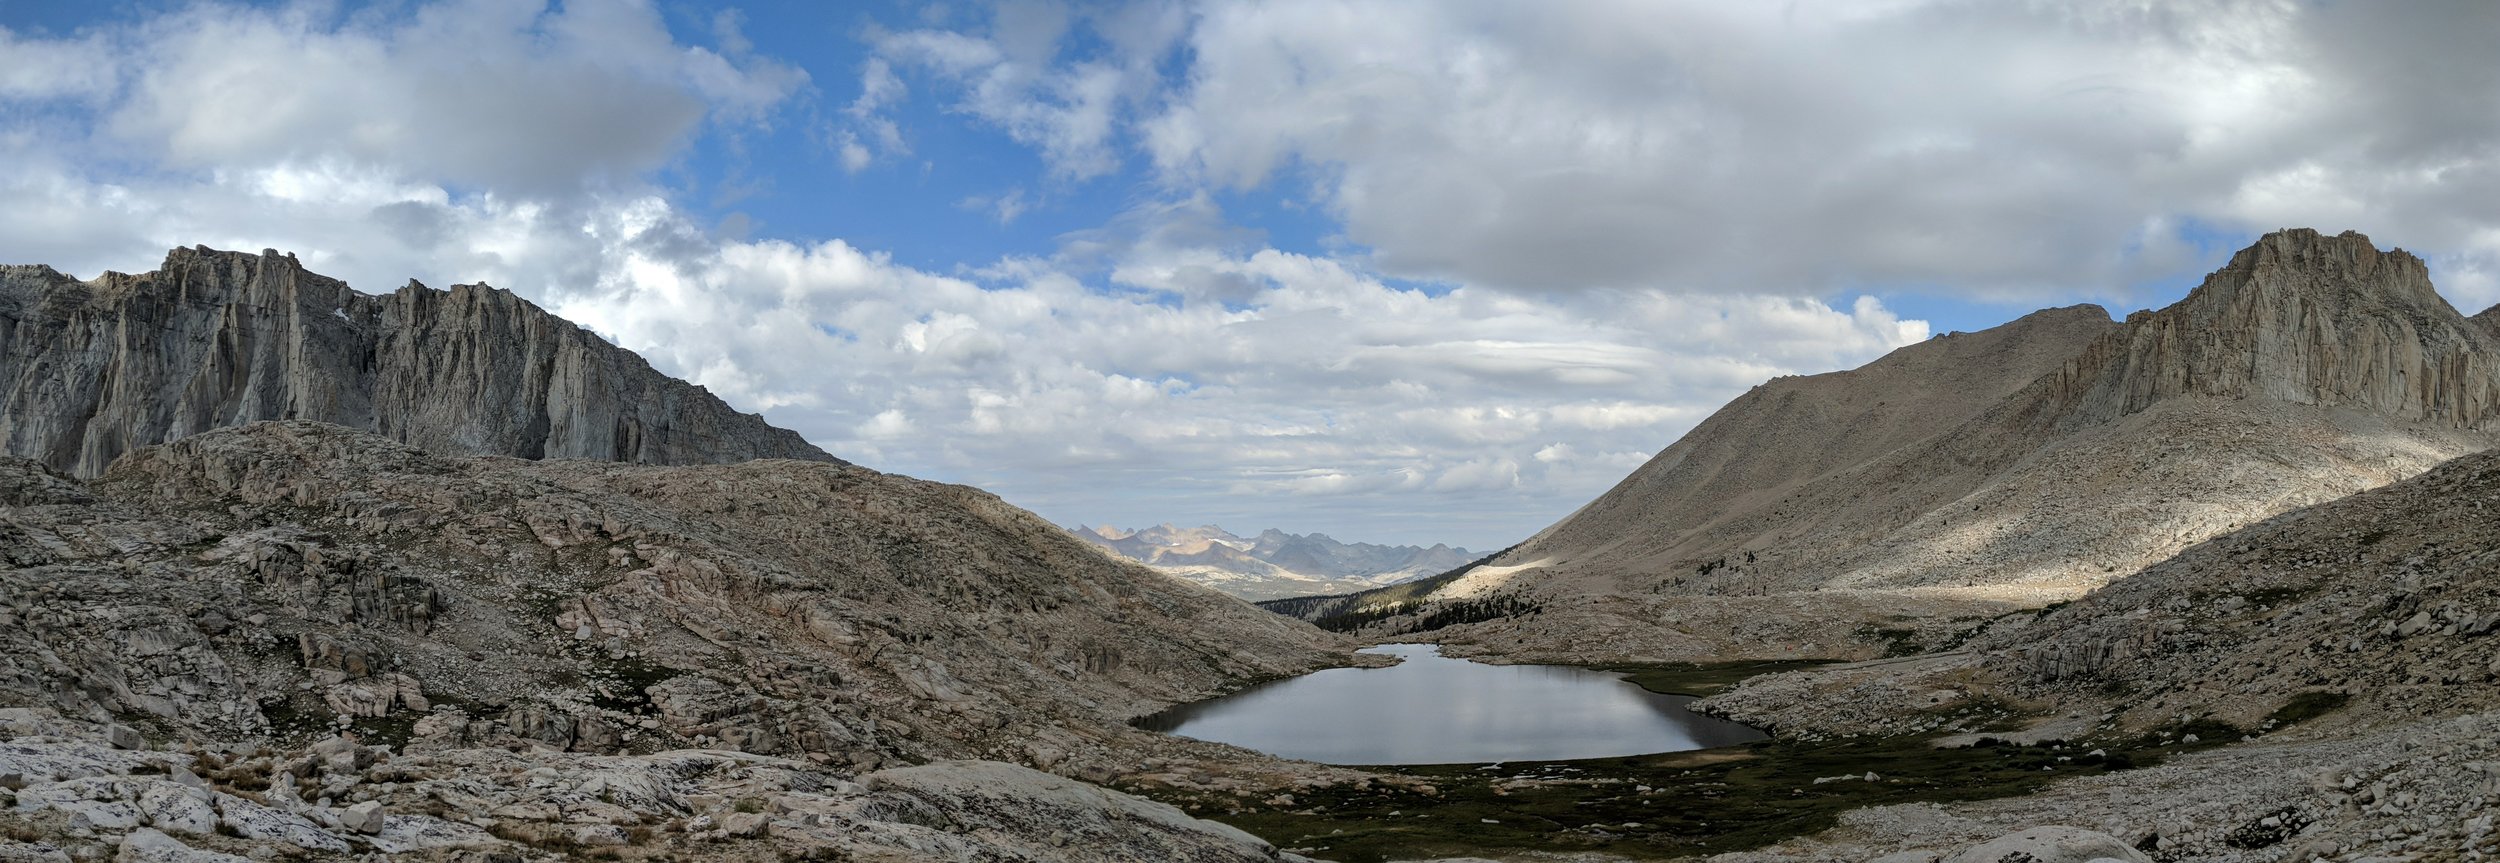
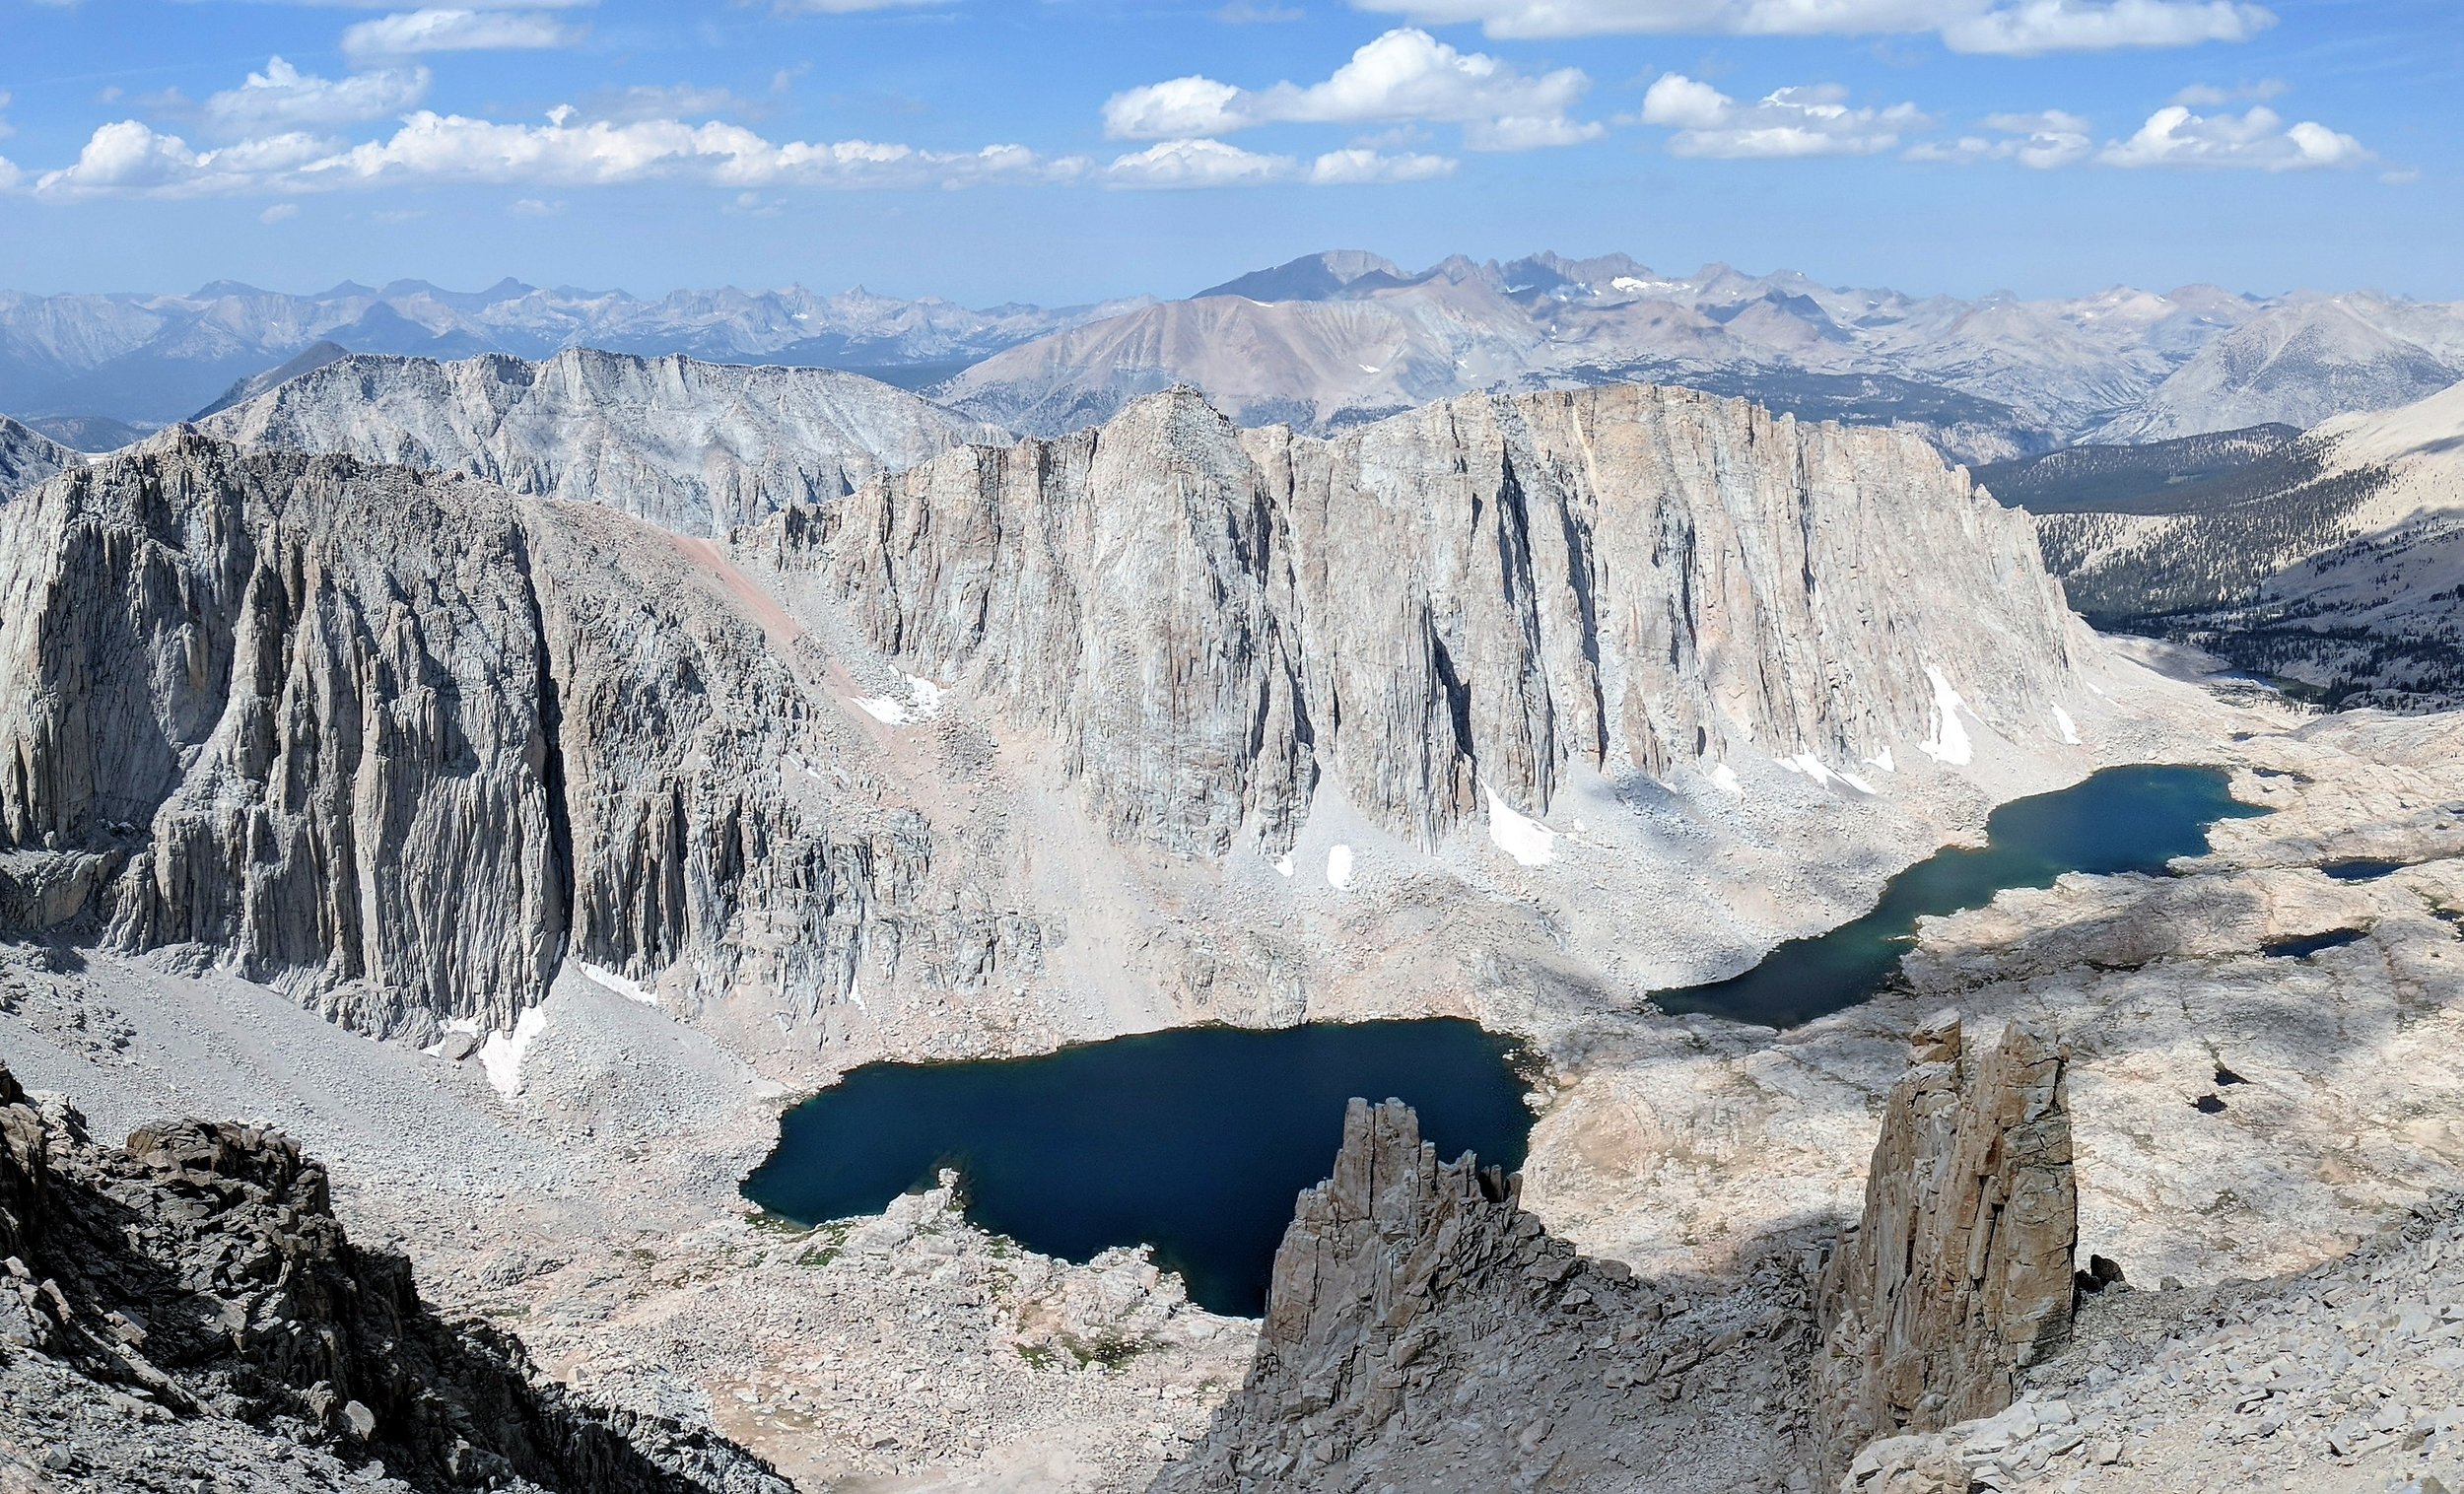
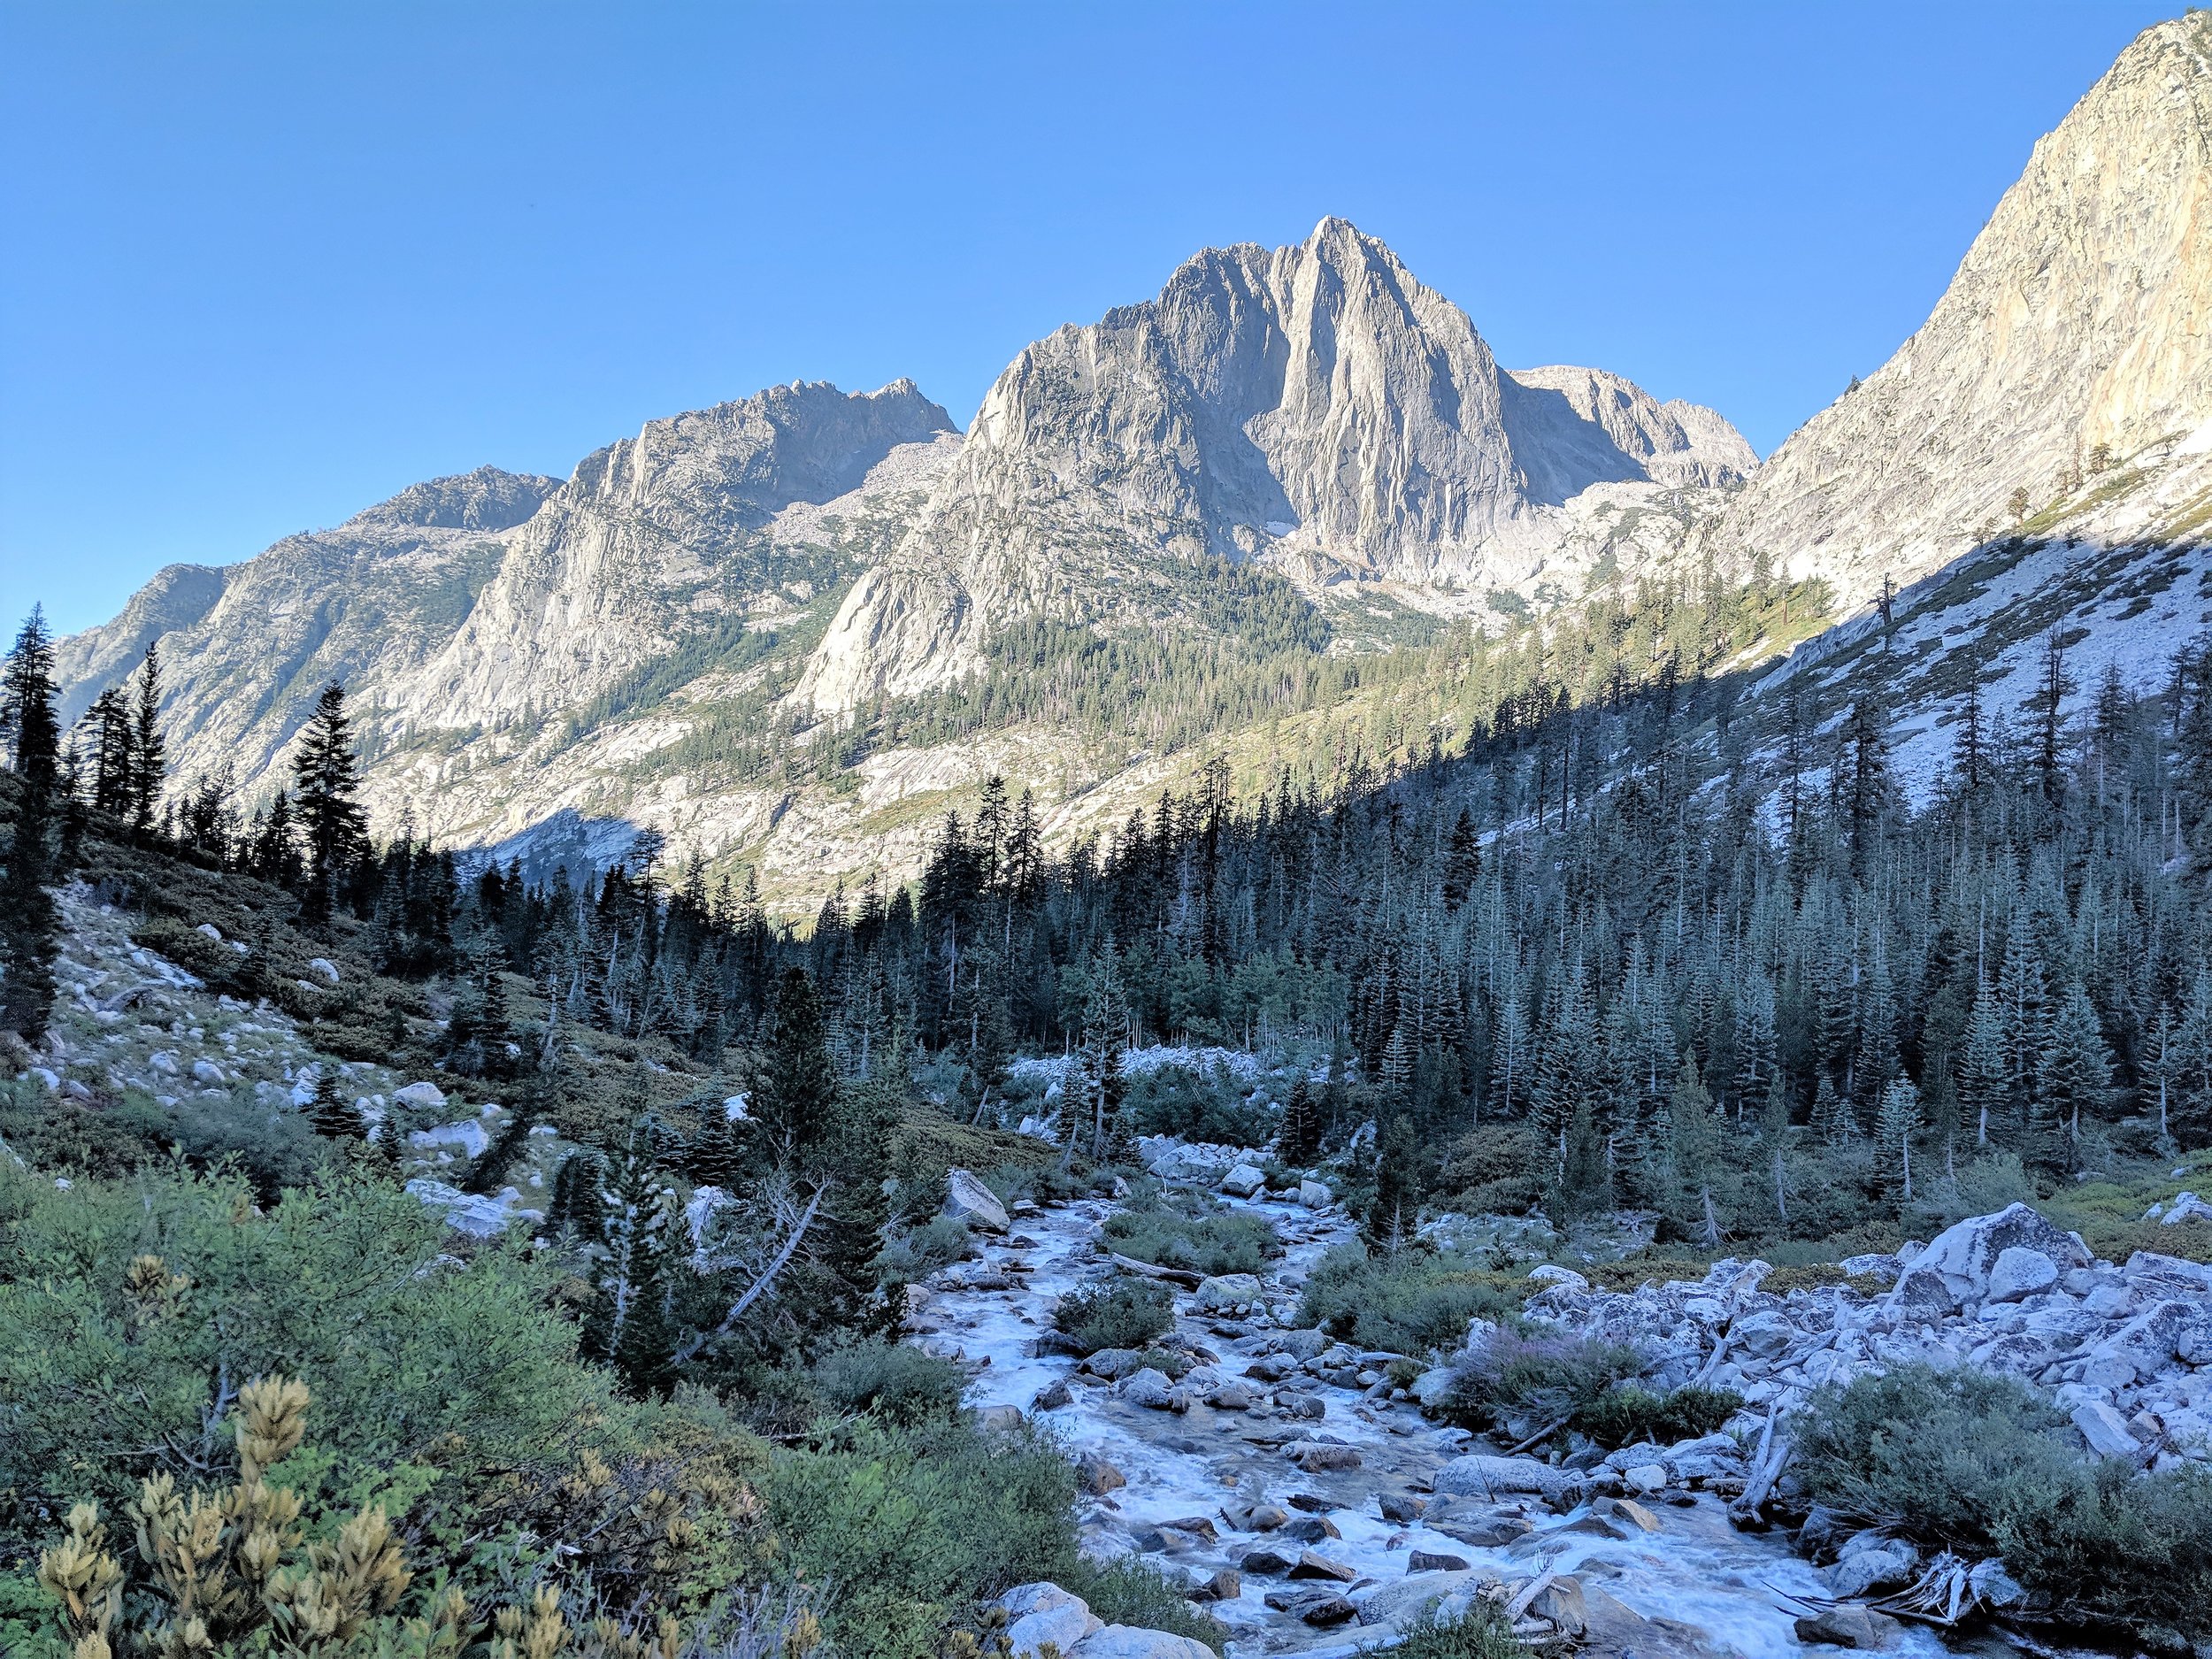
Guitar Lake is one of the best campsites on JMT.
Getting to the Trailhead
To get to the Whitney Portal, here are the steps via Los Angeles:
1. Fly out to LAX
2. From LAX you can rent a car one way which you drop off at Bishop (an hour away from Lone Pine) or you can take public transport starting at L.A.’s union station. You must first take the Metrolink train to Lancaster and then transfer via Eastern Transit bus to Lone Pine.
3. You’ll need to book your shuttle ride to the trailhead at Whitney Portal. We booked our shuttle via Eastside Sierra Shuttle.
Accommodation in Lone Pine: Whitney Portal Hostel has hostel beds and standard rooms. You can search for other accommodations in the area via www.booking.com
How to Get Out
There are a few options for heading out of the Yosemite Valley and connecting to your next desitination. The YARTS buses will be your first transport out that can take you to Merced, Fresno or Mammoth Lakes, among a few other places.
In my case, after finishing in Yosemite Valley, I ended up having to get to LAX to catch my flight to my next trekking destination. Initially, I planned to catch the bus heading to Fresno but due to the fire in Yosemite weeks prior, the road to Fresno was closed. So, I ended up taking the following steps to get to L.A.:
1. From Yosemite Valley, catch a YARTS bus heading to Merced Amtrak.
2. From Merced Amtrak, catch a train to Fresno.
3. Stay overnight in Fresno.
4. Catch the Bolt bus from Fresno to L.A.
Accommodations:
Motel 6 in Fresno: This is a no frills stay but fits the budget. The location is decent as it’s next to Walmart and I was also able to use their laundry facilities to wash clothes.
Freehand Hostel in L.A.: A bit pricey for a hostel but quite nice! The place is well maintained and centrally located so you can roam the artsy parts of L.A. and also enjoy ethnic restaurants in the area.
The Challenge of Pack Weight

The pack weighed 40 pounds on the first day. My best guess is that the weight fluctuated between 35-40 pounds throughout this hike.
If this is your first long distance hike, then you’re in for some major ounce counting. It can even lead to borderline obsession for some people. I knew from the start that my goal is to keep my bag light. I hoped for my pack to weigh no more than 35 pounds at its heaviest state. However, on the first day, my pack weighed 40 pounds. I was dismayed given that the first segment of the trek involved hiking up Whitney. Luckily, my training paid off as my body was already used to the weigh by the time I started my thru-hike. If I wasn’t properly trained, I knew that it would have been much tougher given that the first two days required a climb of over 5000 feet.
I can repeatedly tell you to pack light but in the end it’s really up to you. The key here is to balance the weight with your level of comfort (in terms of gear or food). Either way, it can work out as long as you prepare your body for it. I’m not going to lie. For a petite person like me, carrying 40 pounds was challenging. So, if you can manage to go for less weight, then you should.
Your Trail Food
Unexpectedly, the toughest aspect of JMT preparation turned out to be the question of what food to bring. In fact, researching this aspect of the trek was so overwhelming. You can read literature on this subject forever and just feel paralyzed by the immense amount of information out there. One theme you’ll run into often is the notion of having plenty of calories for each day. I didn’t do that.

You’re the one who knows very well the amount of food your body requires to get through the day’s hike. The best approach is to test your body. Go on a few backpacking trips to get to know your hunger and nutrition level while trekking. One person’s approach on food intake may not be the right approach for another. In my case, I didn’t have to bring tons of calories to enable me to trek. In fact, in the end, I over packed and had to get rid of some of my food items. I also realized that on a long-distance trek my body craves food that I would normally eat at home and having variety helps. For every resupply, I made sure to have bags of trail mix but it turns out I dreaded the taste of trail mix even before I finished the first segment of my thru hike. From that point onward, I decided to give away or donate my trail mix bags. I just couldn’t imagine eating any of it and in some cases I preferred to be half hungry than full.
But that’s just me. Every person is different. What I love about trekking is it allows you to know your body and health intimately. Once you’re in tuned with your own body, it’s easy to decide what food to eat and avoid.
I would advise you to approach your water intake the same way. Know your body’s normal water intake on a hike. Familiarize yourself with your baseline and depending on the difficulty of the day’s hike and the weather, you can increase your water intake as needed. Here’s my food list:

July 29-August 2 (5 days food)
Breakfast (4)
oatmeal, dried fruits, peanut butter, tortilla, coffee
Lunch (5)
- Tuna packets, probar, trail mix, korean bbq jerky
Dinner (4)
- Mashed potatoes, bacon bits, jerky, tailwind shakes, hot chocolate, dehydrated meals(x3)
Snacks
snickers, trail mix, jerky
August 3: Rest day
August 4-10 (7 days food)resupply at independence
Breakfast (6)
- Oatmeal (x3) with dried fruit/raisins, maxim coffee, tailwind fuel
Lunch (7)
- Tuna & chicken packets, tortillas, protein bars, trail mix, chocolate
Dinner (6)
- Dehydrated food (x3), mashed potatoes (x3) with bacon bits, jerky, miso soup, hot chocolate, tailwind shake
Snacks
snickers, trail mix, dried fruits, kind bars
August 11-14 (4 days food) resupply at MUIR TRAIL RANCH
Breakfast (3)
- Nasi goreng noodles(x2); dehydrated food; tailwind fuel; coffee
Lunch (4)
tuna packets, summer sausage; probar
Dinner (3)
- nasi goreng noodles (x2), miso soup, hot chocolate, dehydrated desert
snacks
Probar, kind bars, m&m peanut candies
August 15: Rest day in Mammoth Lakes town
August 16-21 (6 days food) Resupply at RED MEADOWS
Breakfast (6)
Oatmeal (x3), tailwind endurance fuel, dried fruit, mountain house dehydrated (x3)
Lunch (7)
tuna packets, probars
Dinner (6)
mashed potatoes, bacon bits, jerky, tailwind shakes, Mountain house dehydrated food, Hot chocolate, Miso soup mix, nasi goreng noodles
Snacks
Snickers, probars
Non food items added to resupplies
Toilet paper, Batteries for headlamp, Lighter,Baby wipes,Vitamin c packets
Side note: I loved the following food items on the trail: Nasi Goreng noodles, Maxim coffee packets, hot chocolate, M&M peanut candies, Probar, and Korean BBQ Jerky (from Costco). Warm drinks/soups are a must.
Pick Your Essential Gear

Cat not included.
Besides the food, the most challenging part is to decide on what essential gear to bring. Despite, having been to a number of backpacking trips, the notion of having to carry a pack of gear for weeks required careful decision-making on which items I should take. Here’s my official gear list:
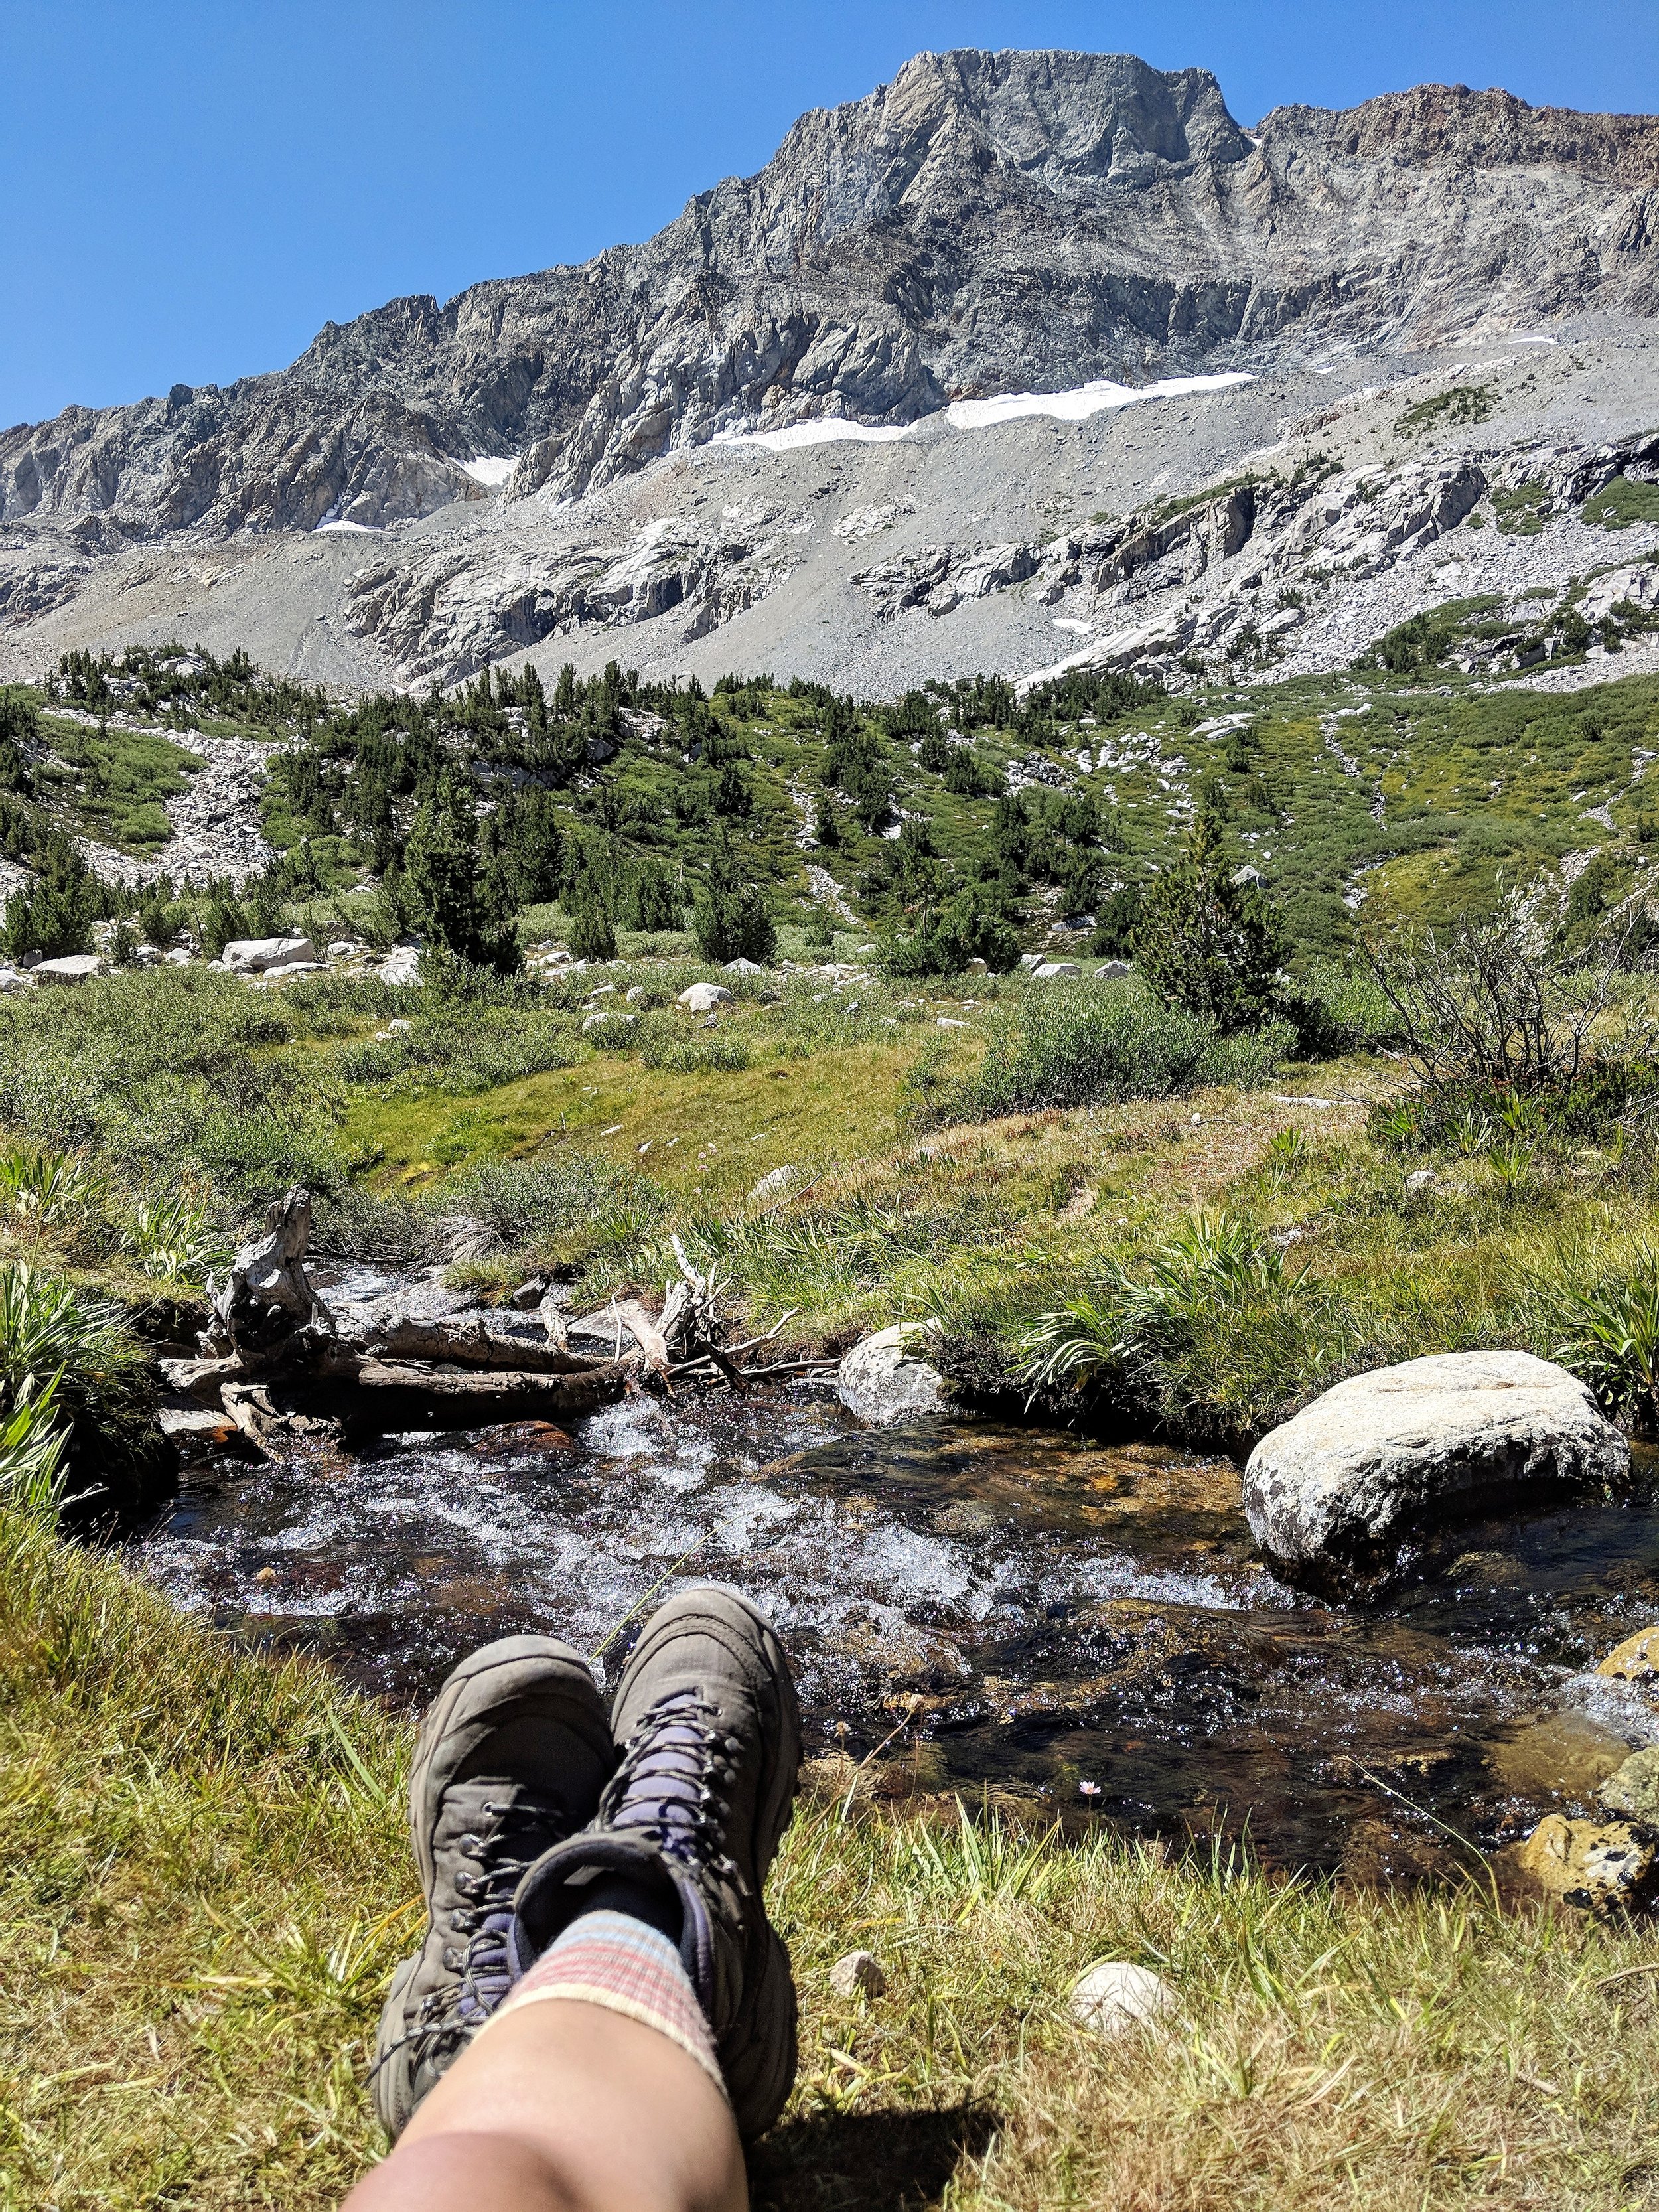
Vasque boots
Camp shoes/crocs
Osprey EJA 58 L pack
Backpack rain cover
osprey Fanny pack
Leki trekking poles
Nemo Hornet 1P tent & footprint
nemo Tenzor sleeping mat
Nemo sleeping bag
3L Osprey bladder
Sawyer water filter + pouch
Marmot Rain coat
Marmot Rain pants
Sunscreen
Sunglasses
First aid kit
Medications: Cipro, Diamox, Immodium, Ibuprofen, cortizone
Purification tablets
Emergency blanket
Bug net (didn’t end up using)
Headlamp
Cell phones (Pixel & Samsung)
Portable charger
Phone cords
(you’ll want them to charge at resupply points)
Stove
Spork
Fuel
Windproof Matches
Garmin Mini Inreach
Bra 2
Panties 2-3
Beanie hat
Sun hat
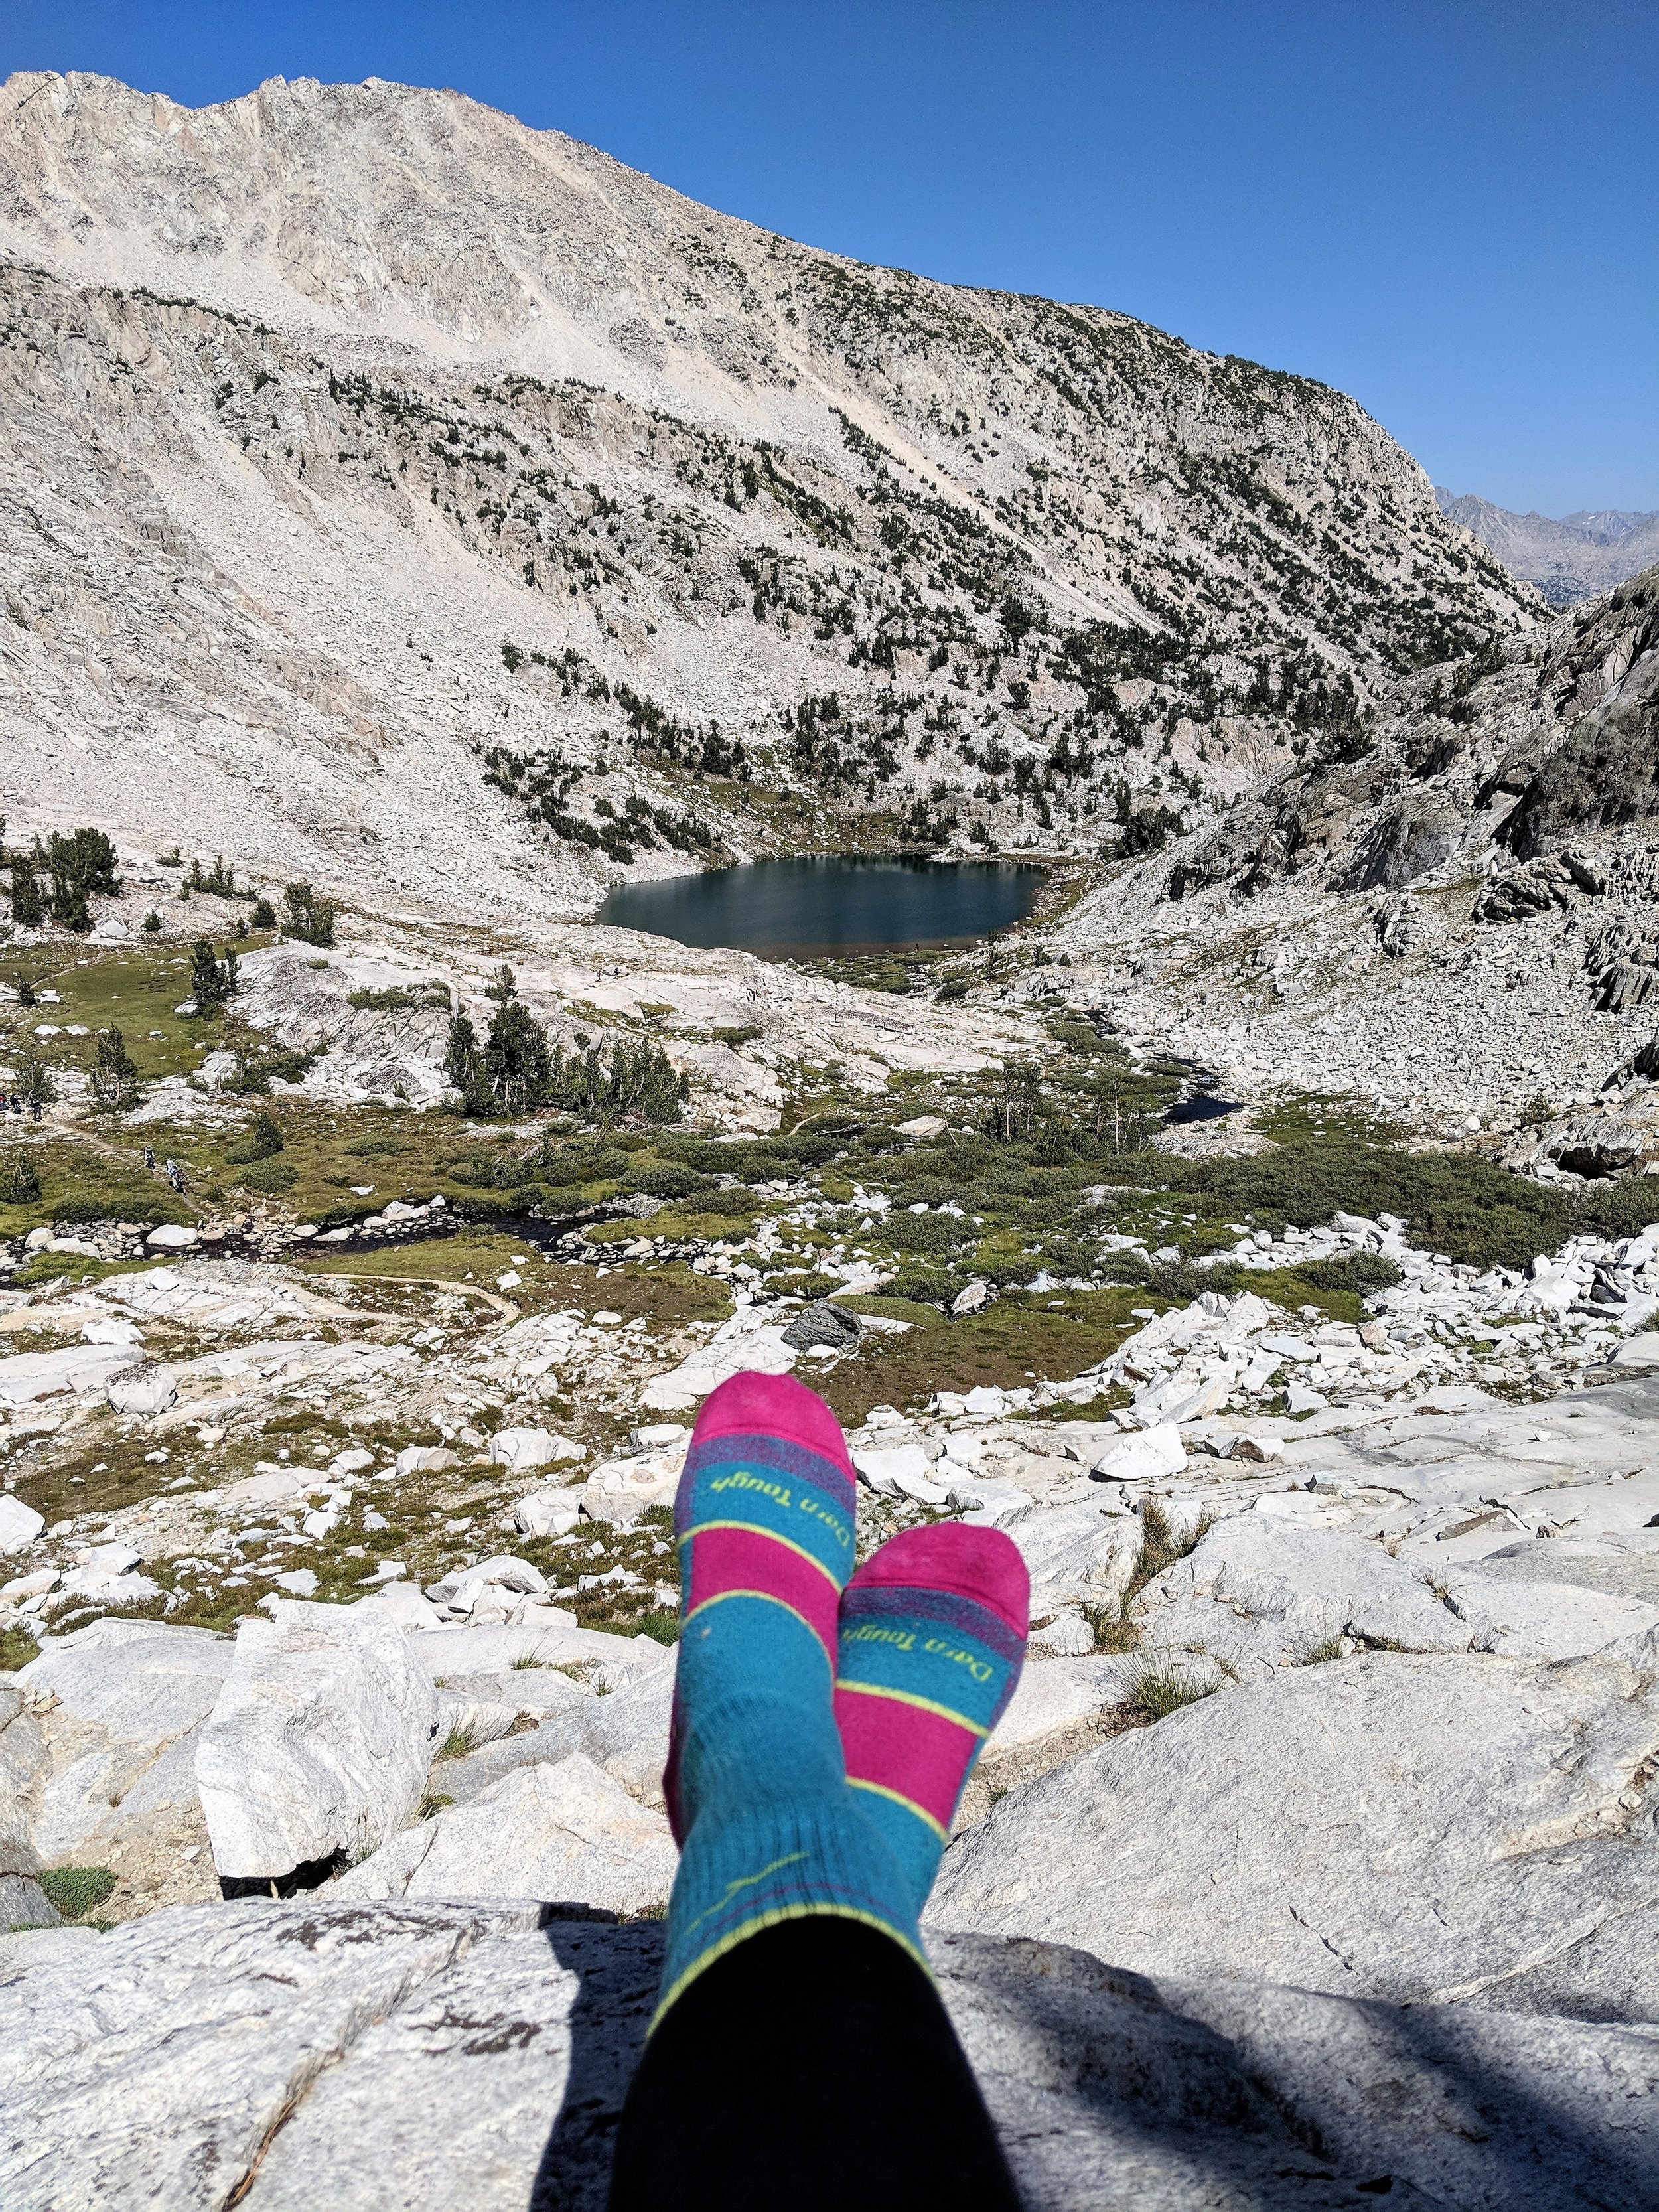
Darn tough socks 3
Hiking pants 1
Leggings 1
Shorts 1
32 degrees Base layer pant
32 degrees base layer long sleeves
Marmot down jacket
short sleeves hiking t-shirts 2-3
Bearikade canister
Bandana
sanitary Napkins
Baby wipes
Ziploc bags
Hand sanitizer
Toilet paper
Trowel
Toiletries- toothbrush, toothpaste, lotion, deodorant
Knee bands
Pen & paper
Trail map
Go pro and stick
Credit card
Driver’s license
passport (for flight after)
Car insurance card
Cash
I can honestly say that I was happy with the gear items that I packed. I realized when you do the same thing every day (i.e. hiking), you don’t mind at all wearing the same attire. I had an extra change of clothes for my hikes but ended up not using it which was a blessing in disguise. The clean shirt and pants I had were the ones I used when I had to do laundry at my resupply points. So, keep in mind the clothes you’ll wear when you need to wash the rest of your stuff at resupply points. Also, I allocated one set of clothes for sleeping (the base layers) and ensured that I keep them dry.
In any backpacking scenario, testing your gear is the golden rule. This is especially true for a long distance trek to avoid pitfalls. I would especially caution you to ensure that you have a pair of shoes that work well for you because there’s no denying how much uphill and downhill you’ll be doing on JMT. If there’s a gear that will get used the most on this journey, I would say it’s your boots.
A tip for Sawyer water filter users: Make sure to bring two plastic containers because with the squeeze method, the plastic container is bound to fall apart. That happened in my case and ended up using a Smart water bottle as replacement. Although the Smart bottle worked, it’s less ideal as water flow is much slower than the plastic container that came with Sawyer.
Which gear surprised me? The 32 degrees base layers, both shirt and pants, were a pleasant surprise. And here’s another surprise - the items cost $5 to $10 each. You can buy them at Costco or via their website. I bought the 32 degrees “heat” base layers, and found them to work well as my pajamas. They kept me warm! I also both their “cool” hiking short sleeve t-shirts and was happy with their performance, as well. There’s nothing like cheap gear that performs well! And, no, I wasn’t sponsored by 32 degrees so I’m 101% honest with this critique.


That Dreadful Bear Canister
Here’s the not so pleasant news about the JMT thru hike: A bear canister is required for JMT.

And yes, when you run into rangers, they will check to see if you have it.
The good news? Using the canister makes you more organized and mindful of your food quantity. Also, I fondly use the canister as my portable chair.
A couple of popular options are as follows:
I have used the Bear Vault 450 for prior treks of up to 5 days. It’s cheaper but has less volume. It was too small for the longest stretch on my trek. Bearikade Weekend provided more volume but with lighter weight.
This is the product I chose as it’s the lightest in the market. Buying it is pricey so luckily the company rents out the item so you can pay per day. I chose the Bearikade weekender. This size was sufficient for the longest stretch on my JMTthru-hike: 7 days. If you opt to rent, you’ll have to fill out the form on the website.
The company will ship your canister to the address you indicate on the form. In my case, I requested the product to be sent to an AirBnb address as I was in Denver days before my trek attending a trade show. The product arrived as expected.
Gear for Photography
I opted to use my Google Pixel camera for taking photos as opposed to a DSLR. The deciding factor here is how much weight you’re willing to carry to capture those moments on the trail. On the trail, I saw some hikers with DSLR while others relied on their phone cameras for photos. There’s no right or wrong way to go here.
I do want to caution you - to avoid losing content which happened in my case as my Pixel somehow malfunctioned in the middle of my hike, make sure you to bring a memory card or portable USB to back up your photos.
Keeping Your Electronics Charged
As I was semi-working on the trail as a content creator for my brand sponsors, I had this constant worry about being able to use my gadgets all the time. I opted to get a portable battery charger but as it turned out this charger wasn’t sufficient for the seven day stretch. I considered bringing a solar charger but decided against it because of the weight and I was skeptical as to whether there would be strong enough sunlight on the trek to charge the battery. In hindsight, I would have taken a solar charger instead as there’s an abundance of sunlight on JMT and people who brought their solar panel were happy with the results. During my research, Goal Zero seems to be a popular brand for thru-hikers although I never tested one myself.
The Dirty Business
The toilet business is certainly a part of the thru hike experience. It’s one thing to do an overnight and it’s another to be using the wilderness for your toilet business for 22 days. In the first five days, I ended up carrying a wag bag with me because in the Whitney zone, you’re required to use a wag bag for any toilet business that you do, which the park office will gladly provide to you. Not only that, you must take the bag with you and dispose of it properly off the trail. Beyond the Whitney zone, you’ll build a relationship with your trowel and develop your digging skills quite fast. Also, remember, toilet paper must be discarded into a bag and taken out of the trail. The good news is you’ll learn fast how little toilet paper you need for your toilet businesses when you’re motivated not to carry too much dirty toilet paper with you for days.
Water Sources
One wonderful aspect of JMT is you don’t need to worry about access to water sources. There’s plenty along the way. Lakes, creeks and streams are abundant. However, do note that when I did this in August, the trail from Tuolumne Meadows until Clouds Rest area had some drier parts to it. The creeks and streams were dry especially around the Cathedral area. Once I started my descent to Yosemite Valley, the creeks were flowing with less than the normal amount of water. I was advised by a ranger that this is typical for August. This part of the hike also felt the hottest for me so keep in mind the need to make sure you carry more water than usual when you reach this part of the trail.
Weather
The weather on JMT can be hazardous especially when you’re hiking over a pass. Be mindful of the weather as much as possible before you start the trek and all throughout when you get a chance to connect to internet such as during your resupply. Be advised that rain storms with thunder and lightning occur mid-day which is more common in the southern end (Whitney side). I experienced lesser instances of rainstorm as I headed north and it was almost non-existent by the time I reached the Yosemite area. The best advise is to start early each day so you can avoid being on the pass when rainstorms roll in. Otherwise, you may get stuck in the valley awaiting for the storm to end before safely hiking up a pass.
Fire

During the 2018 trekking season, Yosemite experienced significant fires that led to the closure of the Yosemite National Park. At the time I started my trek, the park was still closed. Many of the thru hikers for JMT heading southbound either cancelled their trek due to the closure or entered JMT at a different entry point such as Red Meadows. For NOBOs, we were all in suspense as we weren’t sure how bad it would be by the time we reach Yosemite. Luckily, by the time I hit Red Meadows, I learned that Yosemite was opened again. As to signs of fire, I observed smoke in some parts including the areas near Red Meadows, Glen Pass, Rae Lakes, Gladys Lake, Thousand Island Lakes and Donahue Pass. Upon reaching Tuolumne Meadows, I didn’t observe anymore smoke. In fact from Tuolumne up until Happy Isles, the air was devoid of smoke. By the time I reached Yosemite Valley, the park was back to normal with its usual crowd of tourists Only one portion of Yosemite was closed due to smoke which was the road heading towards Fresno. In the last few miles of the hike, the fire impact was noticeable with burnt and fallen trees all over. My last campsite was certainly within the zone of fire. Water was flowing, but barely. Ironically, despite the obvious impact of fire on the landscape, my last night in this affected area was one of the most restful nights I had with nature, which only shows that no fire can render this place any less heavenly than it always is.
Like inclement weather, there’s no way to predict when a massive fire issue will occur. As always, it’s best to be vigilant of your surroundings and gather as much knowledge and information you can by asking rangers and hikers on the trail and checking relevant websites when you manage to get internet. As a solo hiker, gathering as much knowledge on a situation is something I highly recommend so you can approach a potential issue in a preventive fashion.
Navigation
When I was researching navigation tools for JMT, the most popular ones are Guthook app and the topo maps. I carried both and ended up just using Guthook. The Guthook app was my favorite navigation tool, hands down. It provides details on landmarks, distance, water sources, camping sites, altitude, and even up to date information (such as where to find signal and data) via user comments. It’s really the only navigation tool you need. Having said that, the topo maps gave me the bigger picture in terms of my location and in the event of my phone running out of battery, it’s good to have a paper map as a back-up.
What are the chances of getting lost? Quite slim. Even though the trail isn’t constantly marked like the AT, it’s easy to follow. Every junction is clearly marked. If you go during peak season, there are plenty of hikers heading south and in some areas like Whitney, there are plenty of day hikers that will join you on the trail.
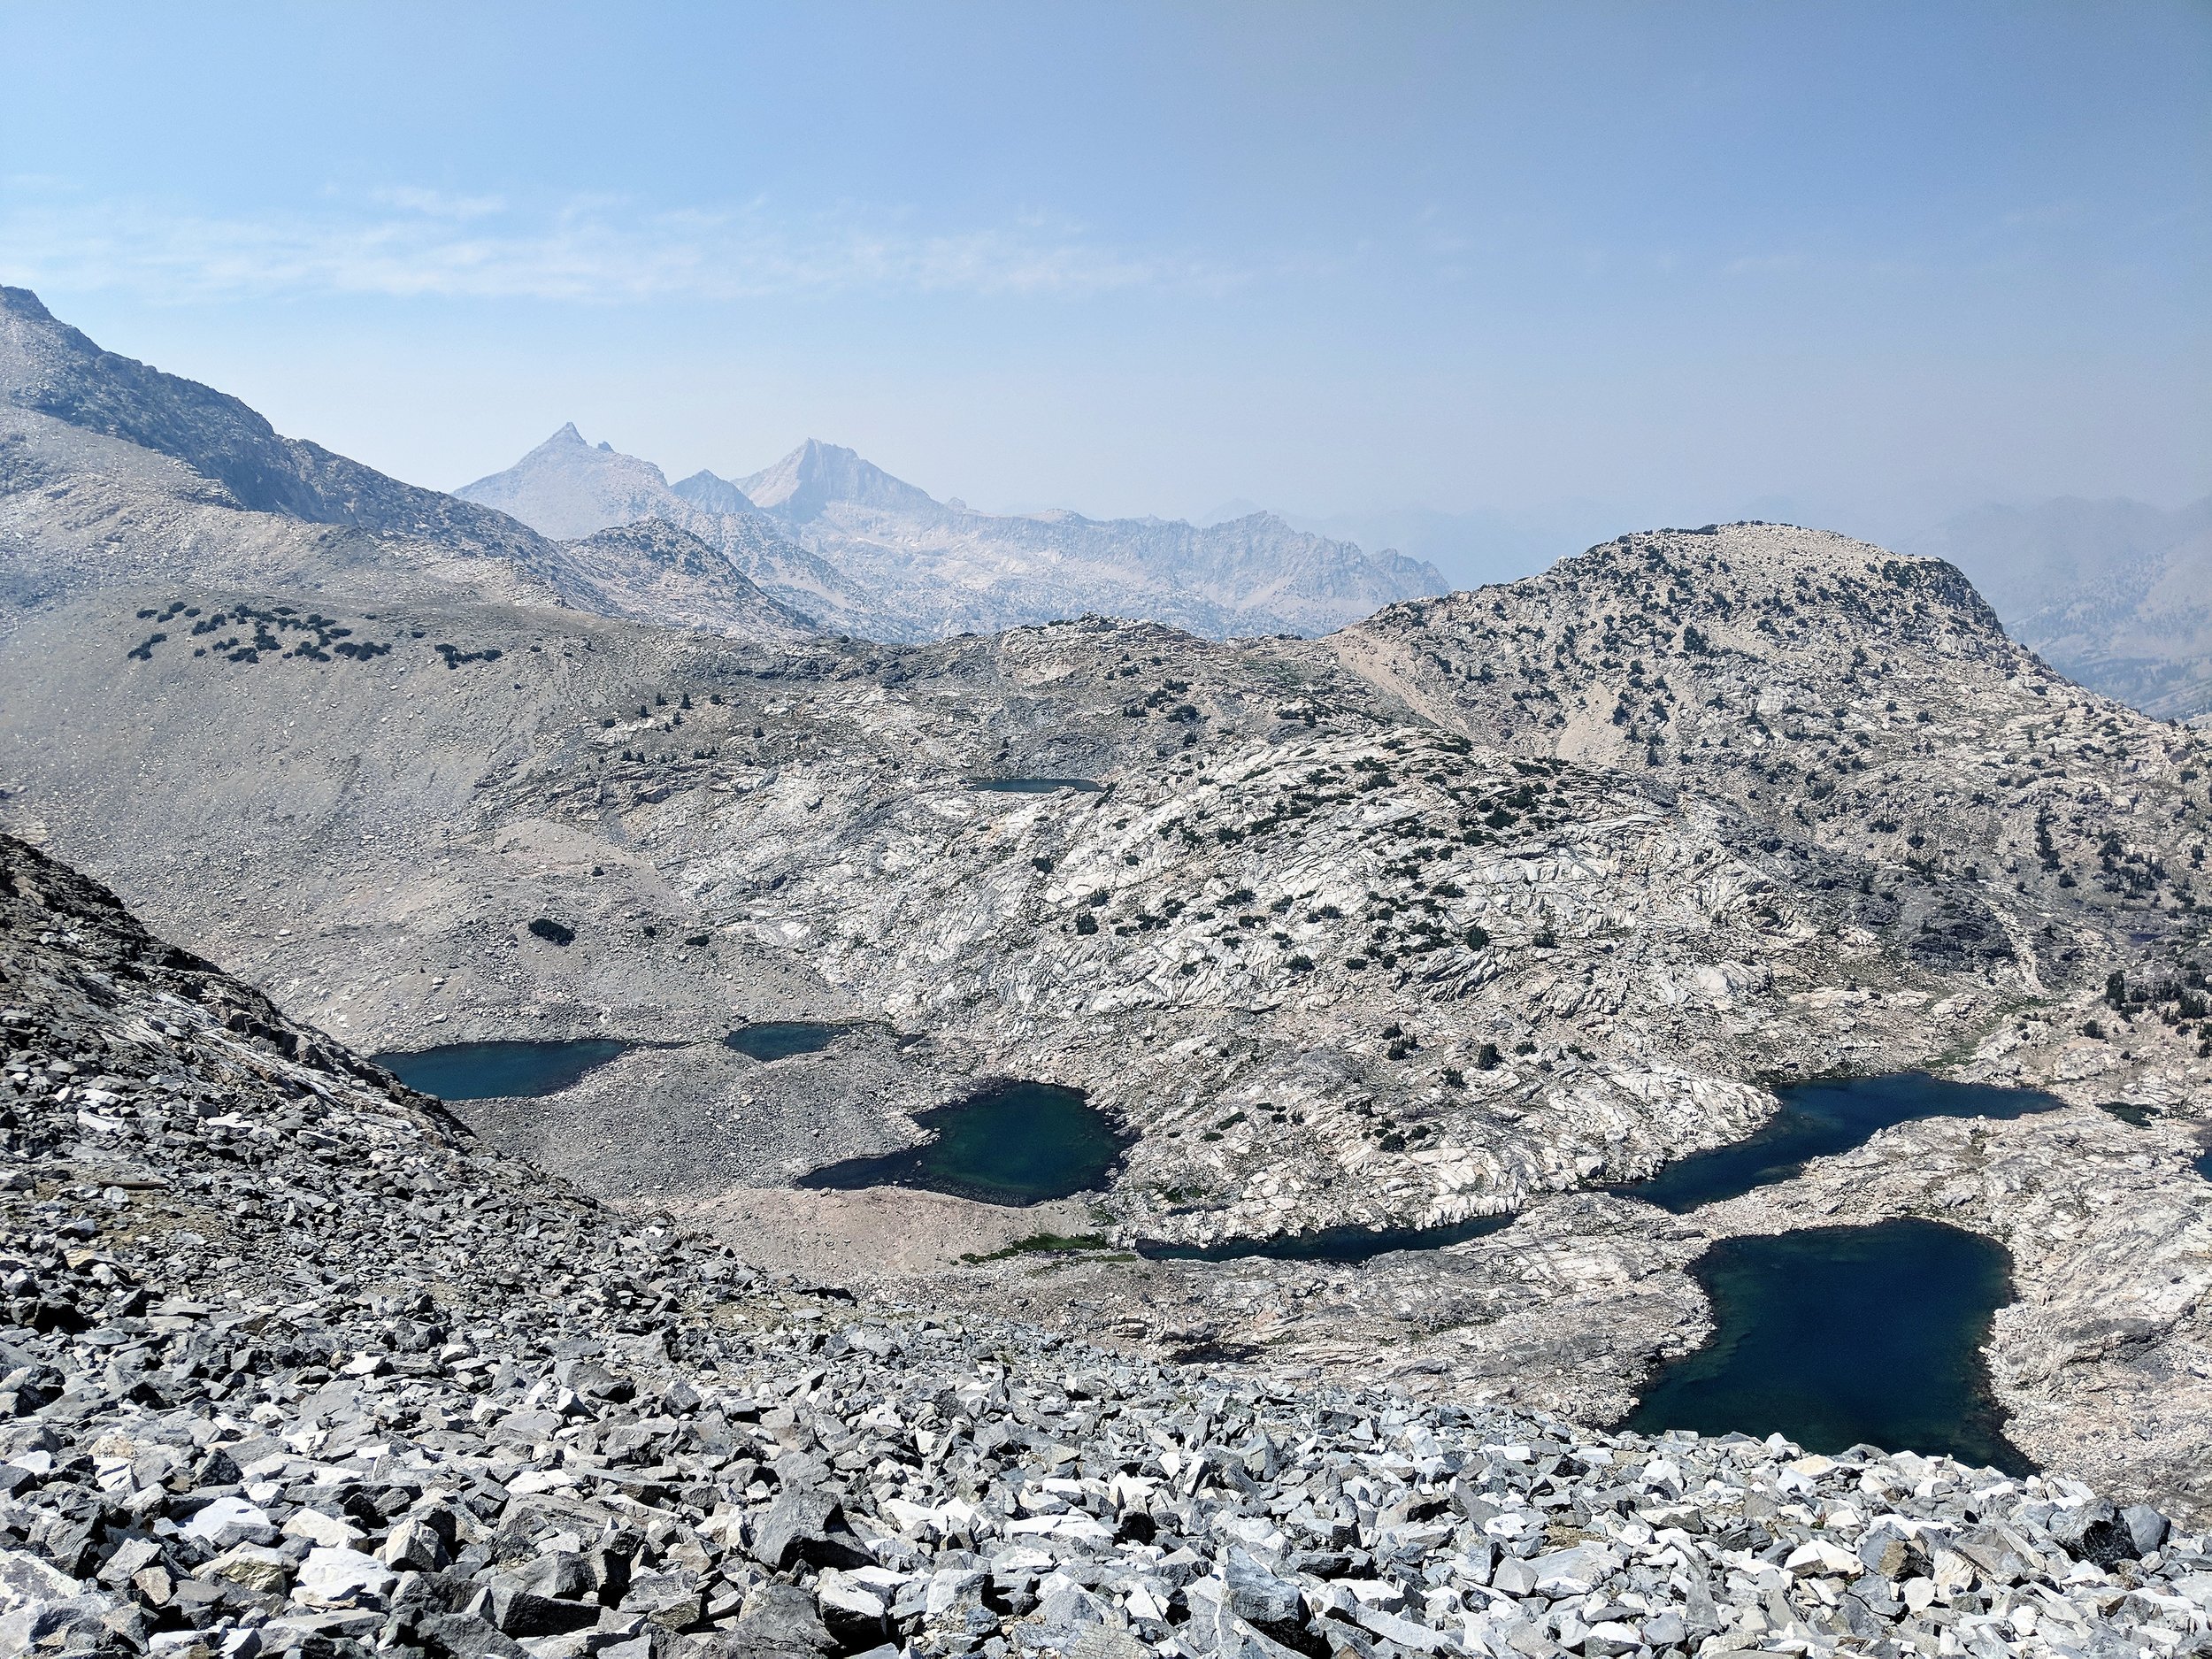
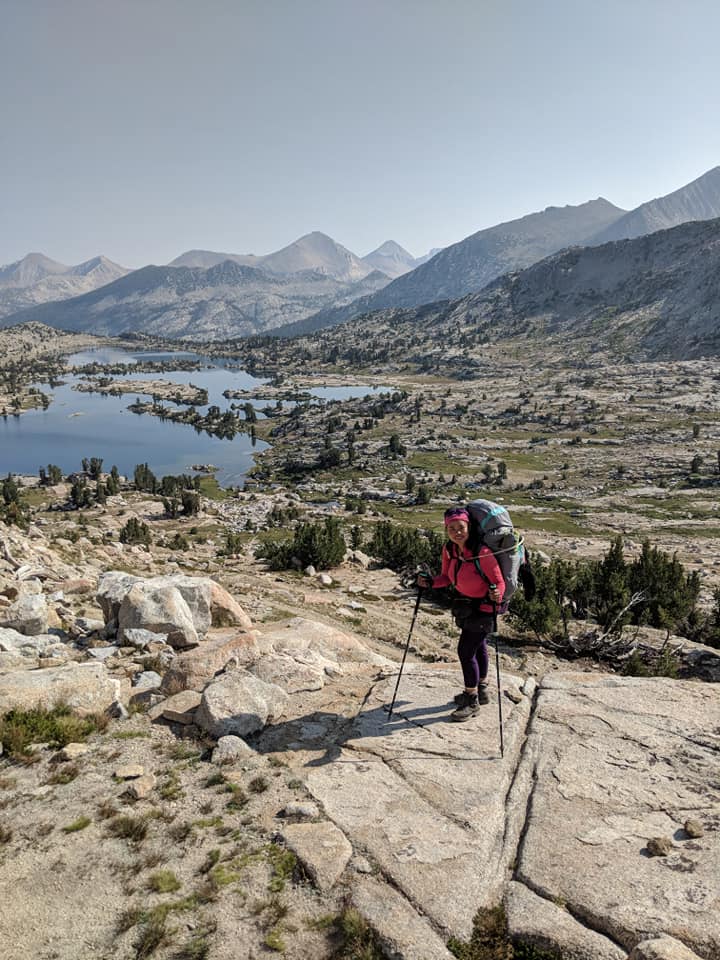
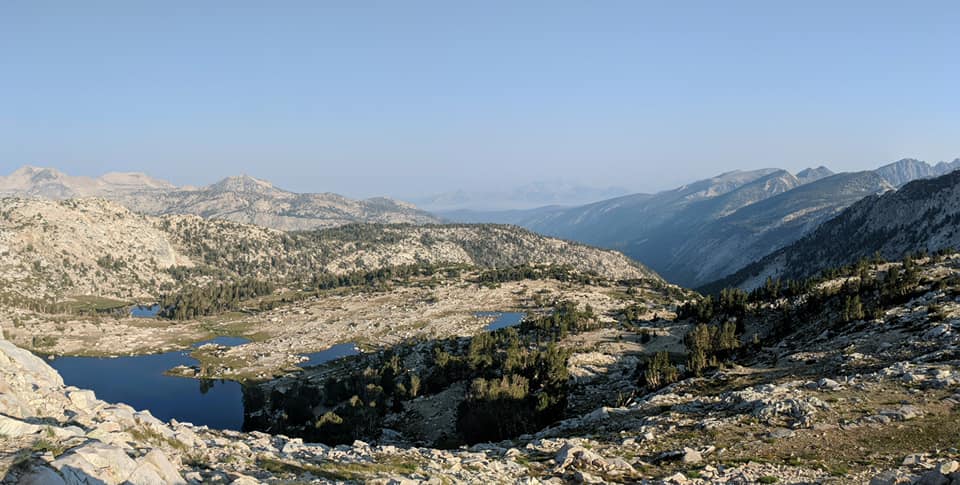
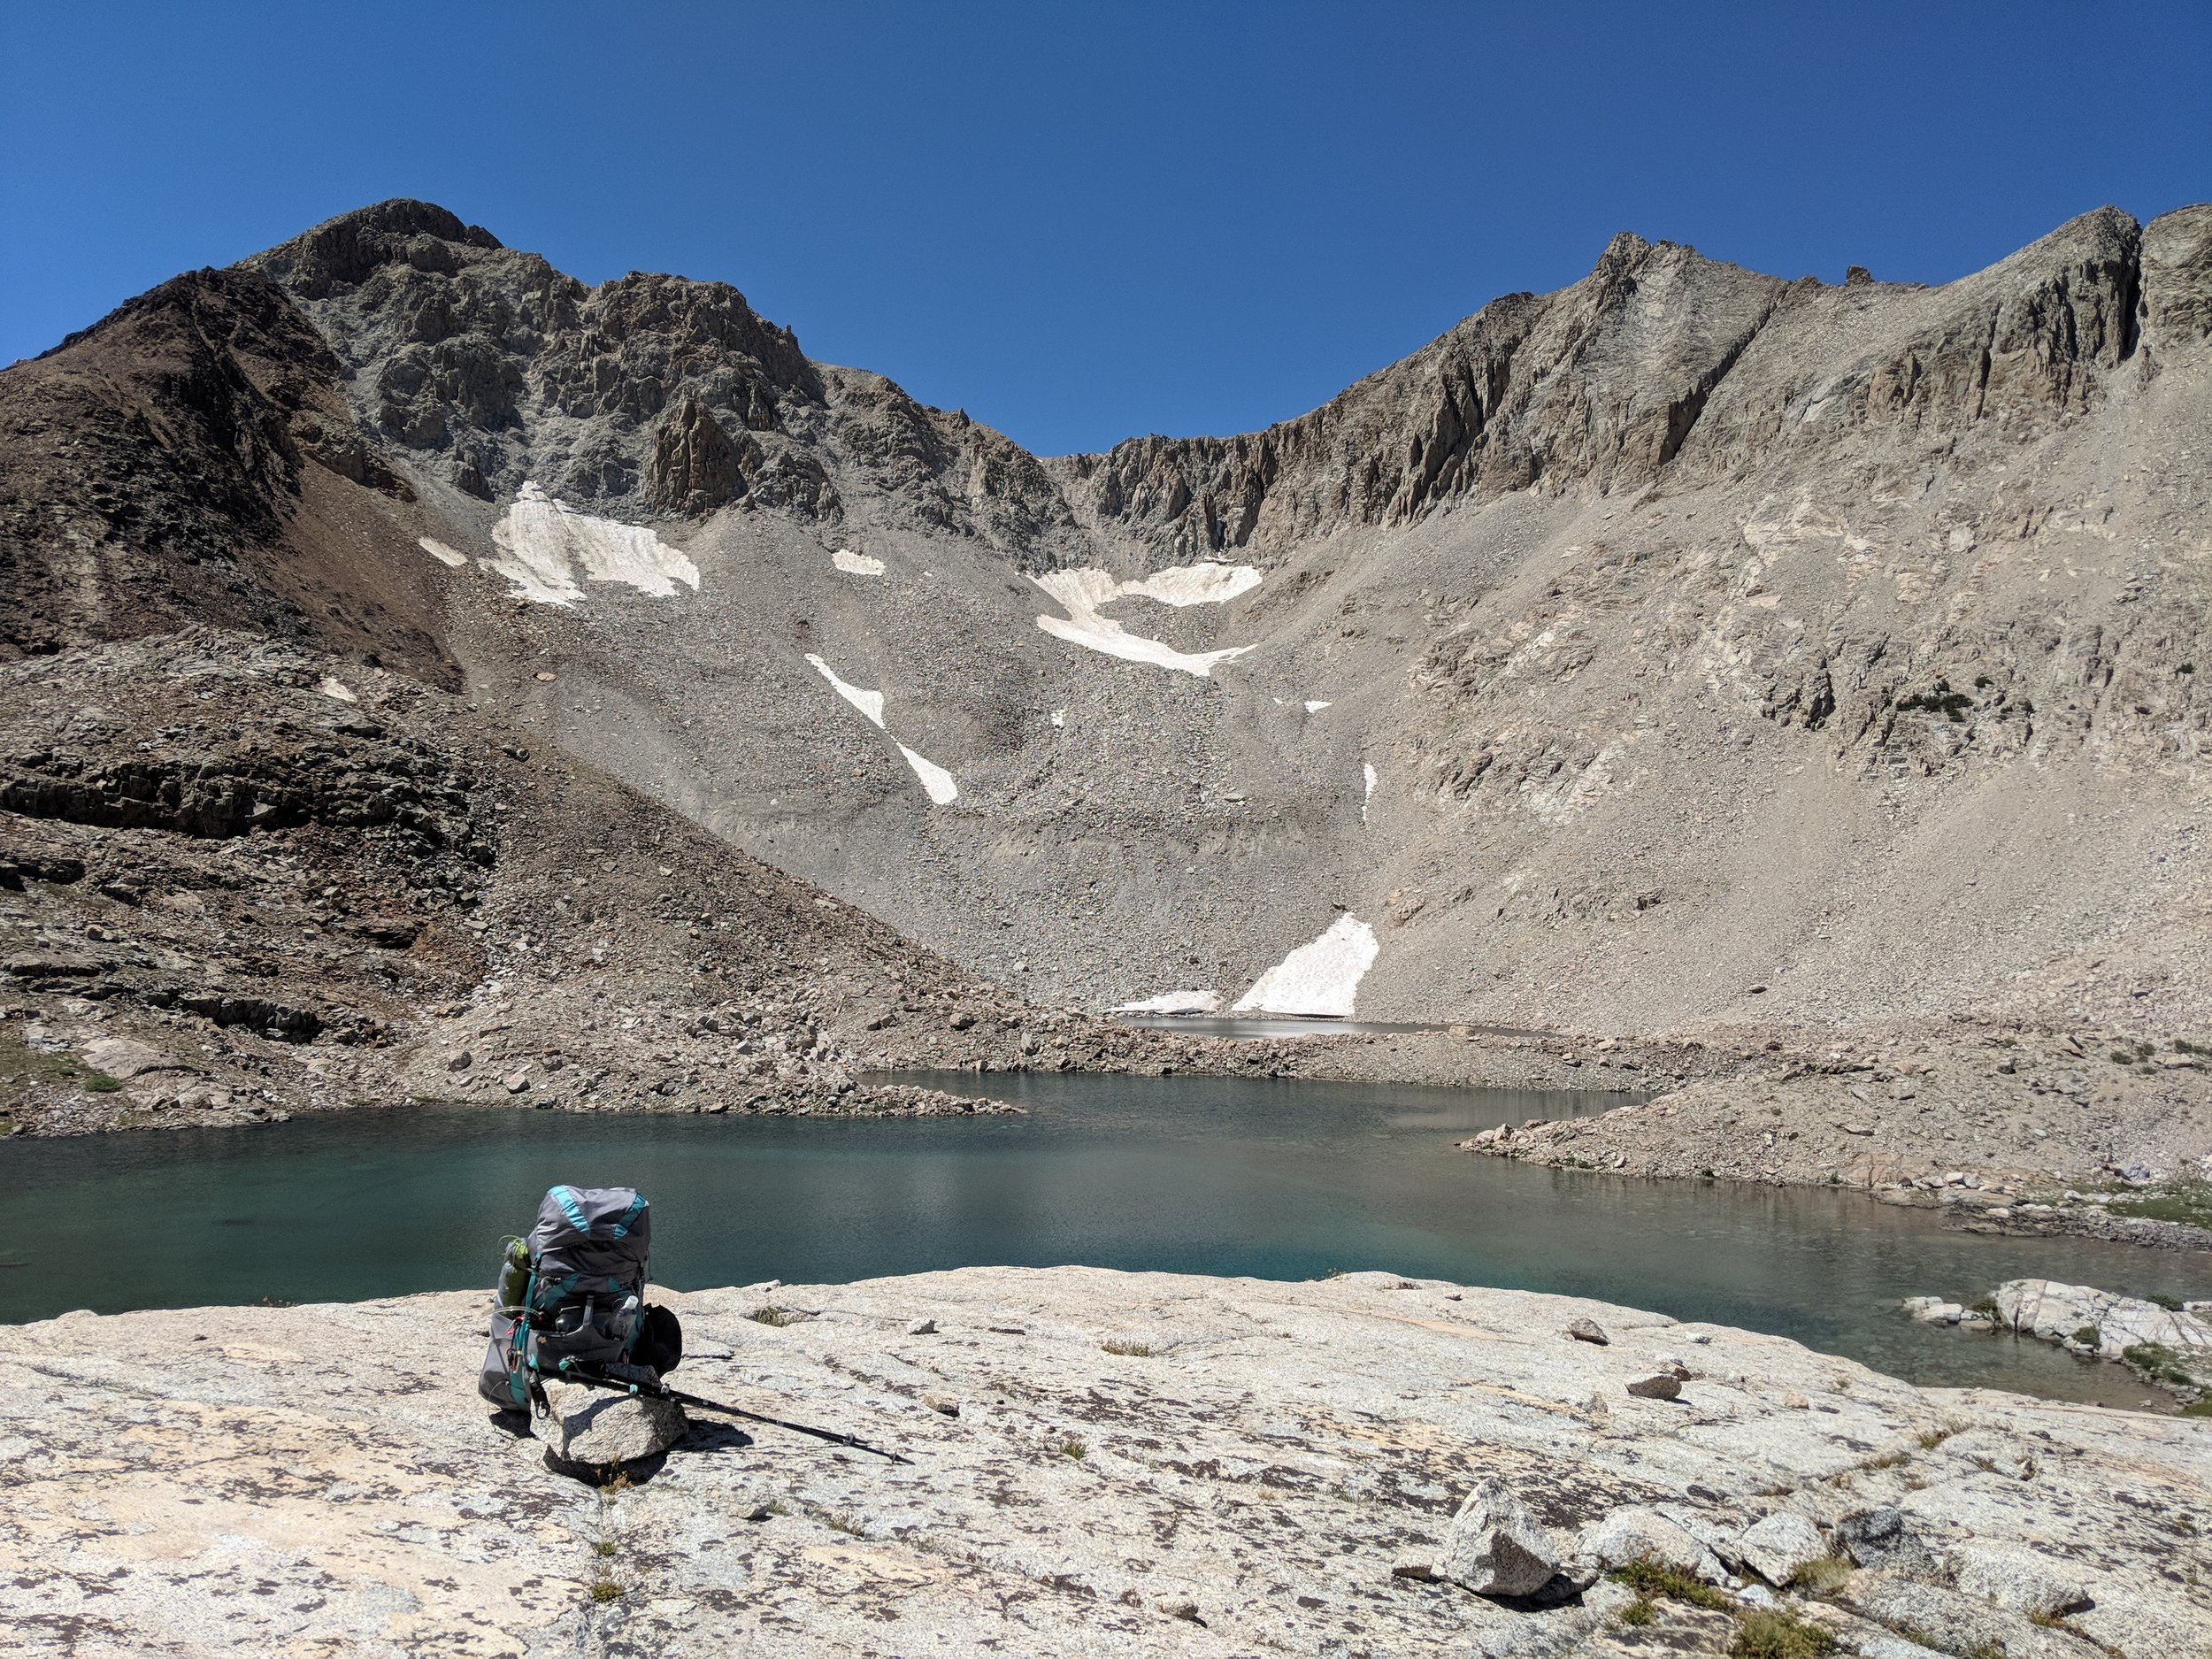
Best Campsites
Of course, you’d want to know the best of the best when it comes to campsites. Why? Where you retire for the night is arguably one of the best things about JMT. There were moments I felt like a VIP especially when my accommodation affords gorgeous views with easy access to water source. The truth is there are several sites worth noting but in the end where you end up staying would depend on how many miles you intend to hike each day. Most thru-hikers can agree that the lakeside campsites are always magical but don’t underestimate sites that are higher or far off from lakes or water sources. One of my favorite sites happens to be just a few meters below a pass but with a vast bird’s eye view of the valley and the lakes below.
Here’s a list of my personal favorites along the trail (northbound) some of which I didn’t get to spend the night in due to my itinerary:
Whitney trail camp
Guitar Lakes
Bighorn Plateau
Rae Lakes
Campsite at the bottom of Muir pass (before walking over the pass northbound)
Evolution Lakes
marie lake
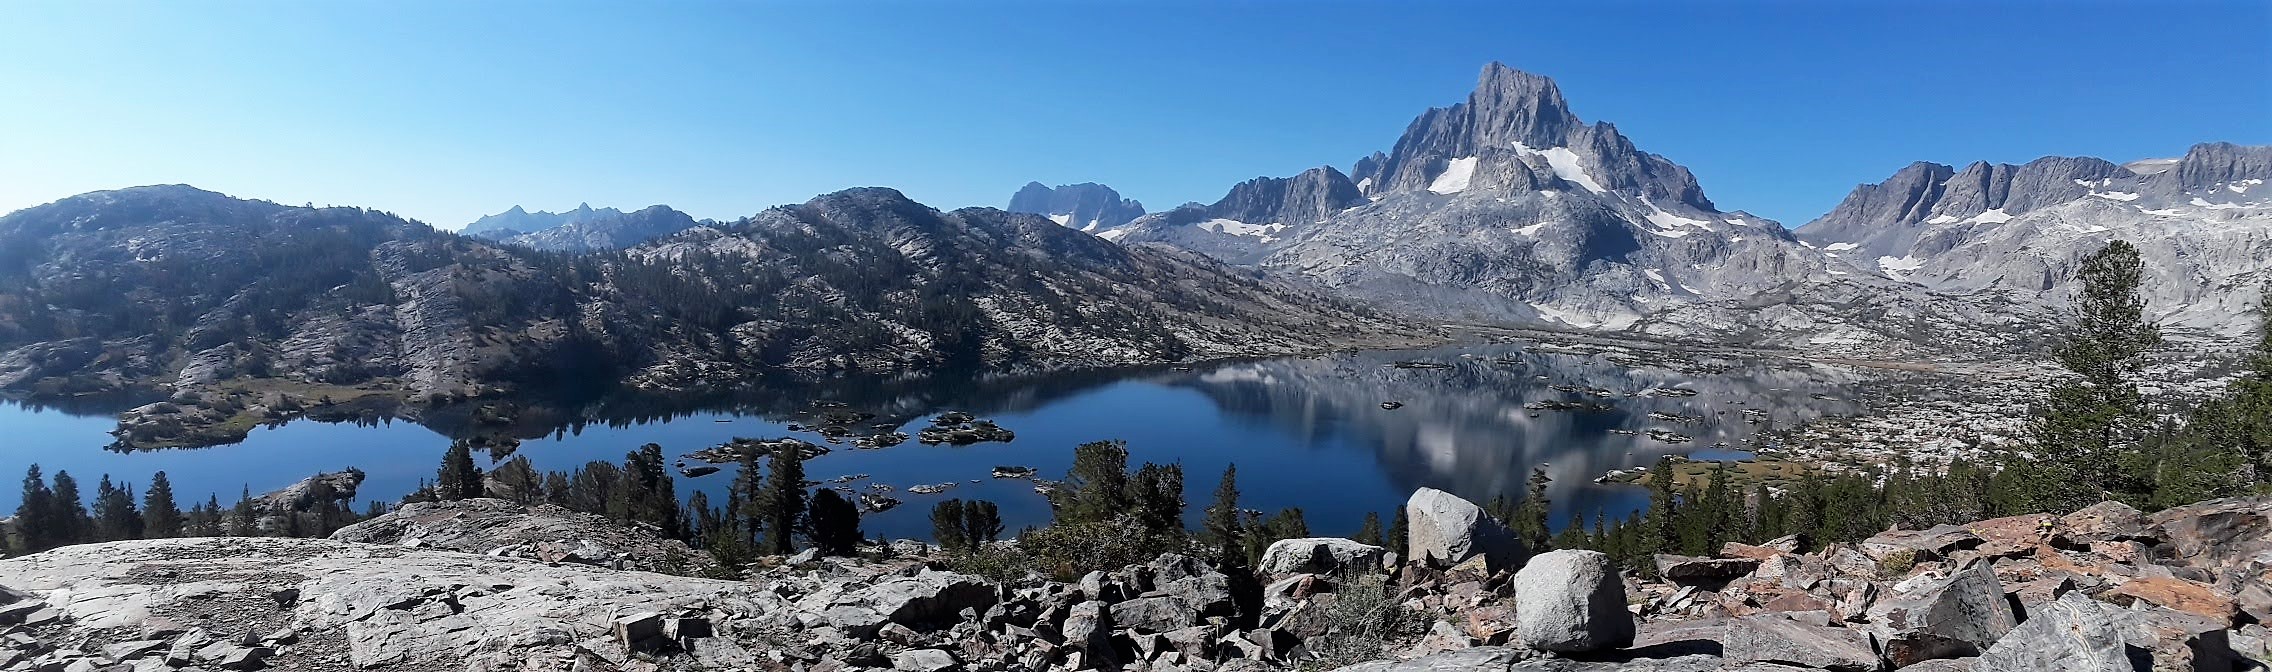
Thousand Island Lake
Silver Lake
Lyell Canyon

At the base of the Lyell Canyon you’ll find one of my favorite campsites .
Honestly, there’s just plenty of gorgeous lakeside campsites on this trail and unless you wish to stay longer on the trail, it’s hard to spend the night at each and everyone of them. I left out a few for you to discover for yourself.
Safety
As extra precaution for going solo on this trek, I bought a Garmin Mini In Reach. It’s not cheap. REI sells it for about $450. It’s one of the lightest safety beacon available in the market. Once you buy it, you’ll have to familiarize yourself with its function. Also, you’ll need to set up an account online and buy a satellite subscription – either yearly or monthly. I used the mini mainly to send Facebook and text messages.
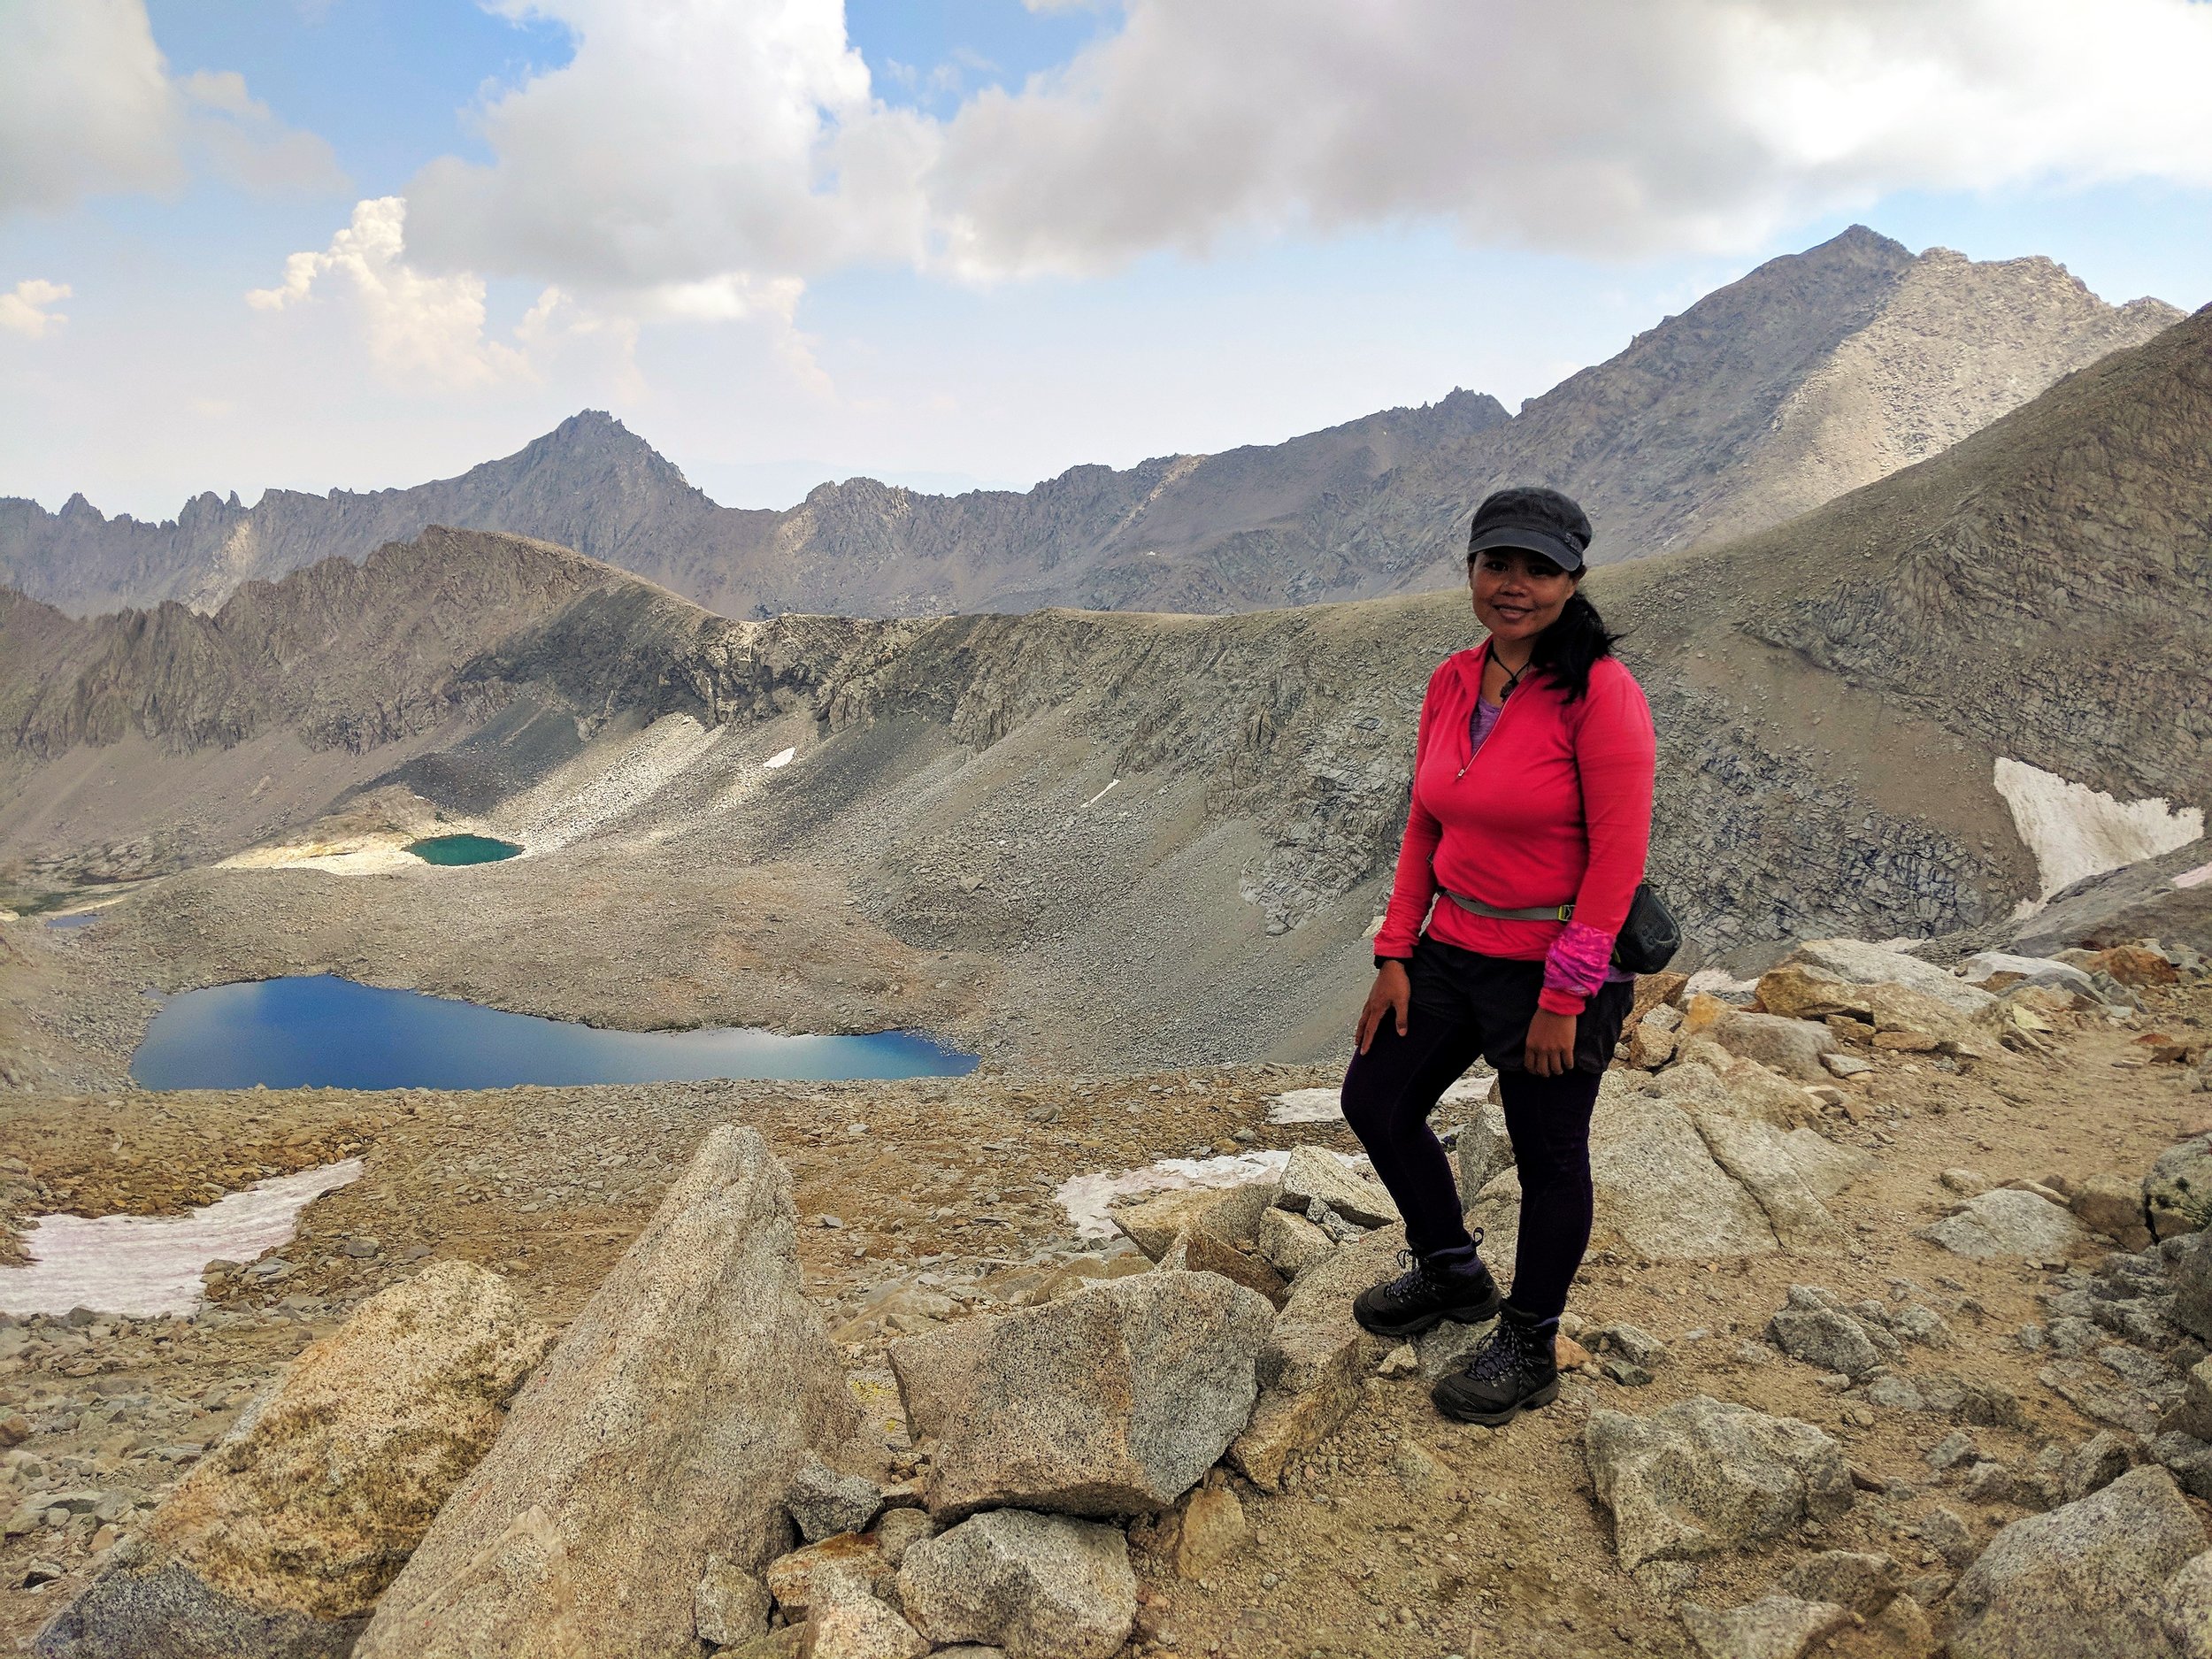
JMT as a Solo Female Hiker
I would be lying to you if I tell you I didn’t feel any reservations about doing the trek solo. The fear of doing it solo came into mind naturally. And this is despite my one year of trekking solo in 21 countries and my other solo endeavors in the U.S. JMT is a different adventure that can’t be compared to any trekking I’ve done globally. What made JMT intimidating was the level of self-sufficiency that was involved which was 101%. Also, the challenge of hiking 13 passes in a limited time period was no small feat along with the JMT being the longest I’ve walked alone – 22 days in total. All these combined reacquainted me with fear regardless of my prior experience hiking solo.
Don’t ever be afraid to go solo on a journey.
Despite the fear, I came to find out soon enough that the trail offers conditions that would make a solo thru hiker more comfortable going at it solo. First, if you go during peak season, there’s plenty of people on the trail. Second, the navigation required is straightforward for solo thru hikers. Like I said, the chance of getting lost is slim. Third, there is an opportunity to bail out if needed. I encountered short-term backpackers entering JMT from various entry points like Bishop, Independence and Mammoth Lake which means if for some reason you need to leave the trail early, you can do so safely. Fourth, the chance of bad animal encounter is slim. I didn’t see a bear or a snake; only marmots and other rodents typical to JMT. So, rest assured, the wildlife shouldn’t deter you.
Having said all this, there’s one more challenge you may end up tackling - loneliness. Personally, I dealt with the challenge of loneliness in my prior solo treks from which I learned how much I appreciate the creativity and zen that I experience from it. I loved the solitude I had on JMT and deem this as one of the highlights. To tackle loneliness, be honest with yourself and assess to what extent you can handle solitude as for some this is a dreadful condition to be in. I do want to remind you that when you go solo, you hardly ever will be alone. In my case, I began to meet people going NOBO and was invited to even hang out with the NOBO crew (we were small compared to the SOBO folks) for dinner when I reached Mammoth Lakes for my rest day. Hence, as a solo hiker, you will make friends whether you anticipate it or not. It’s rather easy because, guess what? There will be other solo thru hikers like you. If you’re still worried about going alone, read my tips on ways to prepare for your first solo adventure via Huffington Post.
And as a female? I must confess that I hardly saw solo women thru hikers on JMT. In fact, at best, I saw one Israeli woman during my trek. However, I didn’t run into any threatening situations based on my gender. Any potential risks were more general in nature. So, for my female cohorts, do it.
Fun tidbit about the solo part of my trek:
Initially, I planned to do the JMT trek with a hiker friend of mine. We obtained our permits and started out on the trail at the same time. In the end, we realized we had very different approaches when it comes to long distance hiking. I woke up early and was oftentimes out on the trail by sunrise. My friend, however, is a night owl so he slept in and didn’t hit the trail until mid-morning. In the 22 days I hiked JMT, we never hiked together. In the first 10 days or so, my friend managed to catch up and meet me at the agreed upon campsites…that was the case until my friend had to pick up his resupply at VVR. Due to a delay in the delivery of his package, he had to stay back an extra day. From that point onward, I didn’t see my friend anymore. He almost managed to catch up with me on the last day when I finished the JMT as he was only 5 hours behind at that point. The catch? I had to take the bus out to get to Los Angeles to catch my flight out to my next trekking destination, Iceland. So, I only got to say bye to him virtually on Facebook messenger.
If you plan to hike with a friend or a partner, be mindful of each other’s hiking style. It can make or break a relationship. In my case, the hiking incompatibility between my friend and I allowed me to learn how much I prefer to do long distance hiking alone because it affords me the utmost freedom and flexibility on the trail. And, it was definitely conflict-free!
P.S. Despite the incompatibilities and unexpected outcome of our plan to hike together, my friend and I remain in good terms.
Supporting a Cause
If there’s a cause that you deeply care about, thru-hiking can be an ideal vehicle to raise funds and advocate for the mission of your cause. By implication, doing this also serves as an effective way of spreading the word and educating others about an issue you care about.
I chose to support City Kids Wilderness of DC by creating a fundraising platform for them through Facebook’s donation page. The setup was easy and fast. You don’t need to be tech savvy to create your donation page. Oftentimes, the organization that you choose is already linked to a Facebook donation page so you simply choose their organization when you set up your donation page. Donation through Facebook goes directly to the organization that you’re supporting so this alleviates you having to be involved in the transfer of funds.
Sponsorship

I was fortunate to receive sponsorship from outdoor brands for my thru-hike. How does one obtain the support of brands? Below were the avenues I took:
1. Apply formally to an actual thru hike program.
In my case, I applied and was selected to become an ambassador for Thru Hike Syndicate (THS), which is a program that supports a selected number of thru hikers each year. THS involves the support of the following brands: Osprey, Leki, Nemo Equipment, Vasque, Otterbox and Darn Tough Socks. Their application process usually starts early in the year and they select about 15-20 ambassadors. As an ambassador, they will support your thru-hike by virtue of providing you gear items that you’ll be using extensively on your trek. I’m grateful for THS’ support as I certainly felt I wasn’t alone on my solo trek and by virtue of being an ambassador you’re inspiring others to pursue their goals.
2. Write or contact your favorite outdoor brands. I owned a few hiking gear with a certain brand which needed replacements. I ended up contacting the brand to see if they would support me with my thru hike by providing new rain gear and down jacket to replace the ones I bought previously. In asking, I did have to share with them that I write for my media site, Brown Gal Trekker, and that I run a trekking social enterprise. I also have been active in the diversity, equity and inclusion work involving the outdoor industry. Brands are more open to sponsoring your endeavor if you already have some involvement in the industry or have a story strongly related to the outdoors. In the end, a certain value must be exchanged both ways in order for the partnership to work.
When you manage to obtain sponsorship, expect to have some form of contract or informal agreement on what is expected which usually entails content creation from your end (photos, blogs, social media postings, etc.).
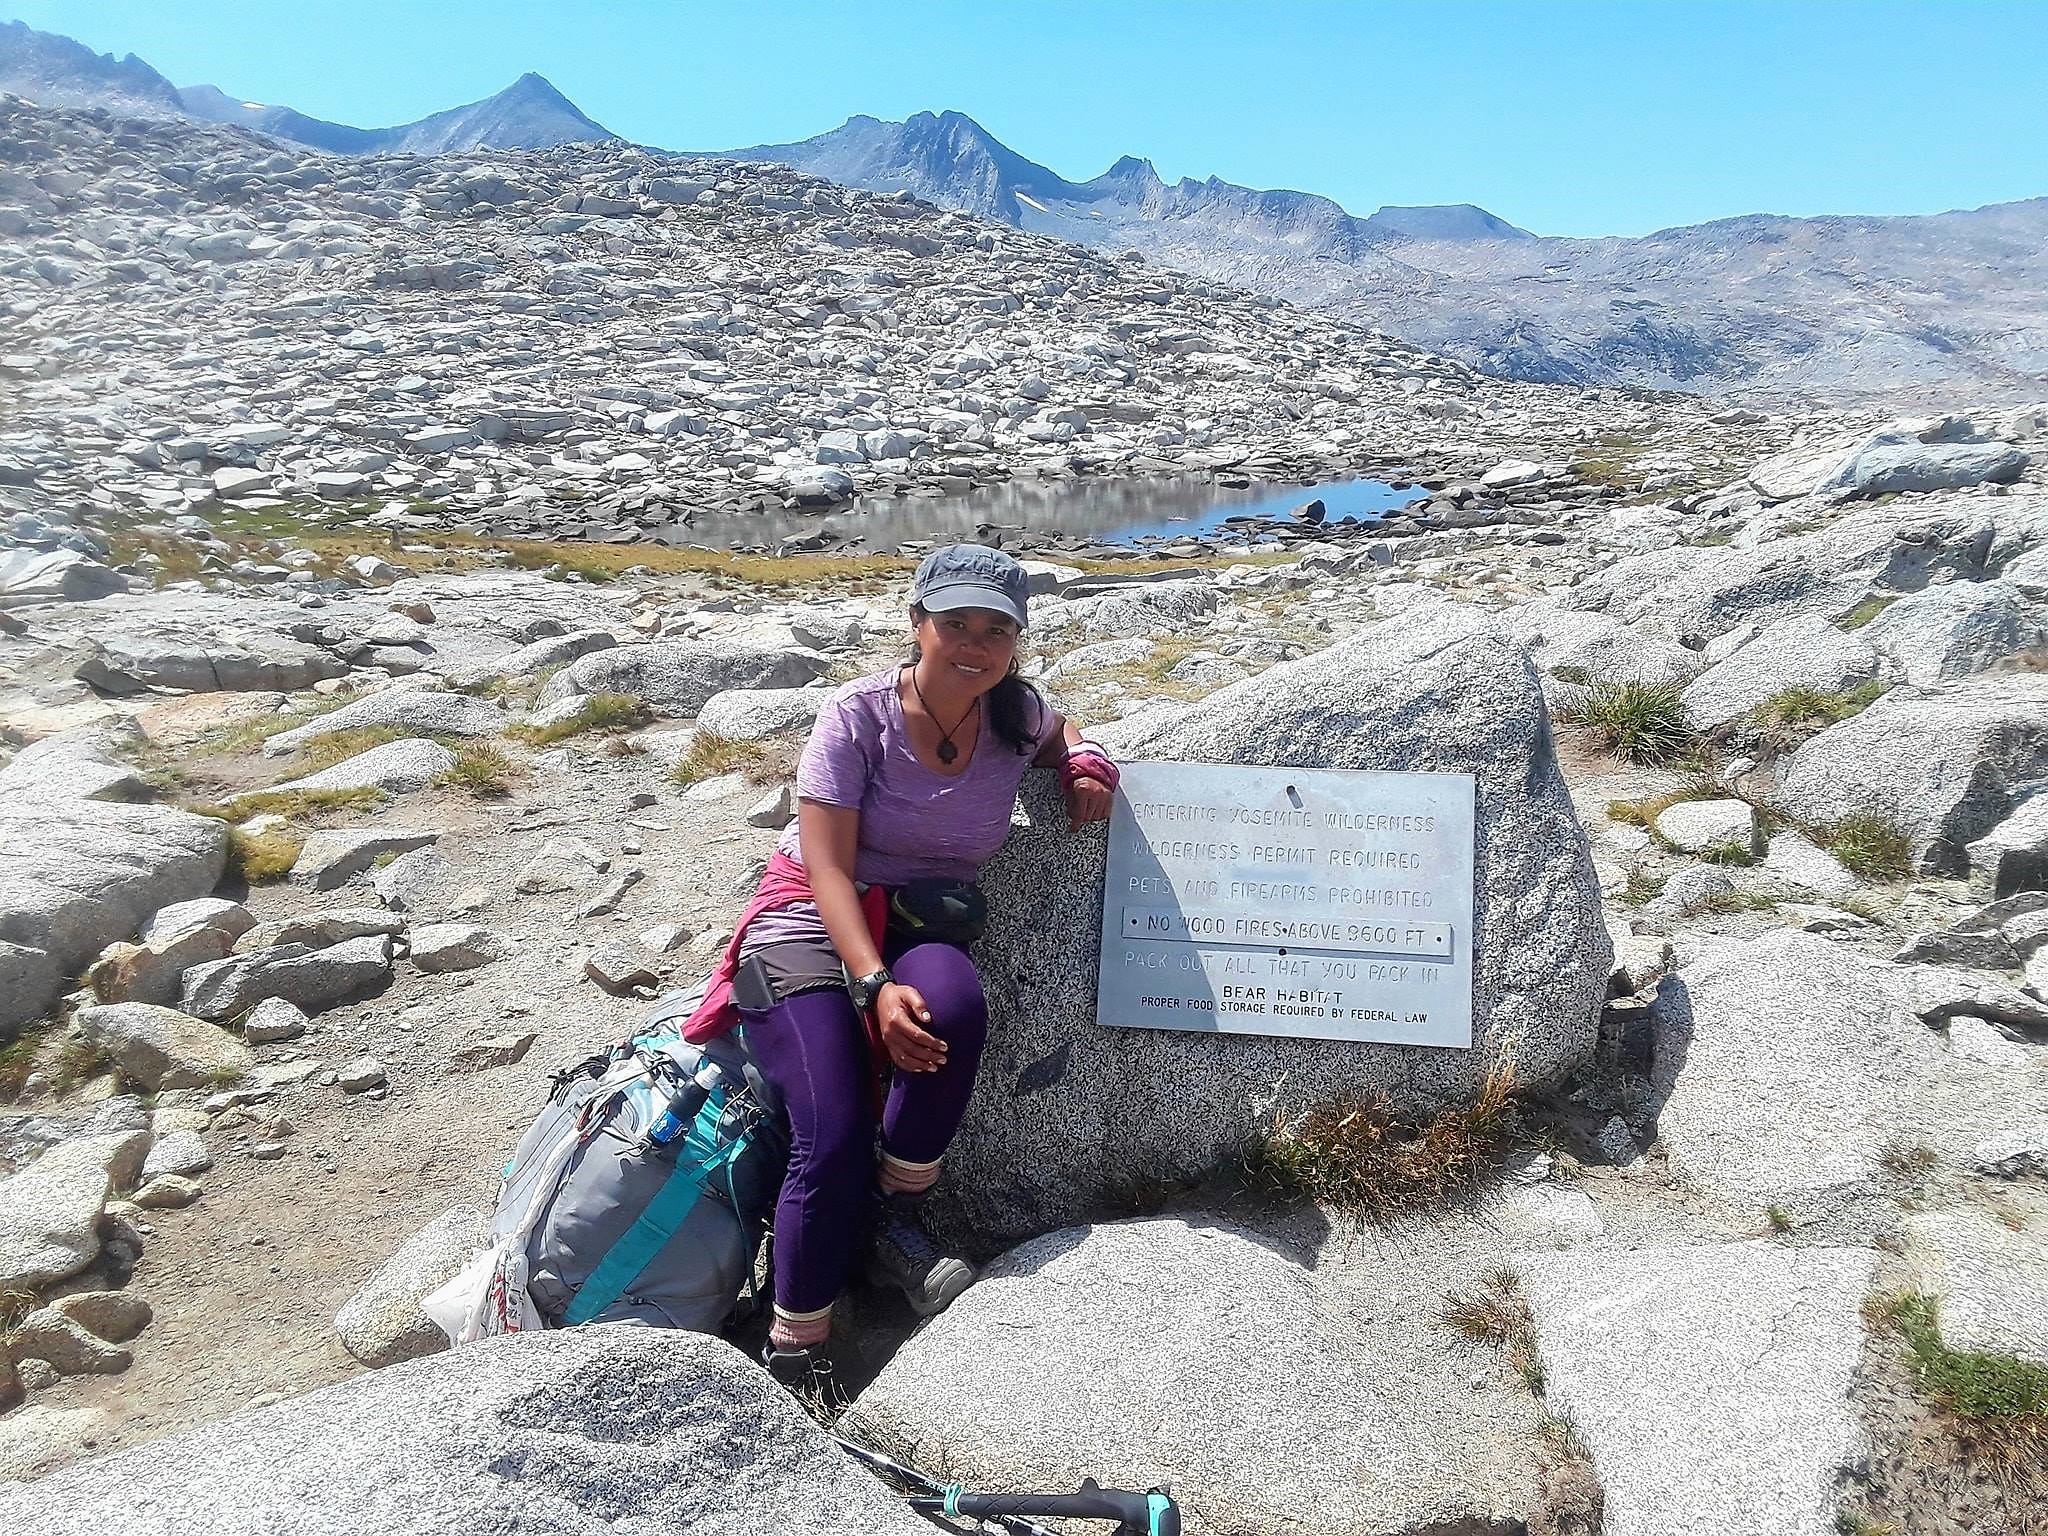
Diversity on JMT

Likewise, the Indigenous Women Hikers are diversifying the outdoors.
If you have come this far in reading this immense write up on JMT, then let this section be a way for you to learn a thing or two about the trail in question. If you’re a person of color, then let this be the point in the conversation where I strongly advise you to hike the JMT. Don’t let being a person of color deter you from experiencing nature’s best landscapes. Whether you’re a person of color or not, I warmly welcome you to a topic that is innately part of yours truly. So, thanks in advance for perusing this section.
We all know JMT was named after the legendary icon, John Muir. Part of my intention with thru-hiking the JMT is to demystify the notion that people of color don’t play in the outdoors. We do. I do. Hence, I’ve been able to provide you with such detailed summary and information on one of the most beloved thru hikes in the U.S.
But what you may not know is that John Muir wasn’t too fond of the Native Americans as during his exploration of Sierra Nevada, his words and actions in the conservation movement were tainted with racism. Learn more here.
Now, as to my personal experience on JMT, I would say it was incident free. If anything, I only noticed unwelcoming looks from a few folks who weren’t used to seeing someone that looked like me on the trail and even with that I’m skeptical to label it as a race-based reaction on the part of the other person. Also, keep in mind that JMT attracts international hikers so geographically there’s diversity on the trail. Now, this doesn’t necessarily mean that racism doesn’t exist in the outdoors. People of color have written articles on their personal experiences on this issue. See this article for instance which provides a historical context or for a personal narrative from a fellow thru-hiker, go here.
As a person of color, it’s ingrained in my psyche to be on the lookout for instances of racism, not because I wish to involve myself in any form of controversy, but rather for the sake of my own self-preservation. Being mindful of racism is akin to being mindful of risky situations because in the end both instances can potentially yield harmful personal experiences that I’d rather avoid. Also, any instances of racism or discord can be an opportunity for learning on both sides. Leaning into that experience rather than shying away from it can benefit all of us.
Age is also a common concern for those considering JMT. I can assure you that the trail has a wide range of age groups. Despite the challenge entailed in hiking 11-13 passes, many hikers who complete the JMT are driven by their mental strength to push through. The altitude, significant elevation gain and loss plus the weight of your pack are the most critical factors with respect to one’s physical ability and in completing the JMT. But it all starts with mental endurance and self-confidence to conquer the challenges. Having said that, if you wish to learn more about the demographics of JMT hikers, you can read this interesting article based on a survey of previous JMT hikers themselves. The survey reveals for one that the average age of a JMT hiker is 43.
I was 42 when I completed it.
Fortunately, the experience I had on the JMT was positive for the most part. If we wish to see inclusion and diversity on the trails, then let’s not wait for the change. Instead, let’s be the one to bring the change itself by hiking the trail regardless of our skin color and age and by appreciating everyone’s diversity on the trail.
Training Is a Must

Training in Colorado’s Indian Peaks Wilderness.
You made it through the above steps, now what do you do before the actual trek? Train. There’s no way around training for JMT. It’s a must. The notion of the more you train the more pleasurable the journey will be applies here. So, do yourself a favor. Train!
Now that I have you motivated mentally to train, what type of training is best? There’s nothing better than doing an actual simulation of the endeavor. That means putting on a pack with the weight you anticipate carrying on your actual trek, hiking the same mileage and terrain as you would on your actual thru-hike. The added benefit of training is you get to test you gear, food preferences and physical abilities.
In my case, I did several backpacking trips including a five day thru hike in Shenandoah. I was lucky enough to also do some backpacking in Colorado to get used to the altitude. What if you can’t practice at high altitude? There are preparations you can do to help you acclimatize. You can learn more via this article.
Final Thoughts
JMT can easily be one of the highlights of your life on earth. But remember - the experience goes fast. Before you know it, you’ll be posing for your picture at the finish line. Everyday I made a conscious decision to be present in whatever moment in time I was in and took it very slowly on the last day because it turns out that the best part isn’t the finish line, but the hike each day to get there. So, enjoy it.

Yes, I walked from Mount Whitney to Yosemite.
At 12:45 pm on August 21, 2018, I completed my solo trek of the John Muir Trail Northbound starting in Mt. Whitney all the way to Yosemite. 221 miles in total in 22 days. 13 passes. 1 sprained toe. And a priceless experience. This journey is in memory of my mom and Andy Manjra, a nomad friend who left this earth too soon. I miss you both.
Read also I Feared the JMT to be Courageous in Life.
Preparation and planning for JMT or any thru-hike can be complicated. You don’t have to plan your ultimate adventure alone. Learn more here.